

This wizard can be used for Qodo multi-tenant, single-tenant, and on-premises deployments on GitLab Cloud (
gitlab.com). For a self-hosted instance, see .Prerequisites
Before you begin, ensure you have:- Access to your Qodo portal.
- The Owner role on each top-level GitLab group you connect, needed for Qodo to create its service account in that group and set up webhooks.
- Network access from Qodo to
gitlab.com.
Access the GitLab integration
1
Log in to your Qodo portal.
2
Start the installation wizard in one of the following ways:
- From the onboarding wizard: If you’re an organization admin signing in for the first time, the onboarding wizard opens automatically. In the Connect Git step, select GitLab. See Set up Qodo with the onboarding wizard.
- From the homepage: On the homepage, in the top right-hand side, click the + button next to Git providers. On the selection page, choose GitLab.
Install Qodo on GitLab Cloud
1
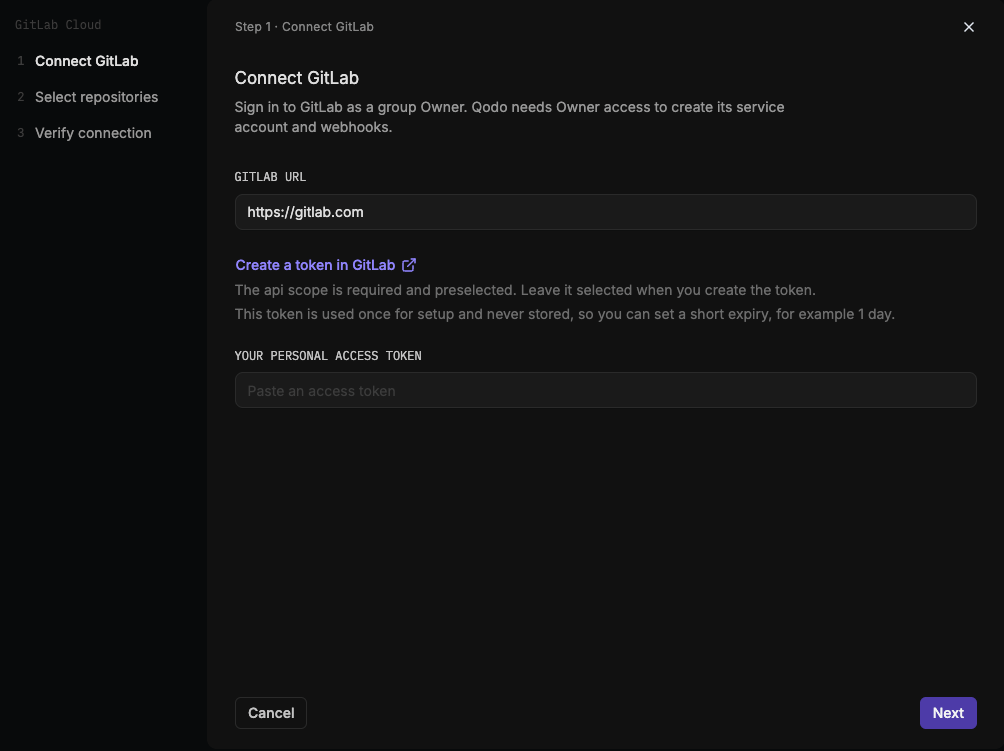
Connect GitLab
1
Confirm the GitLab URL is
https://gitlab.com. Sign in as a group Owner.2
Click Create a token in GitLab to open your GitLab access token settings directly.The
api scope is required and preselected. Leave it selected when you create the token.This token is used once, to create the Qodo service account, and is never stored. You can set a short expiry, for example 1 day.
3
Paste the token under Your personal access token and click Next.
2
Select repositories
1
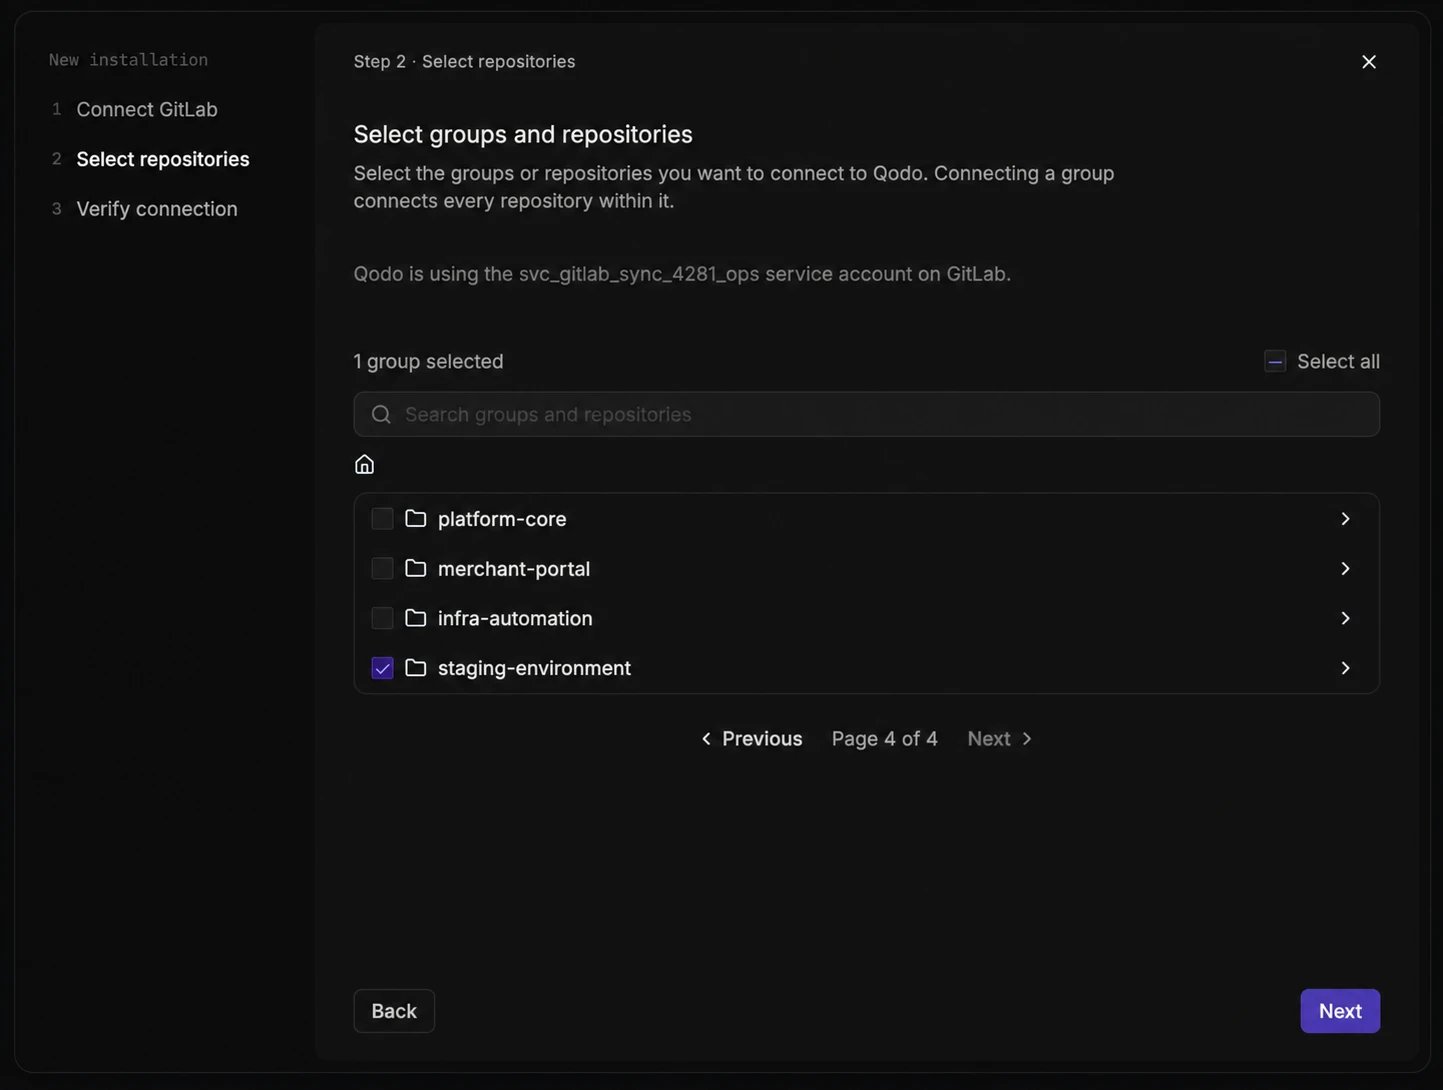
Find and select what to connect:
- Use the search bar to find a specific group or repository, or browse the list of top-level groups you have access to.
- Select a group to connect every repository within it, or drill into a group to select individual repositories.
- Select Select all to connect everything you have access to in one step.
On GitLab free-tier groups, which don’t support group hooks, this step appears as “Select repositories” and Qodo creates a hook for each repository you select. On tiers with group hooks, it appears as “Select groups and repositories”, and selecting a group creates a group hook.
Repositories in personal namespaces aren’t supported.
2
Click Next.
3
Verify connection
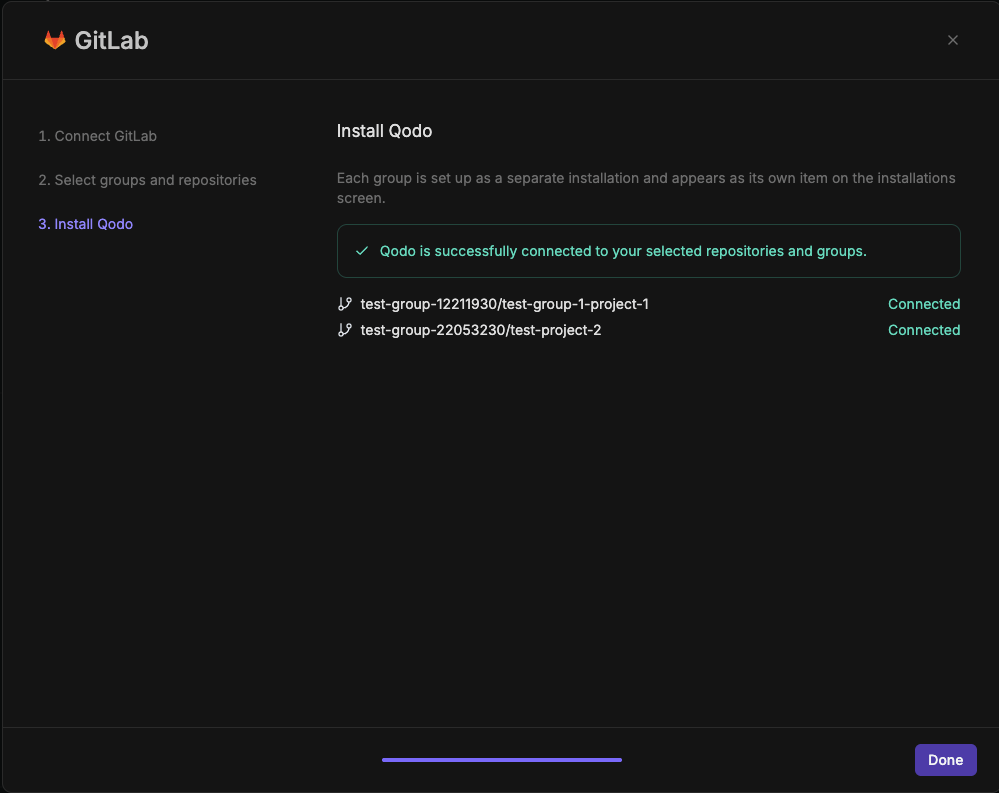
- Each one shows its status: Already connected from a previous installation, or Connected if newly connected.
- Installing across multiple top-level groups sets up each group as a separate installation, appearing as its own item on the Installations tab.
- Click Done.
If you’re connecting your Git provider as part of the onboarding wizard, the wizard continues to the next onboarding step once the connection completes. See Set up Qodo with the onboarding wizard.
What happens after you connect
Qodo starts building context for your code reviews, and the following processes run automatically in the background:- Repository sync: Syncs each connected repository with Qodo.
- Pull request indexing: Indexes each repository’s pull request history.
- Cross-repo discovery: Finds relationships between your repositories.
Verify the installation
1
Open a new merge request in one of the connected repositories and confirm Qodo is triggered automatically.
2
Add a comment using one of the supported commands:
/agentic_describe/agentic_review
Troubleshooting
If Qodo doesn’t respond on the merge request, check that GitLab can reach Qodo’s webhook URL:1
In GitLab, navigate to the webhook settings of the connected group or repository.
2
Copy the URL of the webhook Qodo created. The URL is different for each Qodo installation.
3
Confirm that your network allows GitLab to reach that URL.
Next steps
- Repositories page: Manage which repositories Qodo is active on, or remove an installation.
- Trigger a code review: Run a review automatically or on demand.