

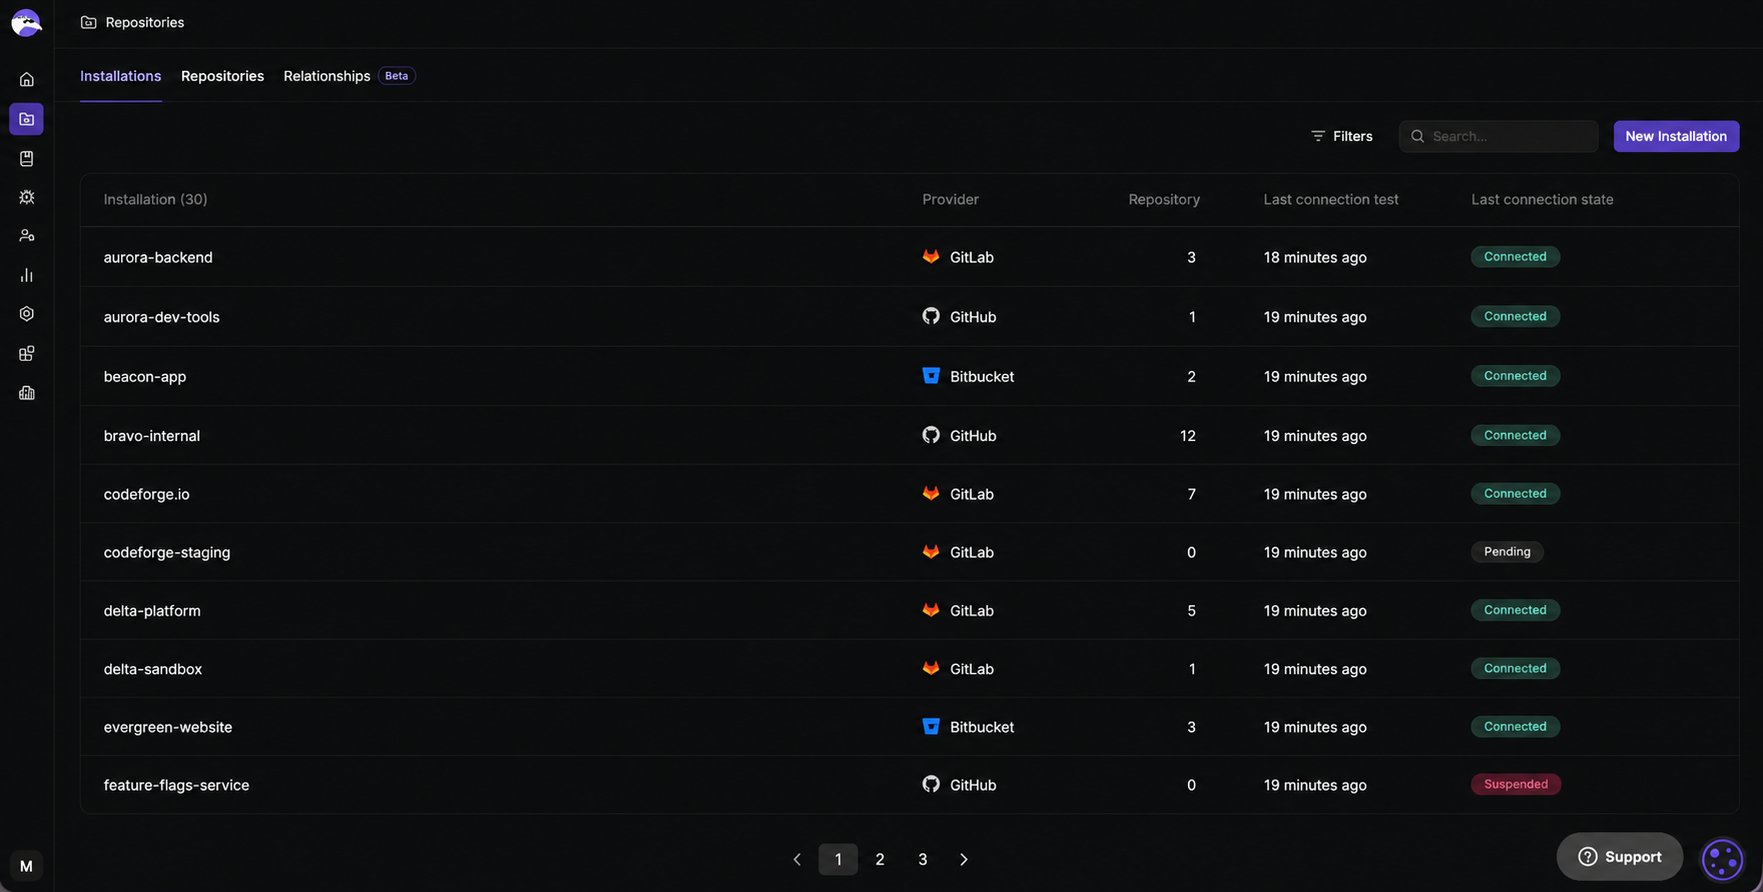
Installations tab reference
Check installation connection status
Check connection status to detect a broken installation before it stops Qodo from reaching any of the repositories under it. Connection tests run automatically on a regular schedule, and the last result is displayed for each installation.Connection states
Resolve installation connection errors
When an installation shows an Error status, identify the error type below to see what went wrong and who can resolve it.Search or filter installations
Use the Search bar to find a specific installation by name. Use the Filters menu to narrow the list by provider, useful when auditing installations across multiple Git providers.Add a new installation
Connect an additional Git account or organization to expand Qodo’s coverage.- Click New Installation. This takes you to the Integrations page, where you can set up a new installation using the guided wizard.
Manage the repositories in an installation
Review which repositories under an installation Qodo can access, and control code review for each one, without leaving the installation’s context.- Click the installation row, or select Manage repos from its three-dot menu, to open the Repositories tab filtered to that installation. For GitHub, Bitbucket, and Azure DevOps installations, this lets you review the repositories Qodo can access and toggle code review per repository. See Monitor and manage repositories for details. GitLab differs, see below.
GitLab: managing repositories requires a personal access token
GitLab: managing repositories requires a personal access token
For GitLab installations, Manage repos opens a Manage repositories dialog instead of the Repositories tab, where you can edit which repositories Qodo can access. Since Qodo does not store your GitLab personal access token, you re-enter it here to load the installation’s groups and repositories.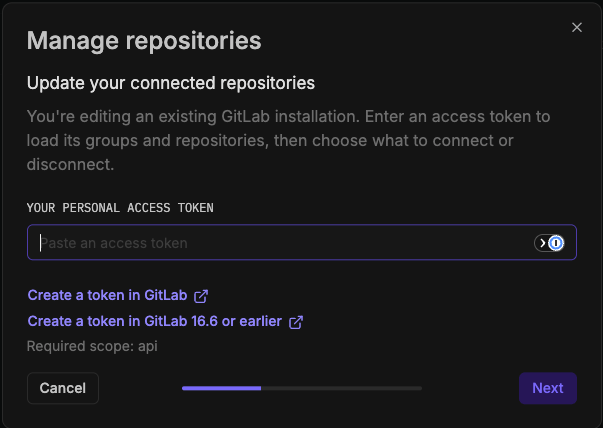
1
Enter an access token
1
Reuse the token created during installation, if it hasn’t expired, or generate a new one:
- Click Create a token in GitLab.
- For a GitLab Server installation on GitLab 16.6 or earlier, click Create a token in GitLab 16.6 or earlier instead.
api, preselected.Used once, never stored. Short expiry recommended, e.g., 1 day.
2
Paste the token and click Next to load the installation’s groups and repositories.
2
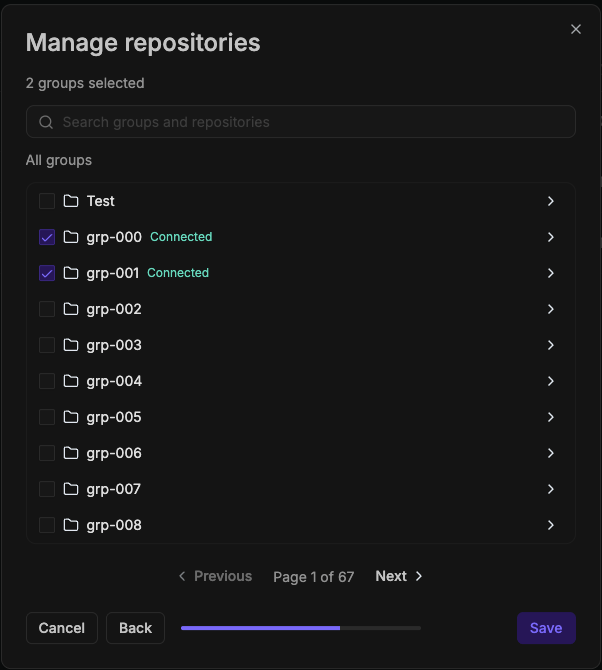
Choose what to connect or disconnect
1
Use the search bar to find a repository by name, or browse the group tree. Already-connected repositories are marked Connected.
2
Select or clear a repository or group to add it to or remove it from the installation.
3
Click Save to apply your changes, or Cancel to discard them.
3
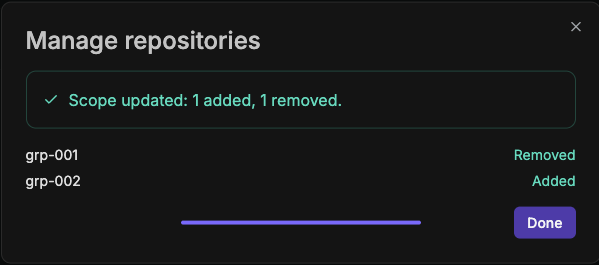
Review the updated scope
Delete an installation
Remove an installation entirely when you no longer want Qodo connected to that Git account or organization.- From the three-dot menu, select Delete installation to permanently remove it. Qodo displays a confirmation dialog before deleting.
GitLab: personal access token required
GitLab: personal access token required
For GitLab installations, deleting also removes Qodo’s webhooks and bot from the connected GitLab repositories and groups. The confirmation dialog asks for a personal access token to do this.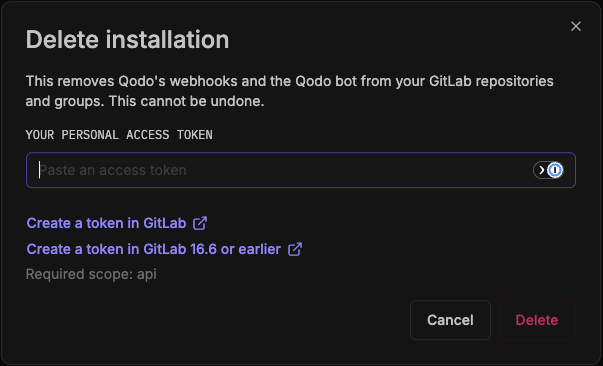
- Click Create a token in GitLab.
- For a GitLab Server installation on GitLab 16.6 or earlier, click Create a token in GitLab 16.6 or earlier instead.
api.Used once to remove the webhooks and Qodo bot, then discarded. Short expiry recommended, e.g., 1 day.
Azure DevOps: additional step required
Azure DevOps: additional step required
If you are deleting your last Qodo installation from an Azure DevOps organization, deleting it in Qodo is not enough to fully remove Qodo from your organization. You must also manually remove the Qodo service principal user. Go to 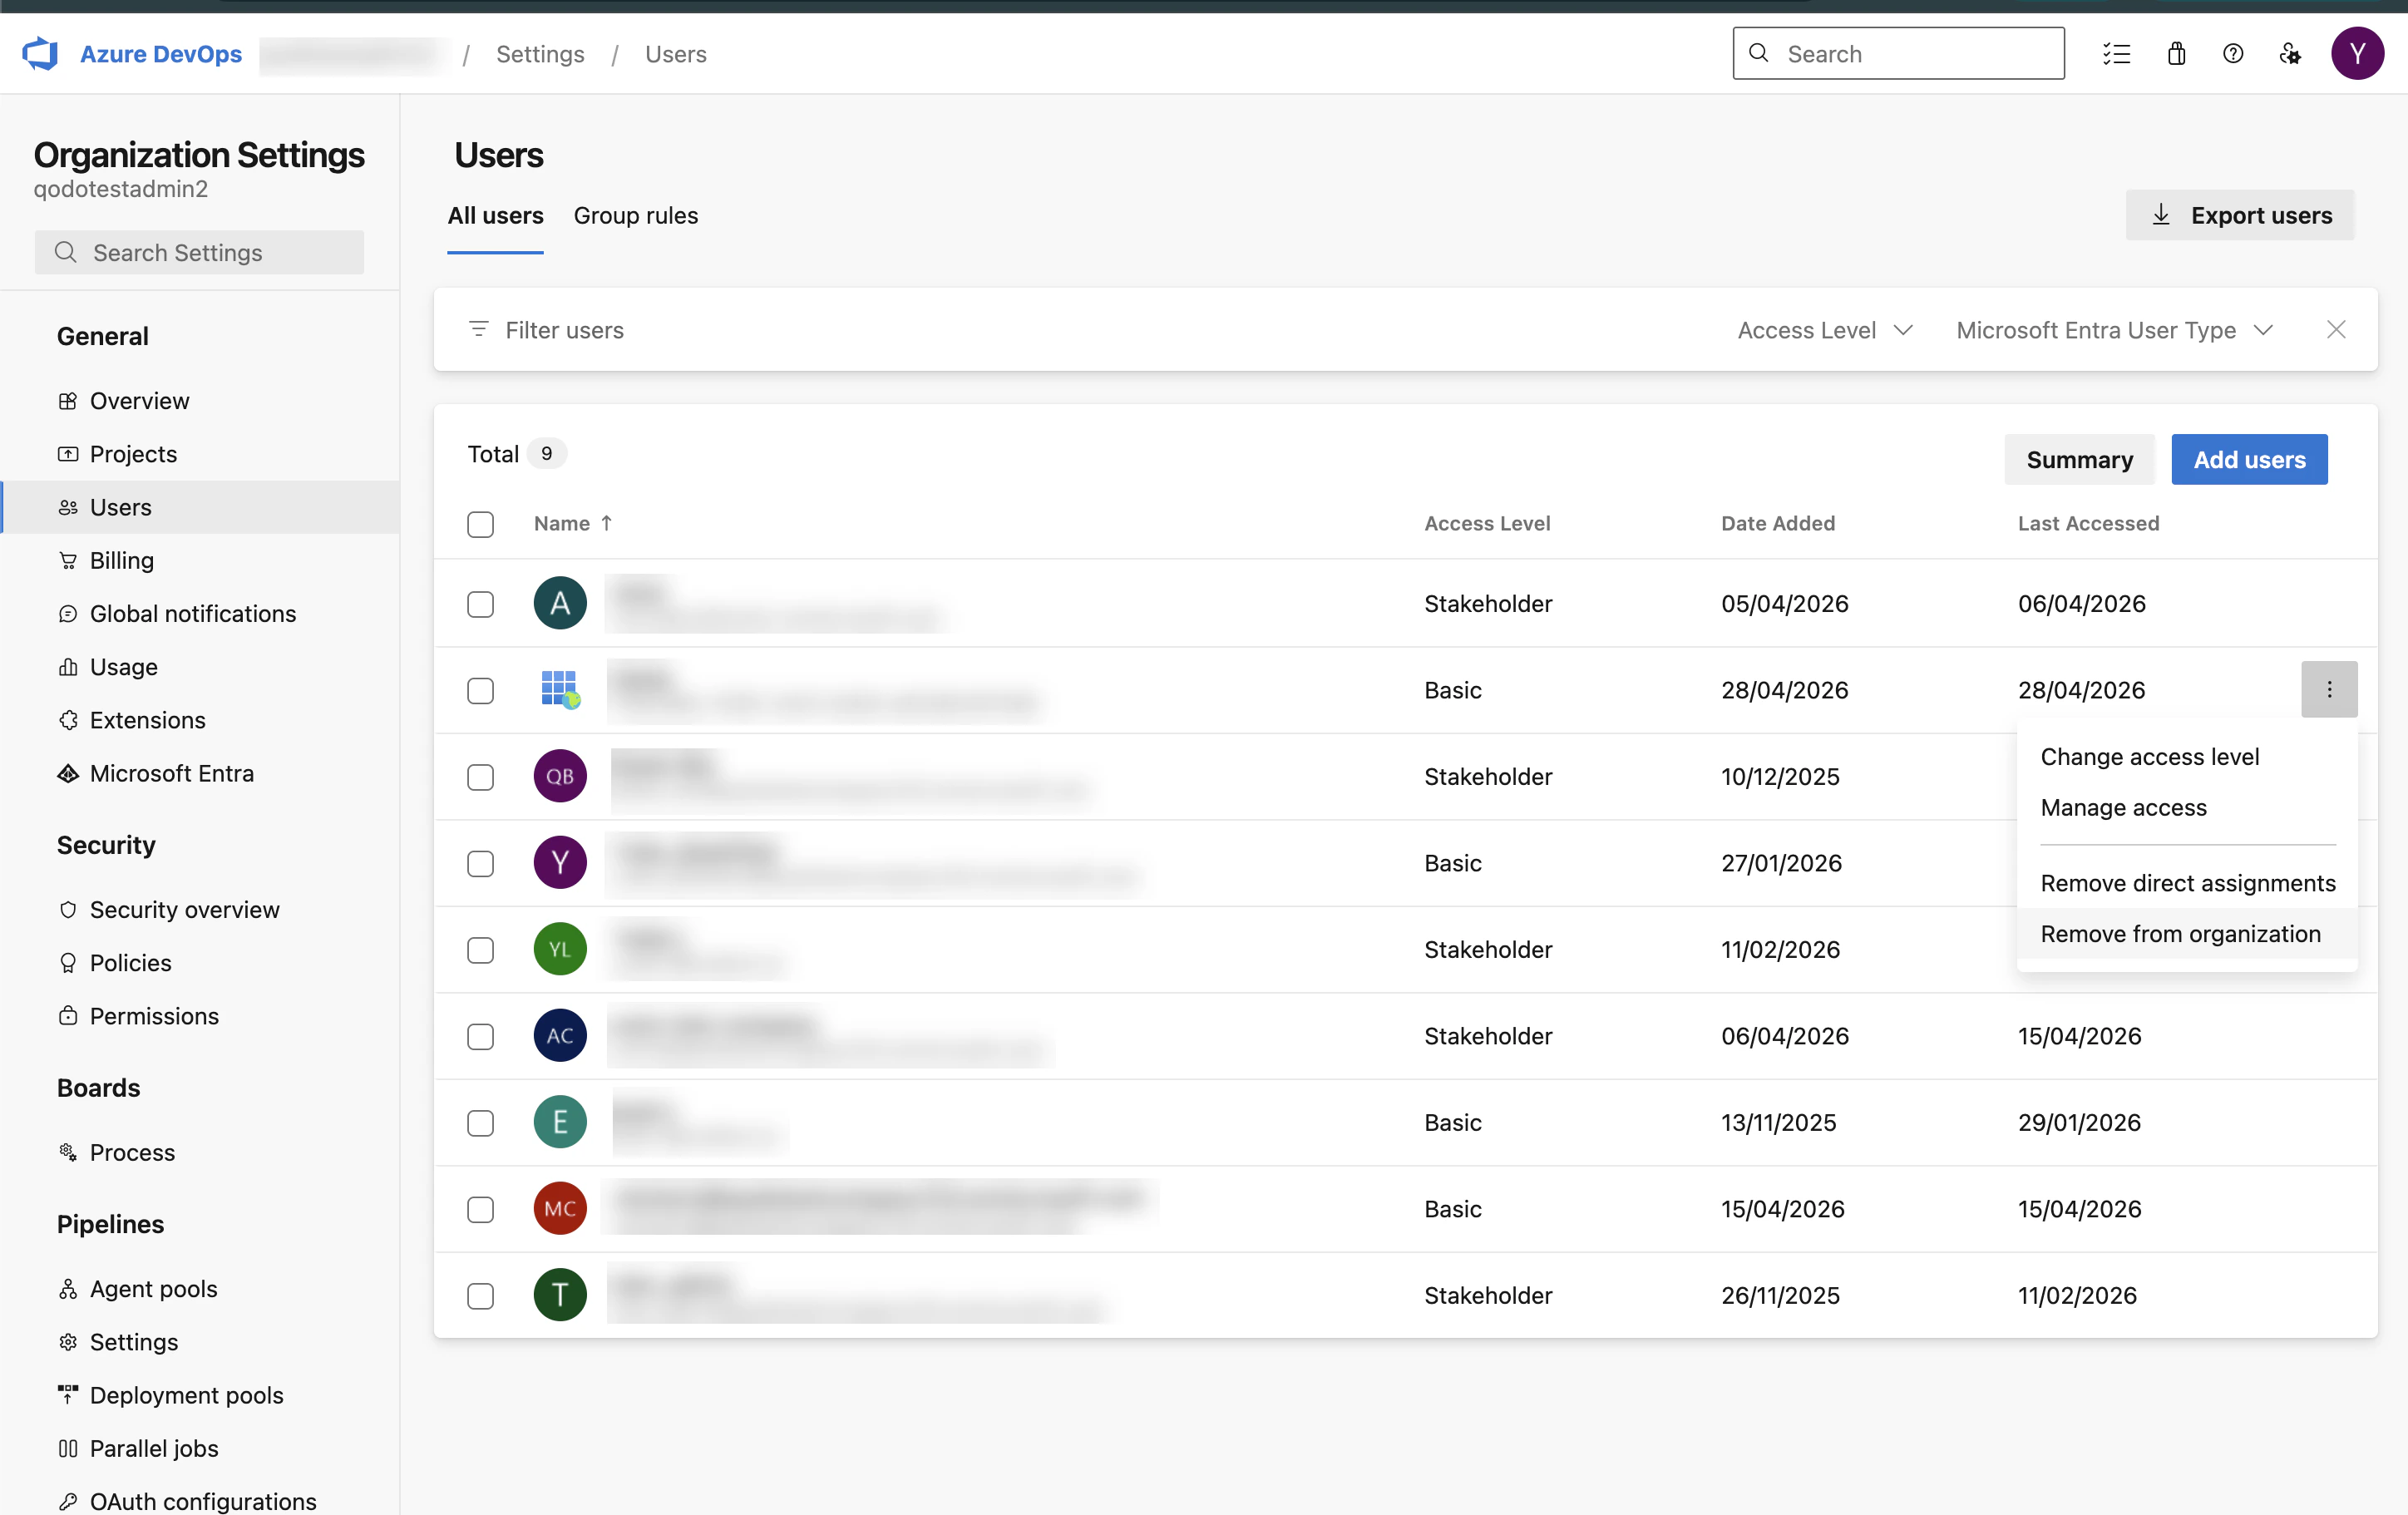
https://dev.azure.com/{org_id}/_settings/users and remove the user from there.Bitbucket Data Center: administrator sign-in required
Bitbucket Data Center: administrator sign-in required
Deleting a Bitbucket Data Center installation also removes the webhooks Qodo created. Since your administrator credentials are never stored, the confirmation dialog asks for them again to complete the removal.Enter your administrator username and administrator password, then click Delete to confirm.
Your credentials are used only for this step and not stored.
View repository sync status from anywhere in the portal
Click Background activity in the top right corner of the portal to open the panel and check repository sync progress without leaving your current page. The row shows how many repositories have synced so far. Click it to open Repositories filtered to repositories with a healthy connection.
The row only appears once sync applies to at least one repository.
Next steps
- Monitor and manage repositories: View and manage individual repositories, connection health, and PR history indexing.
- View cross-repository relationships: View and audit cross-repository relationships across your organization.