

Prerequisites
Before you begin, ensure you have:- A Qodo on-premises environment already set up. Contact your Qodo Account Manager if you haven’t configured this yet.
- A Gerrit instance where you have administrator access, to create a dedicated user, grant it permissions, and register a webhook.
Access the Gerrit integration
1
Log in to your Qodo portal.
2
From the left-hand navigation menu, select Integrations.
3
Select the Self-Hosted tab, locate the Gerrit card, and click Add installation to launch the installation wizard.
Install Qodo on Gerrit
1
Before you begin
1
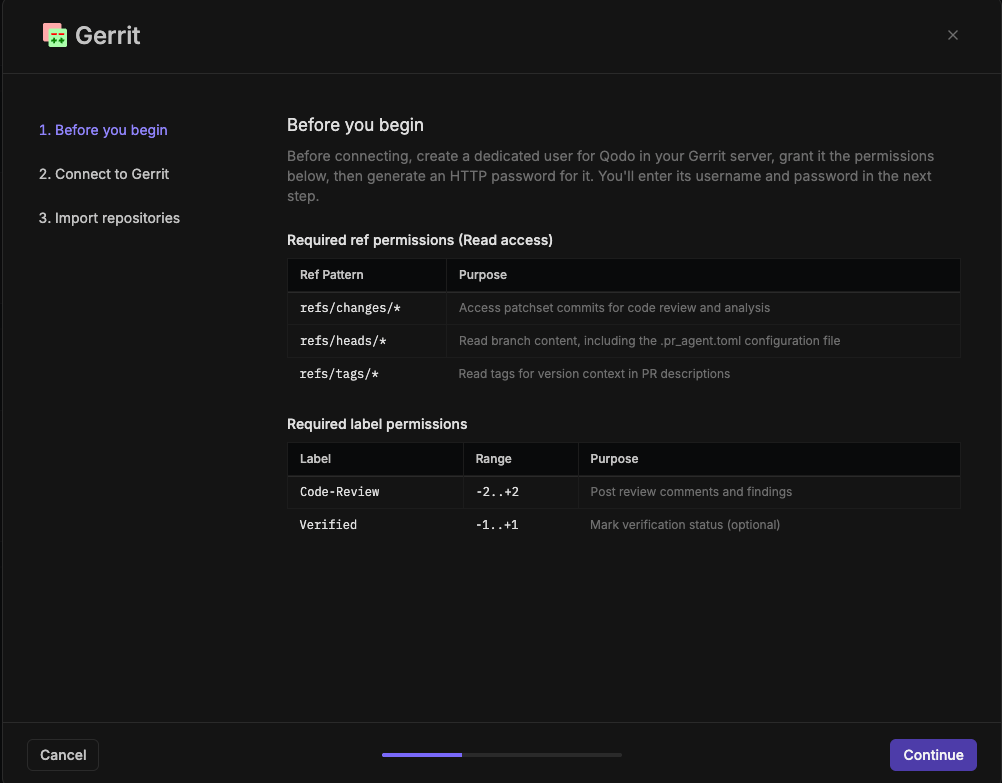
In your Gerrit server, create a new user named
Qodo. This user will be used to post review comments on Qodo’s behalf in the Gerrit UI.2
Grant the user the following permissions:
3
Generate an HTTP password for the user. You’ll enter its username and password in the next step.
4
Back in the wizard, click Continue.
2
Connect to Gerrit
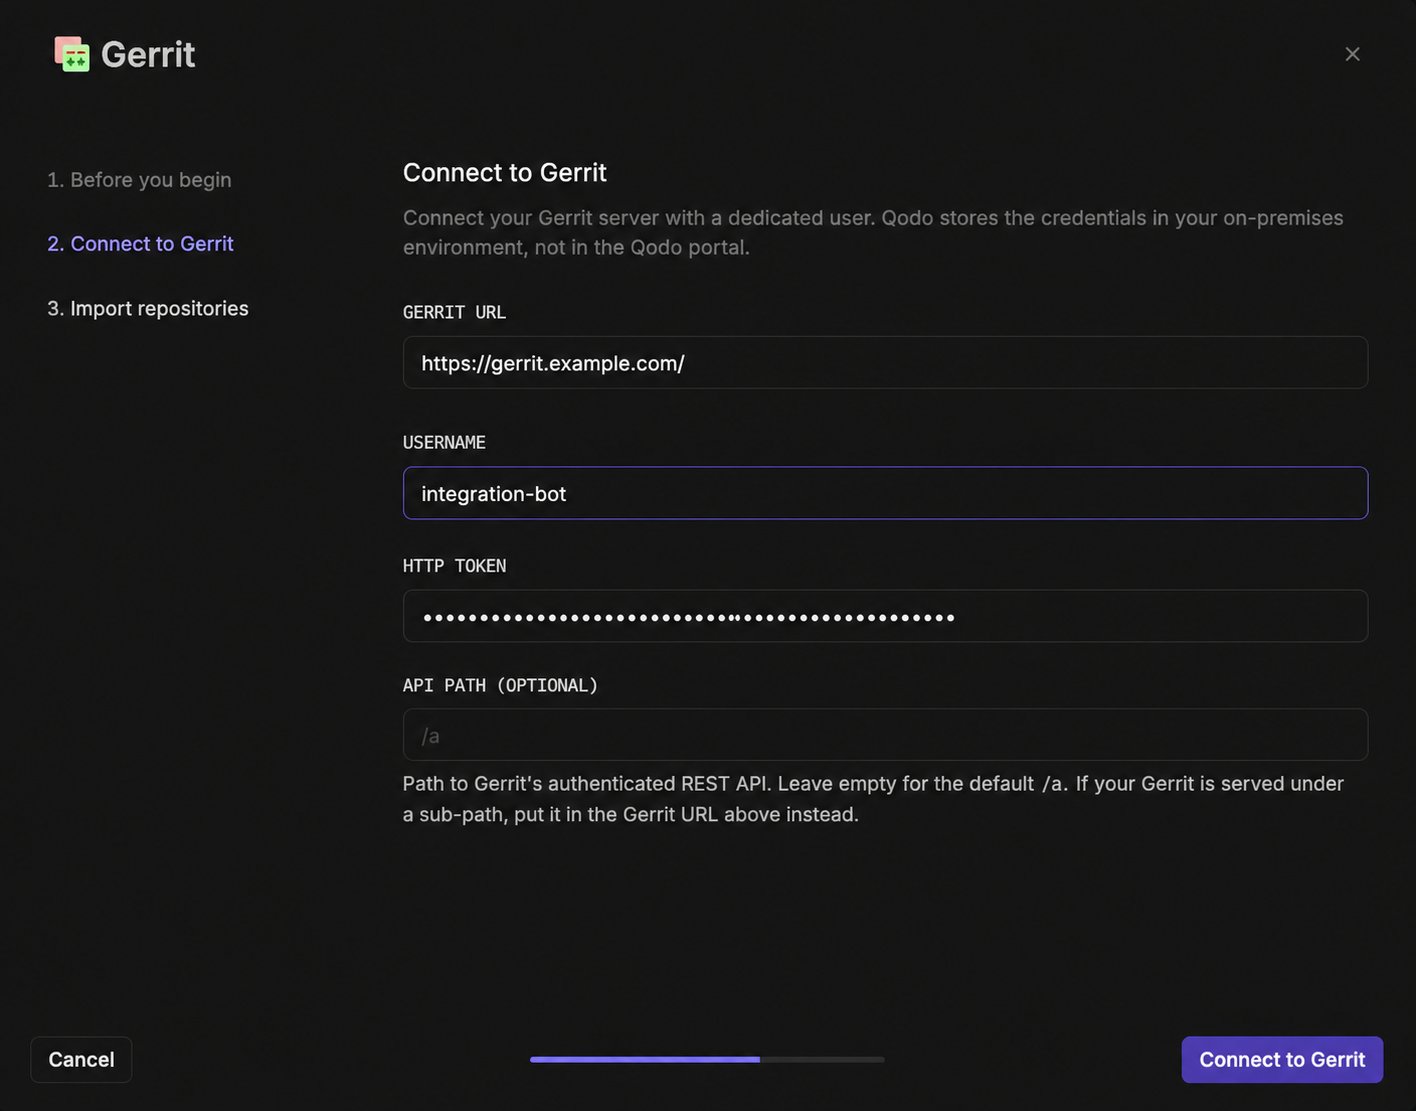
- Gerrit URL: Your Gerrit instance URL (for example,
https://gerrit.example.com). - Username: The dedicated Gerrit user created in the previous step.
- HTTP token: The user’s HTTP password.
- API path (optional): Path to Gerrit’s authenticated REST API. If your Gerrit instance is served under a sub-path, add that to the Gerrit URL above instead of this field.
Qodo validates the credentials against your Gerrit server, then stores them in your on-premises database, not in the Qodo portal itself.
3
Import repositories
1
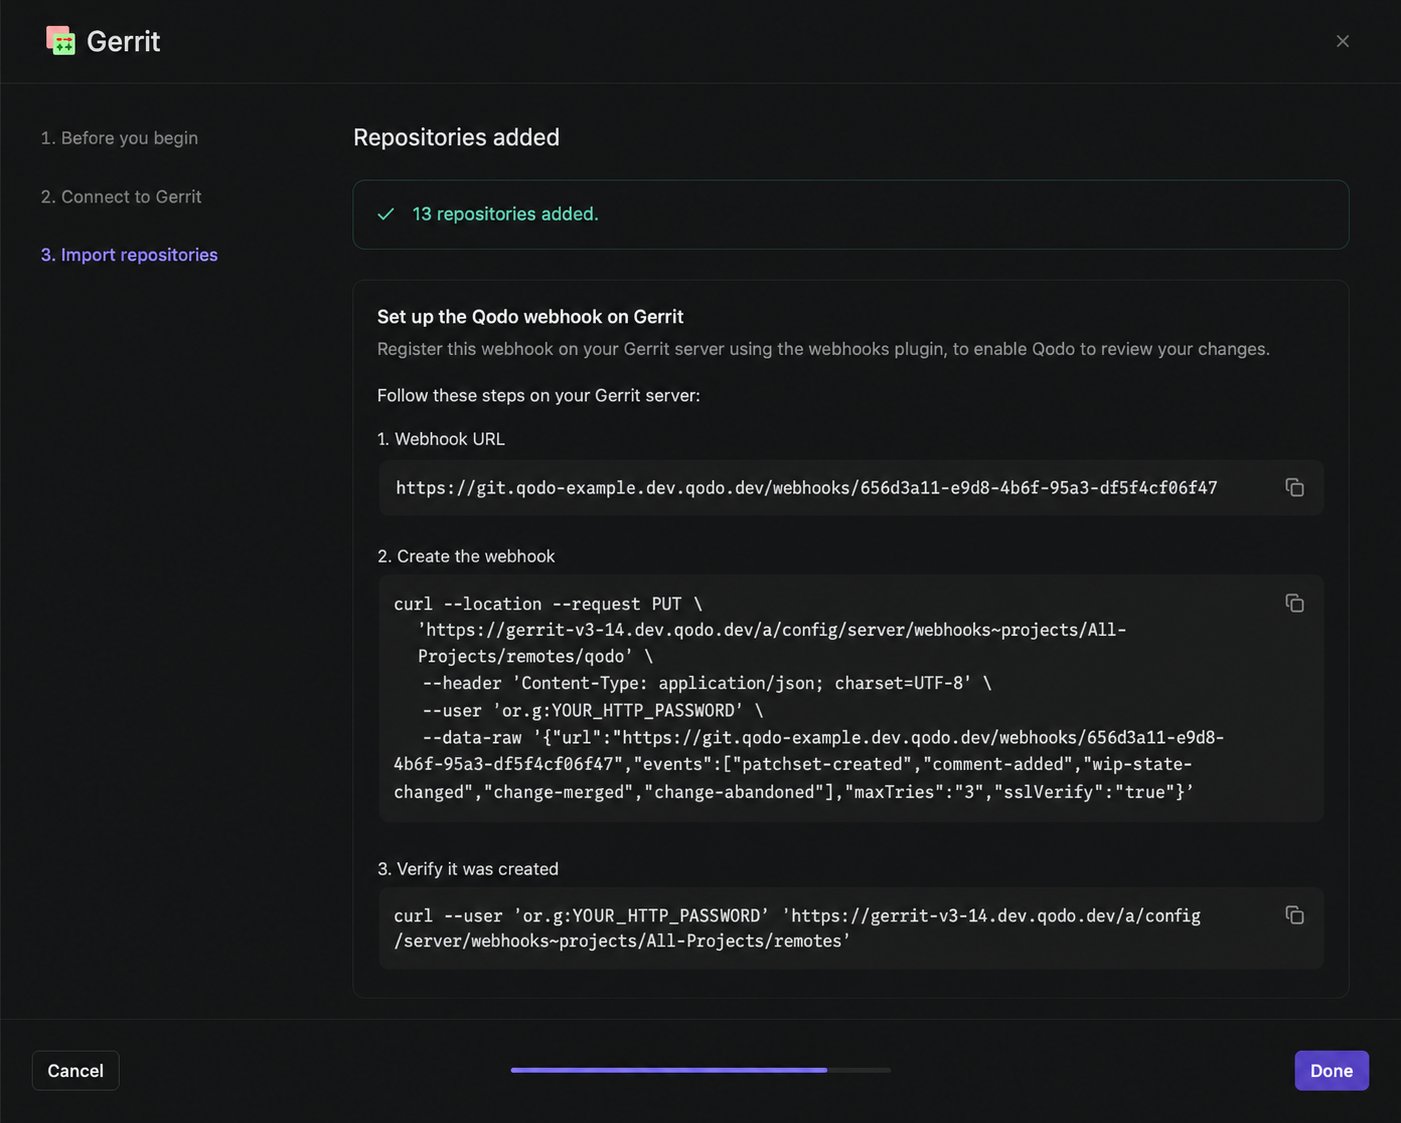
Copy the Webhook URL shown in the wizard.
2
Run the following command against your Gerrit server, replacing the URL and credentials with your own:
This targets All-Projects, Gerrit’s global config project. Webhook configuration is inheritable: it applies to every repository, without requiring per-project configuration. To scope the webhook to specific repositories, replace
All-Projects in the URL with a repository’s name and repeat this for each repository to include.3
Verify it was created:Replace
All-Projects with a specific repository name if that’s what you registered the webhook against.4
Back in the wizard, click Done.
Verify the installation
1
Open a new change in one of the connected projects and confirm that Qodo is triggered automatically.
2
Add a comment using one of the supported commands:
/agentic_describe/agentic_review
Troubleshooting
If Qodo is not responding:- Confirm the webhook is registered on the project you expect (
All-Projects, or a specific repository), using the verify command from Install Qodo on Gerrit. - Confirm the HTTP credential used hasn’t expired.
Manage repositories
Every Gerrit project the connected user can access is imported when you connect (see Install Qodo on Gerrit), but only projects covered by the webhook actually receive change events.- To cover only specific projects, register the webhook against those projects by name instead of
All-Projects. - To turn code review on or off for a project already covered by the webhook, without touching the webhook itself, use the Code review toggle on the Repositories page in the Qodo portal.
Next steps
- Using Qodo in code reviews: Get the most out of Qodo.
- Install and configure Qodo: Use the shared configuration guides to configure Qodo for your organization.