Prerequisites
Before you begin, ensure you have:- A Qodo on-premises deployment. You will receive your Qodo on-premises URL from your Qodo Account Manager. It typically looks like:
qodo-merge.yourcompanyname.qodo.ai - System administrator access to your GitHub organization.
Installation
Step 1: Navigate to the GitHub Apps section
1
Log in to GitHub using an administrative account.
2
Click your profile picture → Your organizations.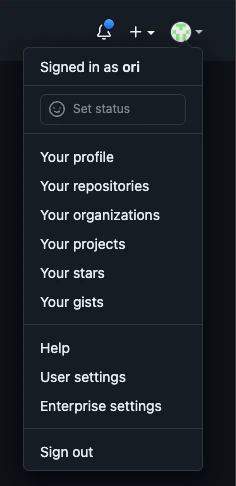
3
Select your organization.
4
Click Settings.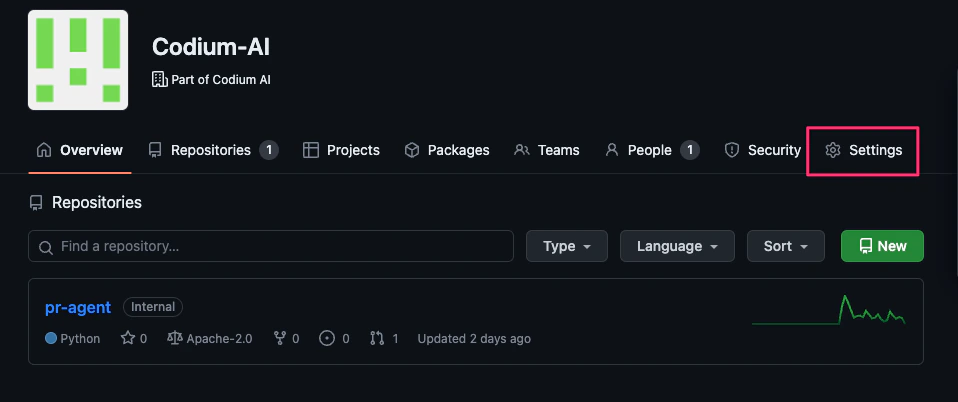
5
Go to Developer settings → GitHub Apps.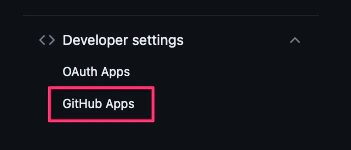
6
Click New GitHub App.
Step 2: Create the GitHub App
1
Register a new GitHub App with the following settings: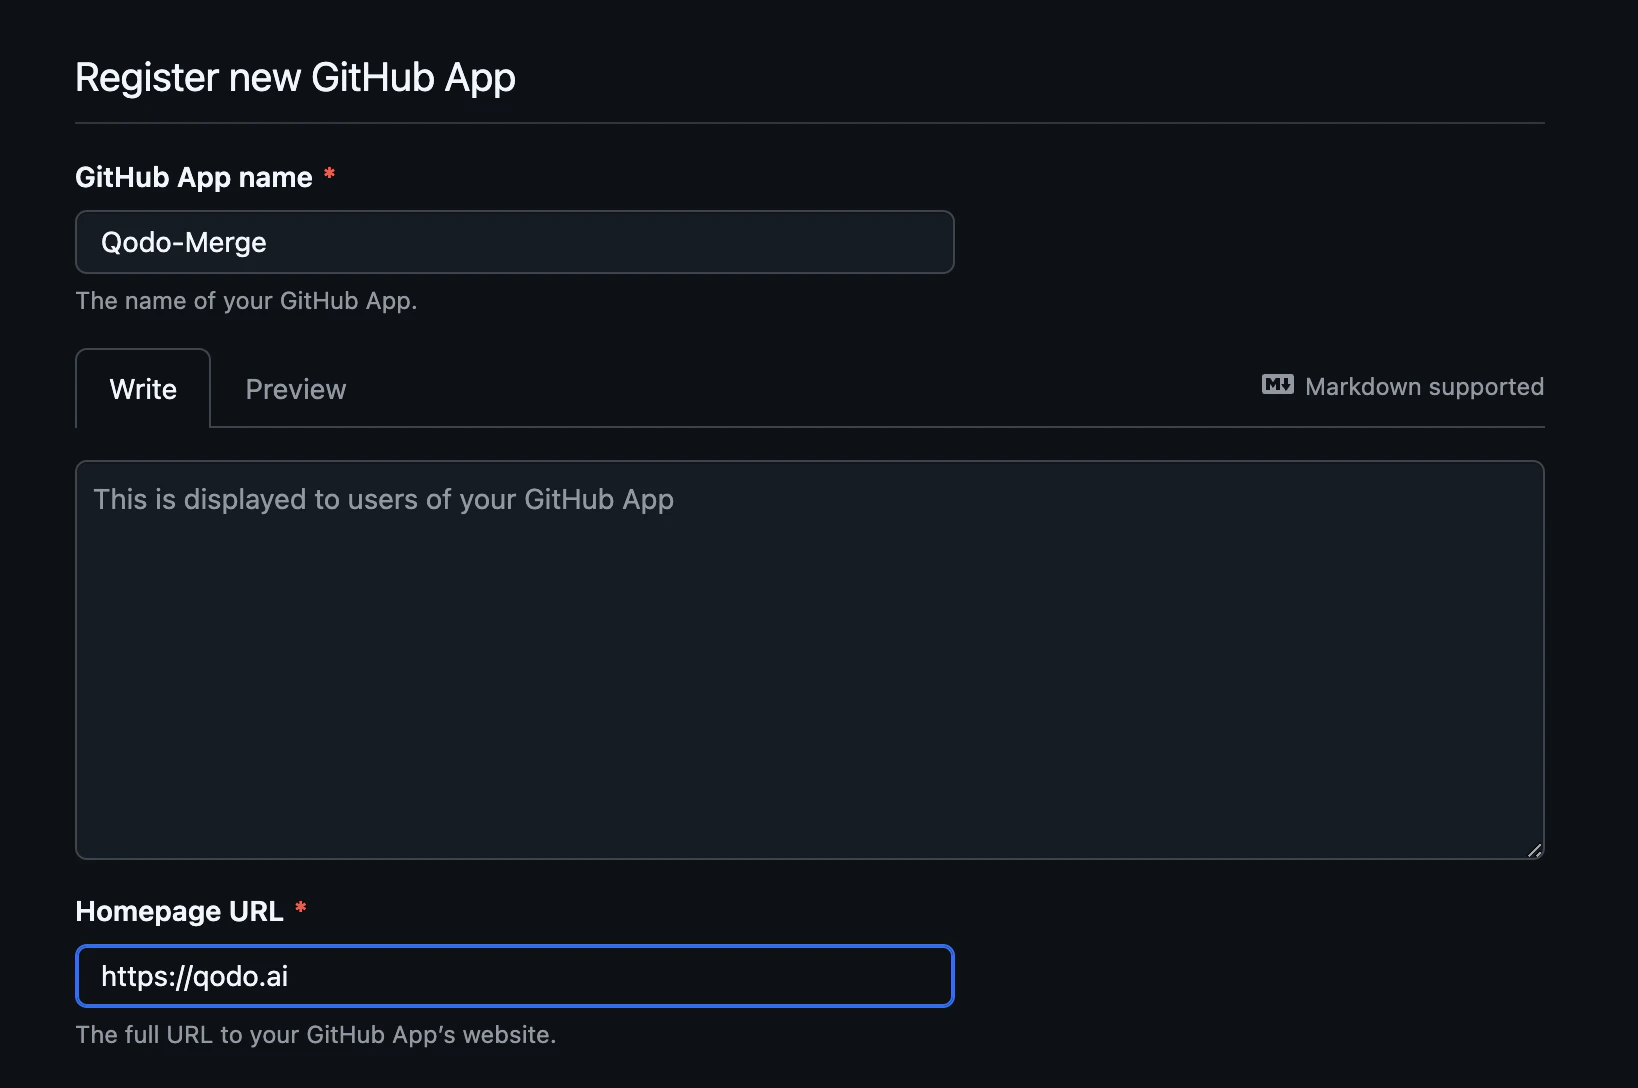
- App name: Qodo
- Homepage URL:
https://qodo.ai
2
Configure the webhook: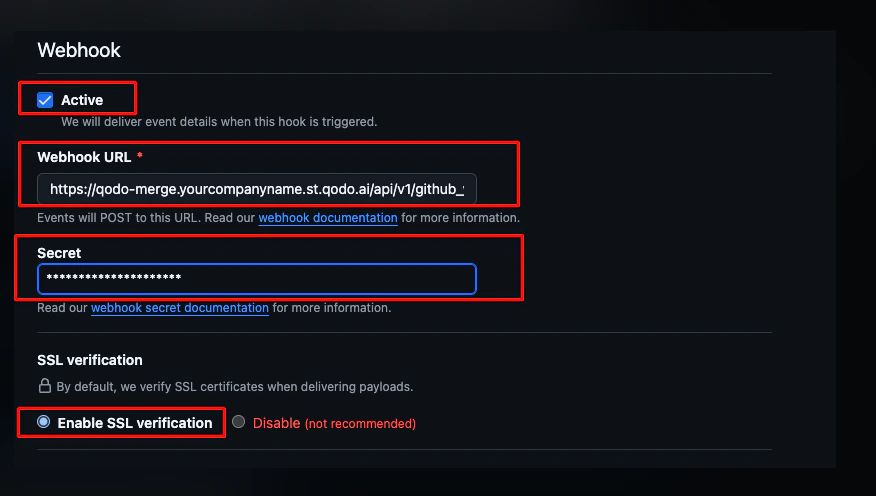
- Check the Active checkbox.
- Webhook URL:
https://qodo-merge.[yourcompanyname].qodo.ai/api/v1/github_webhooks - Secret: generate a strong random secret and save it. You will need it to configure the Qodo service.
- Select Enable SSL verification.
3
Set the following repository permissions:
4
Subscribe to the following events: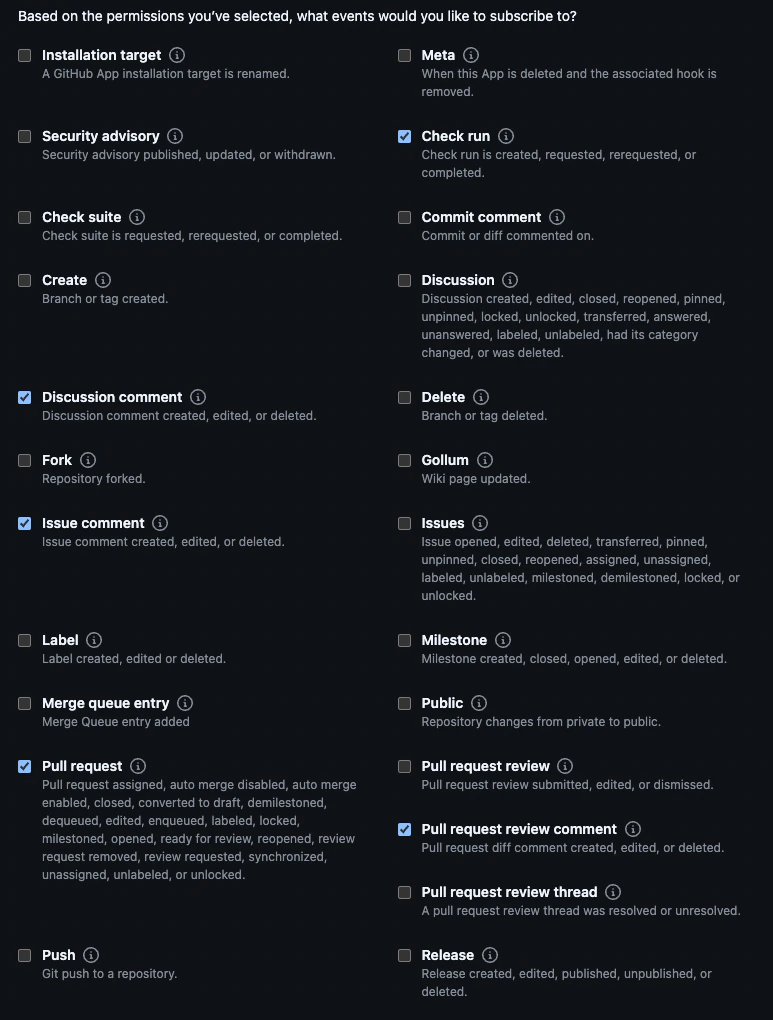
5
Under Where can this GitHub App be installed?, choose Any account. This avoids creating a separate application per organization.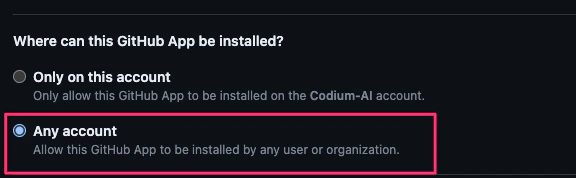
6
Click Create GitHub App.
Step 3: Post-creation actions
1
Note the App ID. You will need it for Qodo configuration.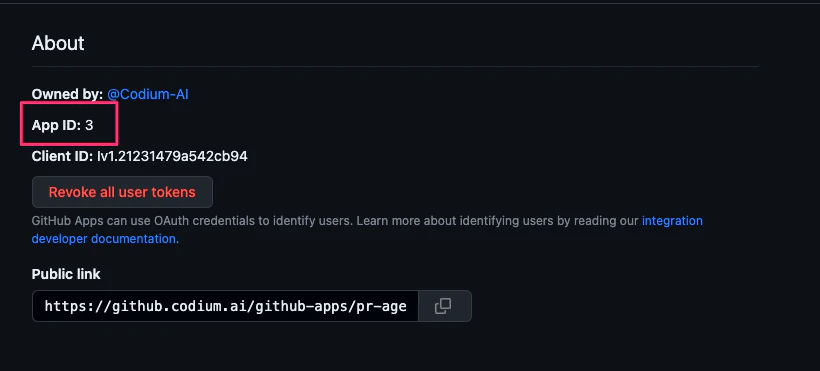
2
Generate a private key. You will need it for Qodo configuration.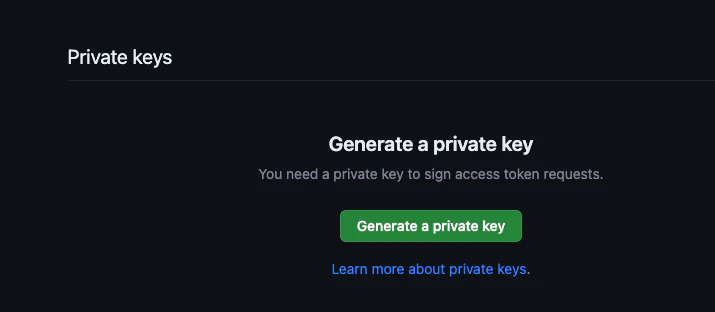
3
Upload the Qodo logo to use on GitHub posts.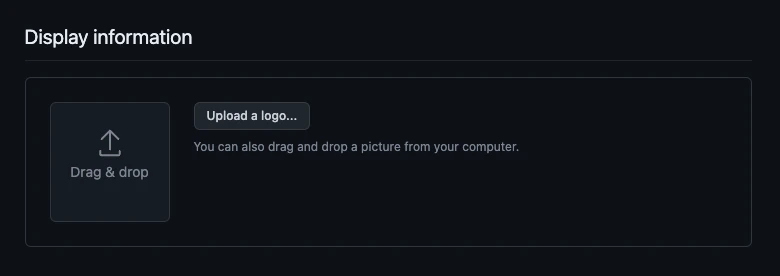
Step 4: Install the app
1
Go to Your Organization → Settings → Developer Settings → GitHub Apps.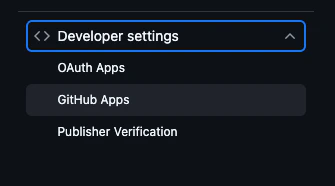
2
Click the Qodo app name.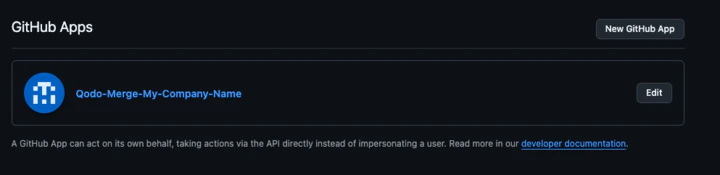
3
Click Install on each relevant organization.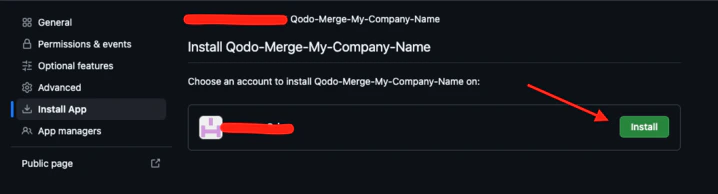
Step 5: Configure repository access
1
Go to Settings → Developer Settings → GitHub Apps in your organization.
2
Click Configure on the Qodo app.
3
Under Repository Access, choose Only select repositories and select the repositories to include.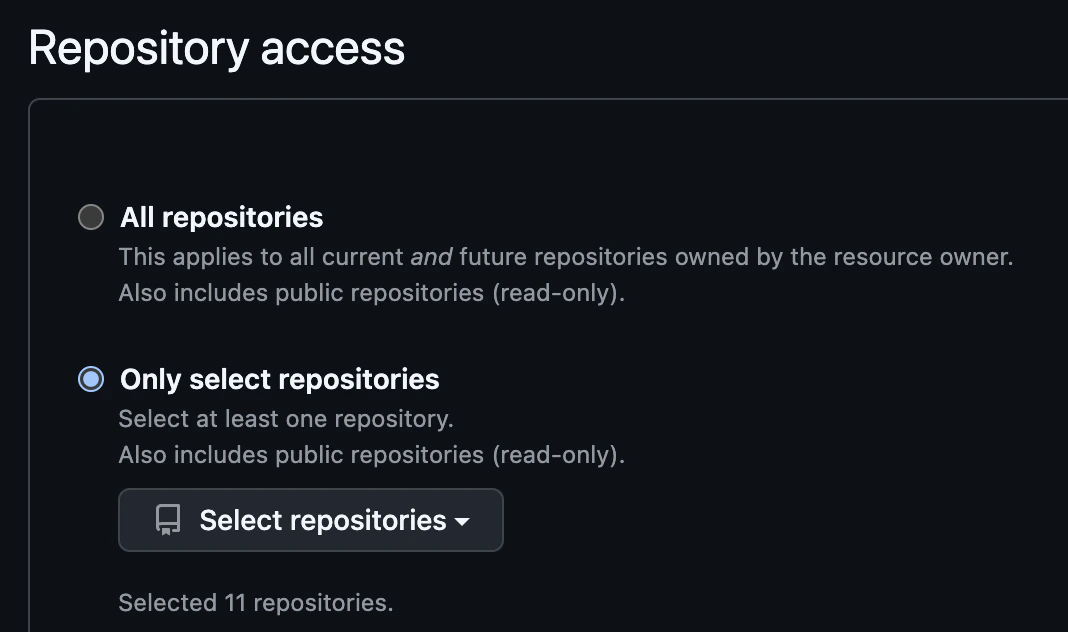
Step 6: Configure your Qodo instance
Add the following details to your Qodo on-premises configuration:The organization name is available in your organization’s settings in GitHub. You can provide multiple organizations if the app is installed in more than one.
For production environments, follow your organization’s secret management procedures to securely store these credentials.
Verify the installation
1
Open a new pull request in one of the configured repositories and confirm that Qodo is triggered automatically.
2
Add a comment using one of the supported commands:
/agentic_describe/agentic_review
Troubleshooting
If Qodo is not responding:- Verify that the pull request is in a repository selected in the app settings.
- Contact your Qodo Account Manager for assistance.