Where to start?
- Follow the Context Engine setup guide to complete the initial configuration.
- If you are using GitLab for version control, continue with this guide for the next steps.
Note on limitationsGitLab’s current integration only supports group-level indexing, meaning you cannot select individual repositories directly.To control what gets indexed:
- Choose specific groups, or
- Use a personal/group access token that only grants access to the repositories you want indexed.
Step 1: Generate a group access token
Prerequisites for GitLab SaaS
- You must be a Group Owner or Maintainer.
- Group access tokens are available on paid Premium and Ultimate tiers.
Prerequisites for GitLab Enterprise
- You must be a Group Owner or Maintainer.
- Group access tokens are available on all tiers, including Free.
-
Ensure that token creation is not disabled:
- Go to Group Settings ▸ General ▸ Permissions and group features
- Confirm “Users can create project and group access tokens” is enabled.
Instructions
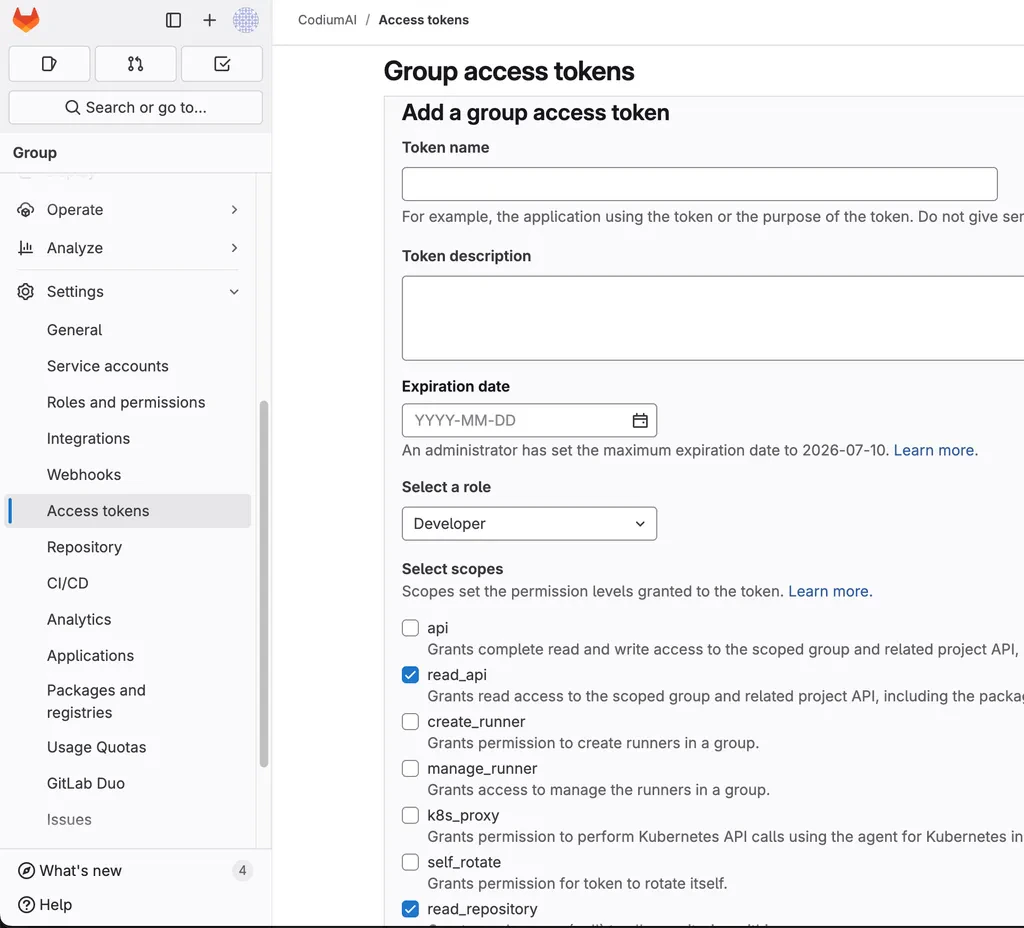
Fill in the form
- Token Name: anything descriptive
- Role: Developer or higher
-
Scopes: check only
read_apiandread_repository
Step 2: Configure the Context Engine
In yourqodo-aware configuration (typically under Secrets), add the following:
Replace the placeholders:
-
<YOUR_GITLAB_DOMAIN>– Your GitLab server domain (e.g.,gitlab.example.com). -
<GITLAB_GROUP_ID>– The numeric ID of your GitLab group (visible in the UI or URL). -
<GROUP_ACCESS_TOKEN>– The access token you created in Step 1.
Note: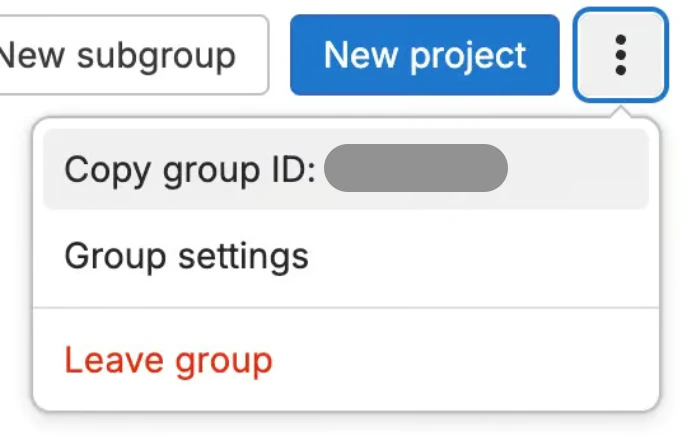
-
Do not duplicate existing
[gitlab.tokens]entries. Each group ID should be unique. -
You can find the Group ID in the GitLab UI under your group’s Settings ▸ General, or in the group’s URL:
https://gitlab.example.com/groups/<group-name>/-/→ the ID is typically in the page source or settings.