This guide walks you through installing Qodo single-tenant on GitHub using the built-in wizard. Assuming your Qodo environment is already set up, configuration typically takes about 5 minutes.

Prerequisites

Before you begin, ensure you have:
  • Access to your Qodo single-tenant portal.
  • Sufficient permissions to create GitHub applications.

Access the GitHub integration

1
Log in to your Qodo portal.
2
From the left-hand navigation menu, select Integrations.
3
Locate the GitHub card and click Add installation to launch the setup wizard.

Install Qodo using the wizard

The wizard guides you through six steps:
1

Enter organization details

Enter your GitHub organization or GitHub Enterprise homepage URL and click Next.
GitHub integration wizard step showing organization homepage URL field
2

Review the manifest

1
Review the Manifest, which defines the configurations and permissions Qodo requires. If you have questions about permissions or need adjustments, contact your Qodo Account Manager before proceeding.
2
Click Next.
3

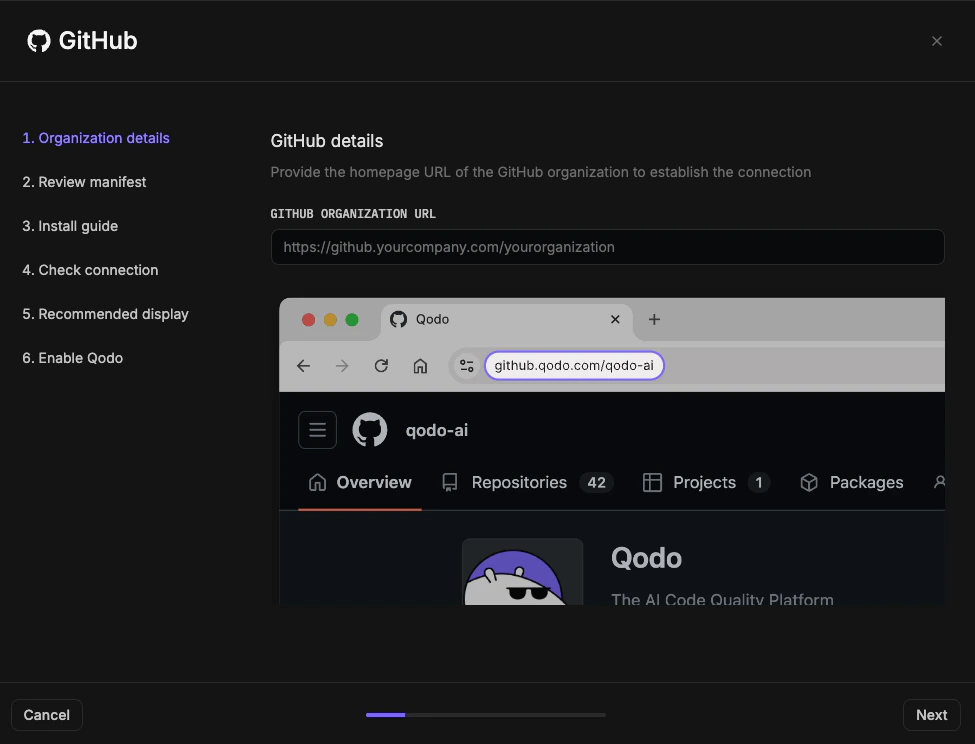
Install the GitHub App

Review the Installation guide for the steps you will configure in GitHub, then click Install GitHub App. You are redirected to GitHub.In GitHub
1
Enter a name for the GitHub App (for example, your organization name + Qodo).
2
Click Create GitHub App for Codium-AI.
3
Select the GitHub user account to authorize the app. If the displayed account is correct, click Continue; otherwise sign in with a different account.
4
Select which repositories Qodo can access: All repositories (recommended) or Selected repositories only. Repository-level settings can later be managed from the Qodo portal.
GitHub App installation page showing repository access permission options
5
Click Install. You are redirected back to the Qodo portal.
4

Check the connection

1
Check for a “GitHub installation successful” message.
2
Click Next. If unsuccessful, click Test Connection to retry. If it fails again, contact your Qodo Account Manager.
5

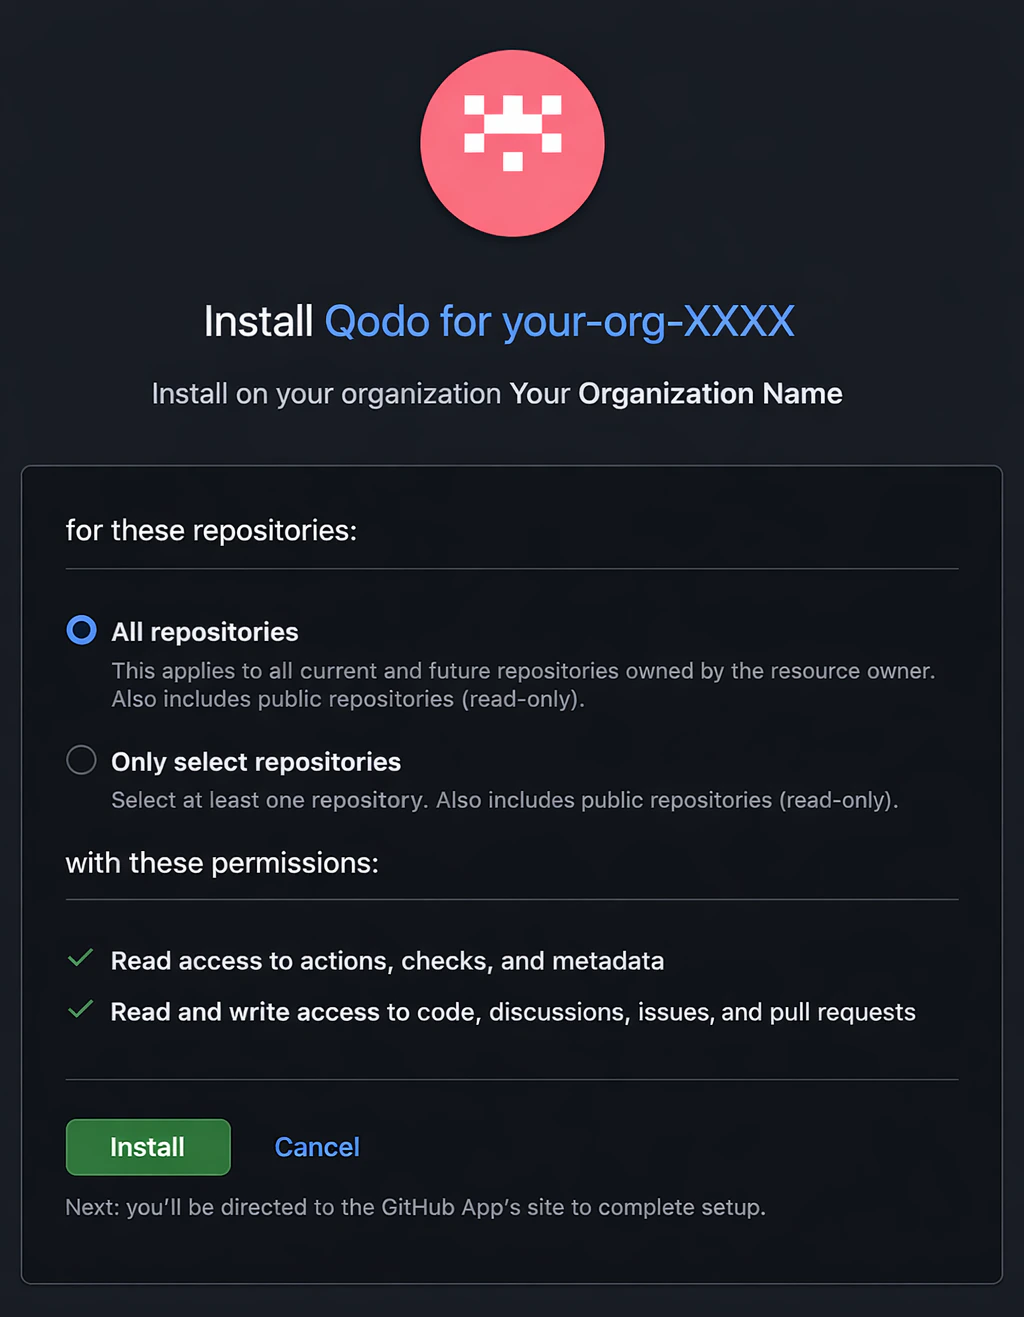
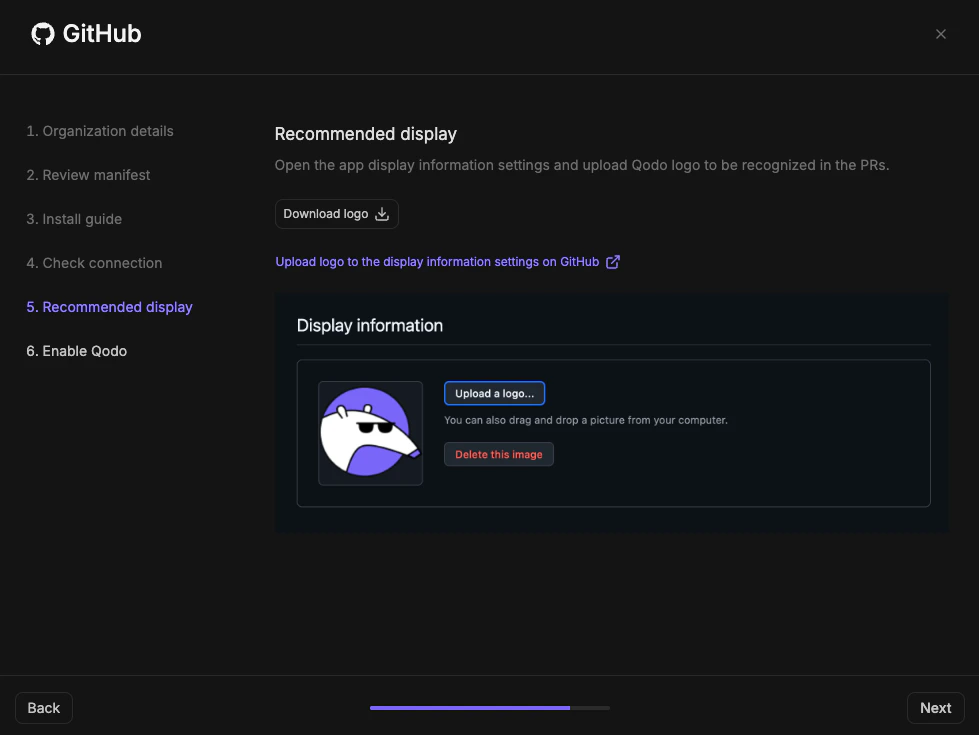
Configure recommended display

To ensure Qodo appears consistently in pull requests:
1
Click Download logo to download the official Qodo logo.
2
Click Upload logo to the display information settings on GitHub to open the GitHub App settings page.
3
Upload the Qodo logo as the app logo and click Save. You are redirected back to the Qodo portal wizard.
4
Click Next.
GitHub integration wizard display configuration step with logo upload option
6

Enable Qodo

  • Click Finish Installation.
GitHub integration wizard final step with Finish Installation button
You are redirected to the Integrations page, where the GitHub card shows your connected organizations.GitHub integration card in Qodo portal showing number of connected organizations
Qodo is now active on the selected repositories.

Verify the installation

1
Open a new pull request in the configured repositories and confirm that Qodo is triggered automatically.
2
Add a comment using one of the supported commands:
  • /agentic_describe
  • /agentic_review
Qodo should respond with a review or PR summary directly on the pull request.

What’s next

View Using Qodo in PRs to learn about next steps and how to get the most out of Qodo.