- This guide applies to the following deployment combinations, all of which use the same installation wizard:
- Qodo single-tenant with GitLab Cloud
- Qodo single-tenant with GitLab Server
- Qodo multi-tenant with GitLab Server
- Not sure which deployment model you need? See Install Qodo in your Git provider for a full comparison, or check your deployment type.
Prerequisites
Before you begin, ensure you have:- Access to your Qodo portal.
- A Qodo environment configured for GitLab.
- GitLab group administrator access.
- A dedicated email address to use as a Qodo GitLab account (for example,
qodo@yourcompany.com). The account is created during the installation wizard.
Access the GitLab integration
1
Log in to your Qodo portal. For single-tenant accounts, your portal URL follows the pattern
app.yourcompany.st.qodo.ai and is provided by your Qodo Account Manager.2
From the left-hand navigation menu, select Integrations.
3
Locate the relevant card and click Add installation to launch the installation wizard:
- If you are using GitLab Cloud, select the SaaS tab and locate the GitLab card.
- If you are using GitLab Server, select the Self-Hosted tab and locate the GitLab card.
Install Qodo on GitLab
1
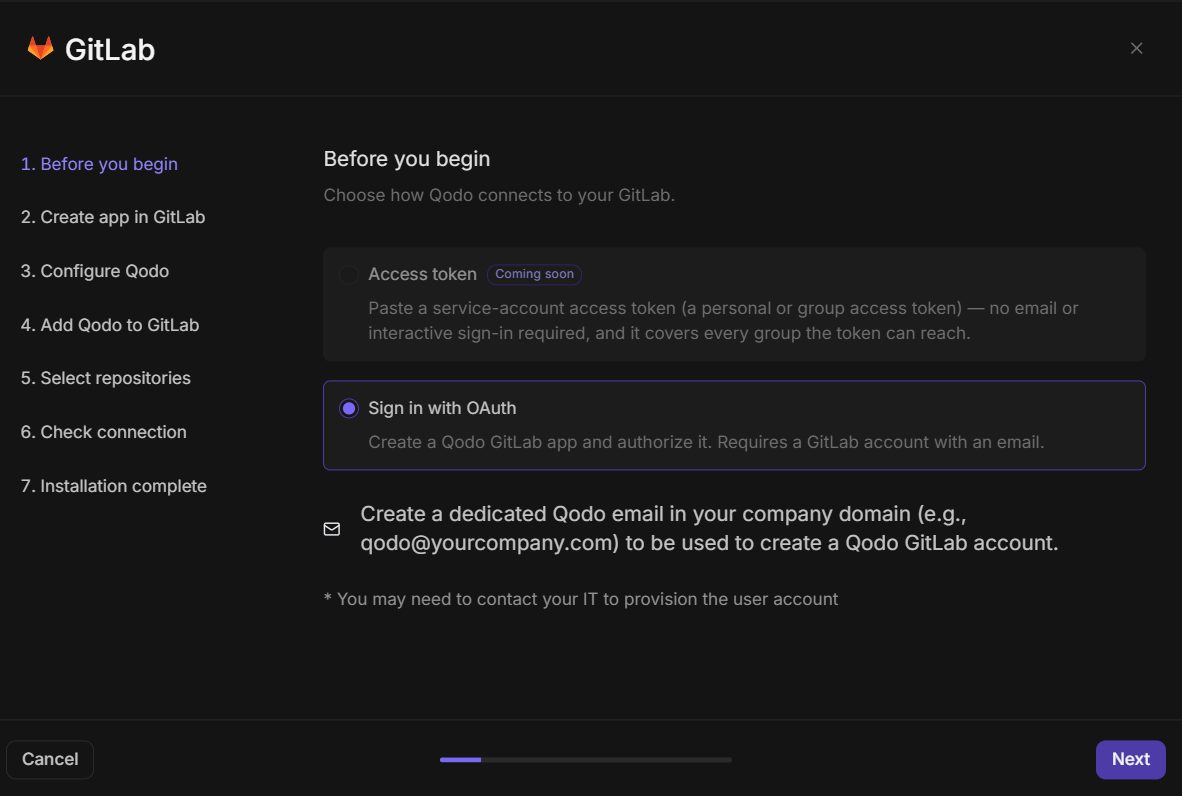
Before you begin
1
Under connection method, select Sign in with OAuth. The Access token option is coming soon.
2
Create a dedicated Qodo email address in your company domain (for example,
qodo@yourcompany.com) to use as the Qodo GitLab account. You may need to contact your IT team to provision the user account.3
Click Next.
2
Create app in GitLab
In this step you create a GitLab OAuth application so Qodo can connect to your GitLab group.Back in the wizard, click Next.
- Click Copy URL to paste in GitLab and keep it ready for sub-step 1.
1
Create the app
In GitLab, go to your group Settings → Applications → Add new application. Configure the application with the following settings: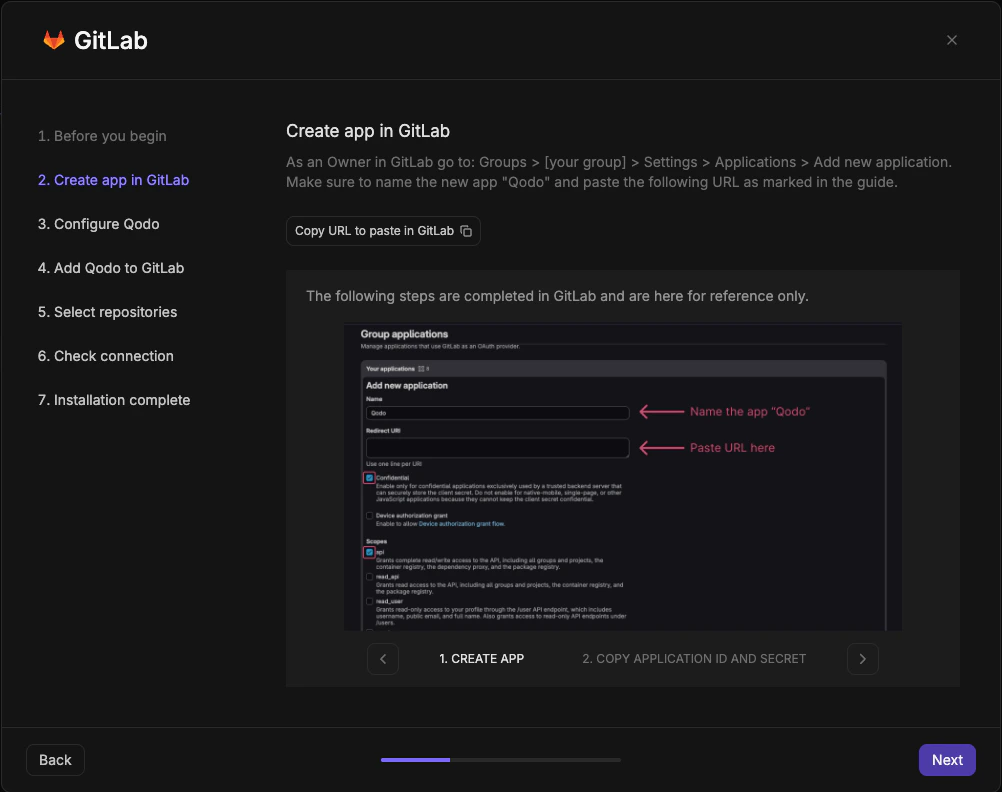
- Name: Qodo
- Redirect URI: Paste the URL copied from the wizard
- Confidential: Ensure the Confidential checkbox is selected
- Scopes: Ensure the api checkbox is selected
2
Copy the client ID and secret
After saving, GitLab displays the application credentials. Copy both the Application ID and the Secret and store them safely.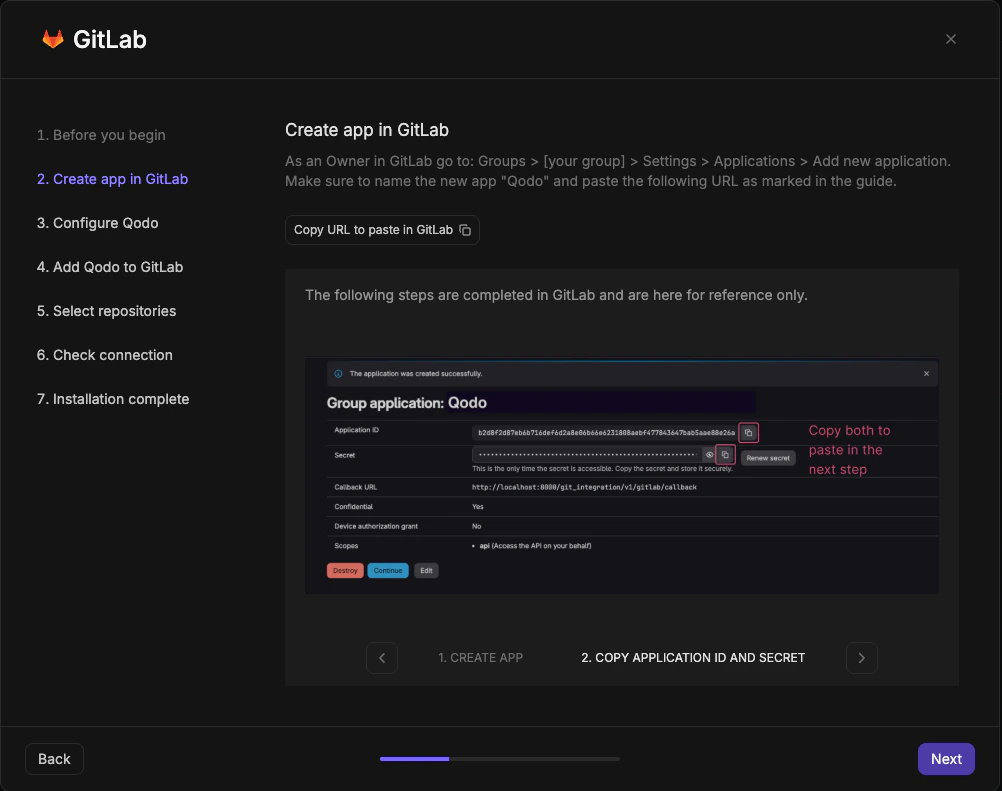
This is the only time the secret is accessible. Copy it before leaving this page.
3
Configure Qodo
1
Enter the following details from the previous step: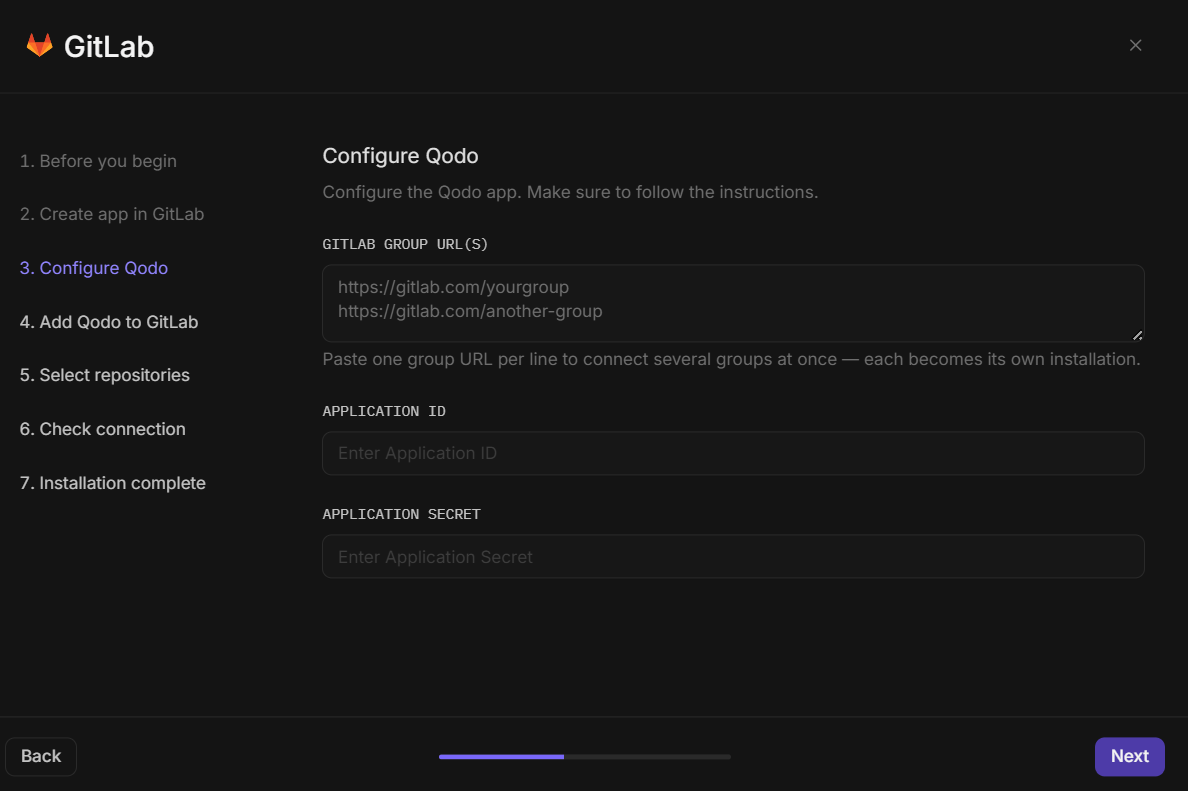
- GitLab group URL(s): Paste one group URL per line to connect several groups at once, for example
https://gitlab.com/yourgroup. Each URL becomes its own installation. - Application ID: The Application ID copied in step 2
- Application Secret: The Secret copied in step 2
A single OAuth application authorizes all the groups you list, so you only need the one Application ID and Secret from step 2. Each group becomes a separate installation, listed individually on the Repositories page.
2
Click Next.
4
Add Qodo to GitLab
Using the email you created in step 1, add Qodo as a user in your GitLab workspace.Back in the wizard, select the Confirm GitLab Qodo account creation checkbox and click Install Qodo. You are redirected to GitLab to authorize access.
- Click Download Qodo logo for avatar and save it for use in sub-step 3.
1
Invite the Qodo user
In your GitLab group, go to Manage → Members and click Invite members. In the dialog, enter the Qodo email address, set the role to 
Maintainer, and click Invite.2
Create the Qodo GitLab account
The invited user receives an email from GitLab. Accept the invitation and complete the account setup.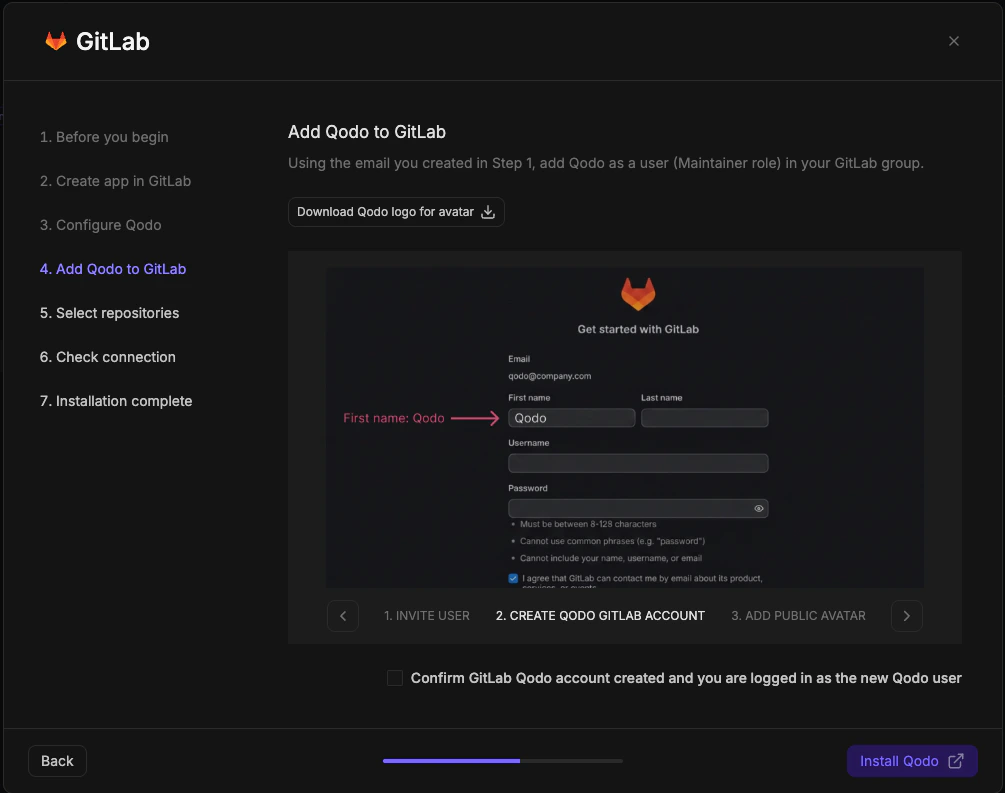
The GitLab first name must be set as
Qodo.3
Add the public avatar
In the Qodo account’s GitLab profile settings, go to Edit Profile and upload the Qodo logo as the public avatar.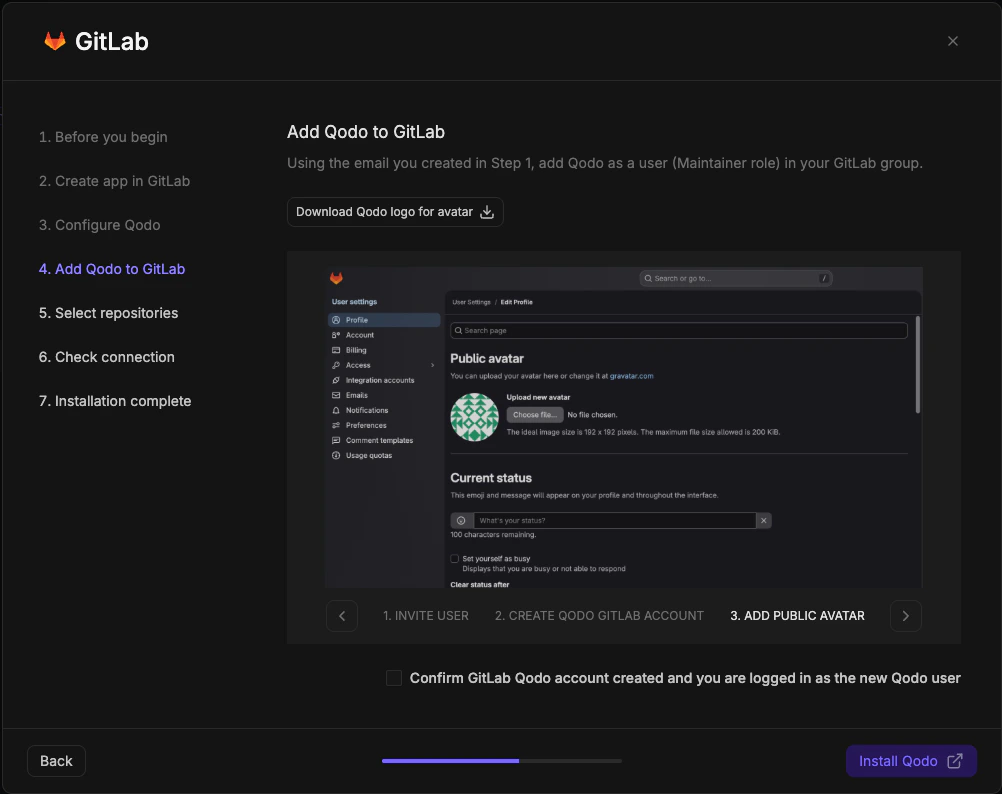
5
Select repositories
1
Select the repositories where you want to enable Qodo. Use the search bar to find specific repositories, or browse the group tree.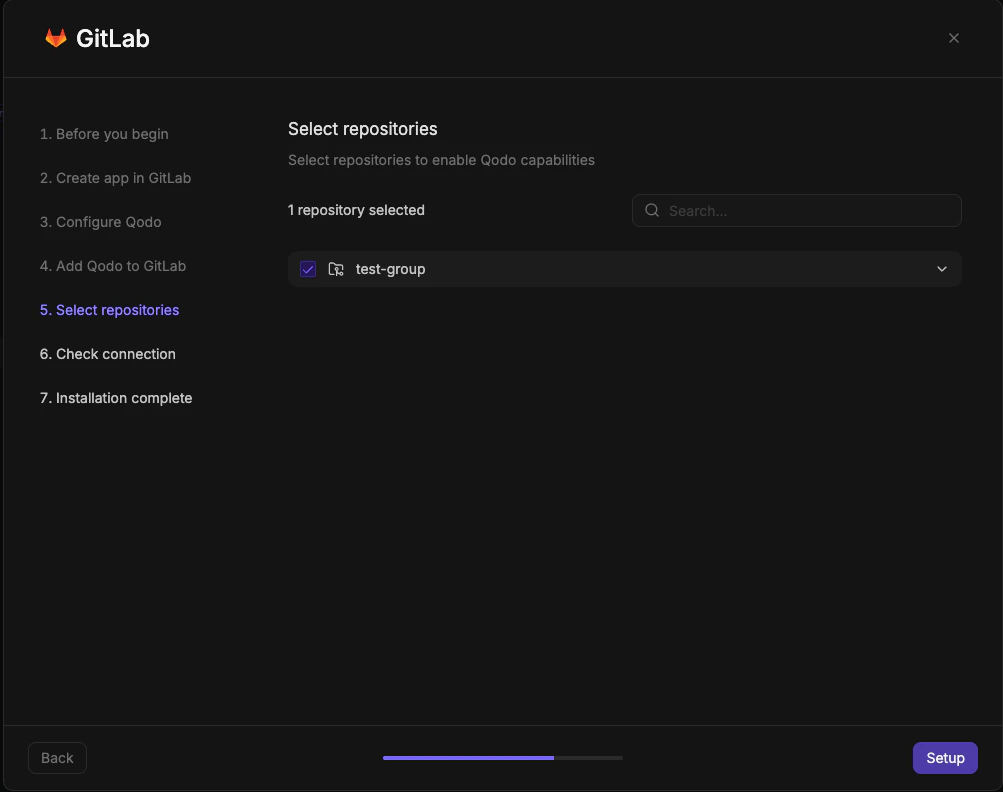
2
Click Setup to continue.
6
Check connection

- Click Next to proceed.
7
Installation complete
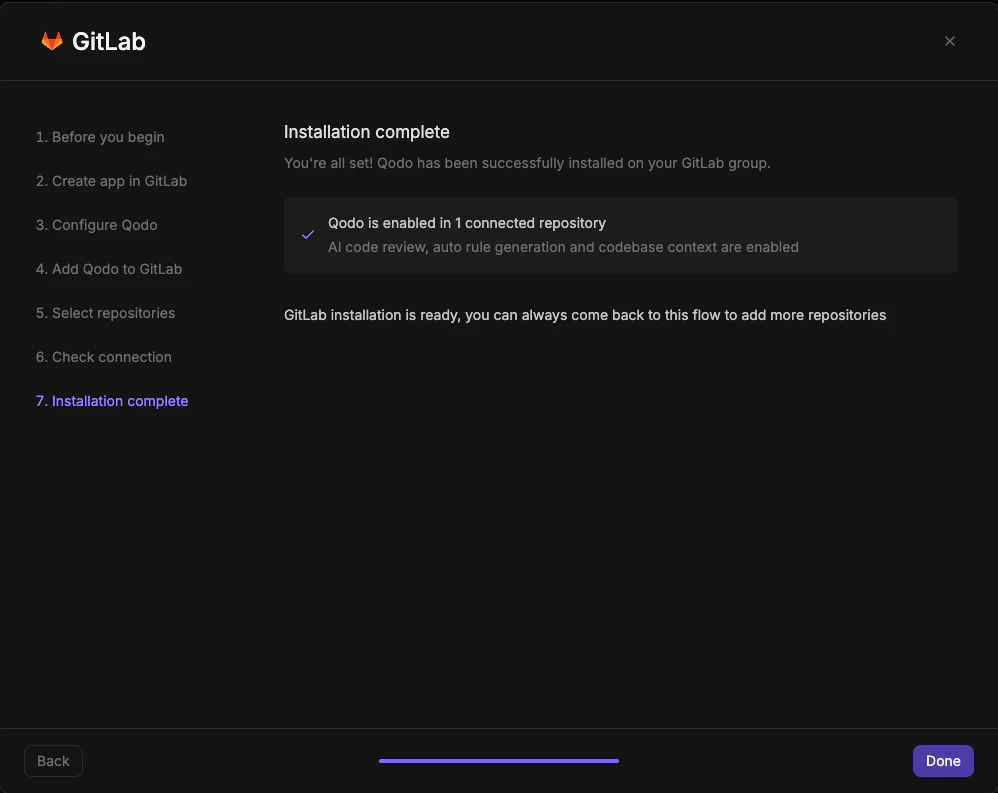
- Click Done.
Verify the installation
1
Open a new merge request in one of the connected repositories and confirm Qodo is triggered automatically.
2
Add a comment using one of the supported commands:
/agentic_describe/agentic_review
Next steps
- Repositories page: Enable or disable Qodo on individual repositories within your current scope.
- Using Qodo in PRs: Get the most out of Qodo.
- Migration guide: Migrate an existing Qodo installation.