Using GitLab Server? The installation flow is the same as Qodo single-tenant. See Qodo single-tenant.
Not sure which deployment model you need? See Install Qodo in your Git provider for a full comparison, or check your deployment type.
Prerequisites
Before you begin, ensure you have:- Access to your Qodo portal.
- System administrator access to your GitLab group.
- A dedicated email address to use as a Qodo GitLab account (for example,
qodo@yourcompany.com). The account is created during the installation wizard.
Access the GitLab integration
1
Log in to your Qodo portal.
2
From the left-hand navigation menu, select Integrations.
3
Select the SaaS tab, locate the GitLab card, and click Add installation to launch the installation wizard.
Install Qodo on GitLab Cloud
1
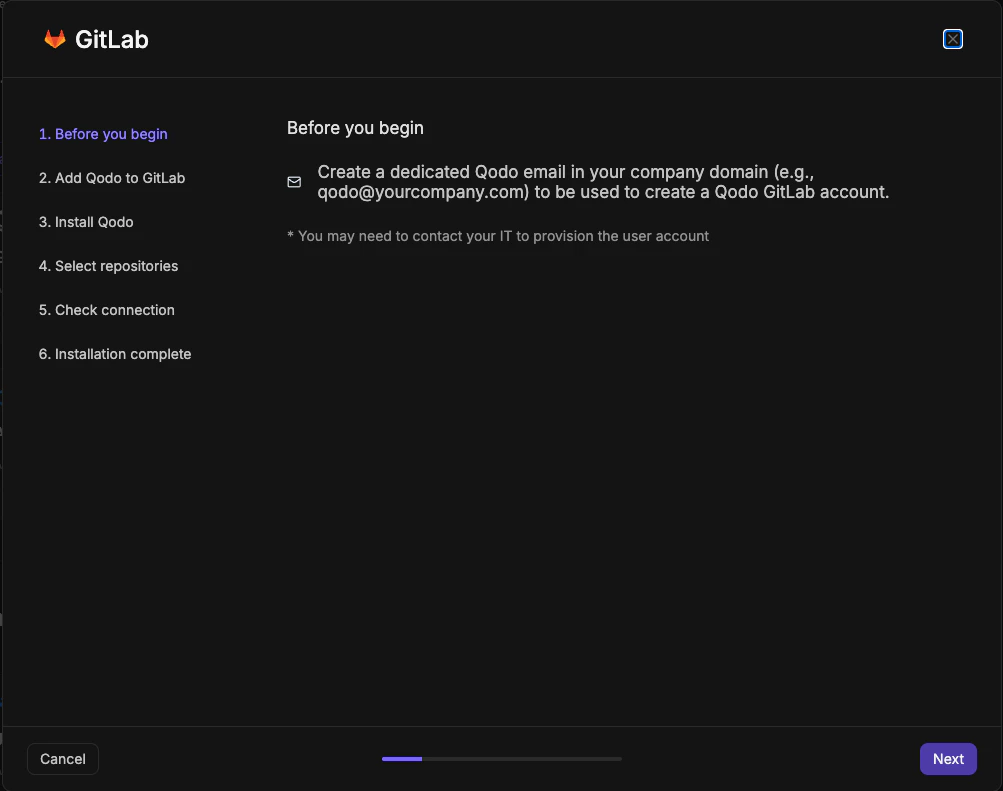
Before you begin
1
Create a dedicated Qodo email address in your company domain (for example,
qodo@yourcompany.com) to use as the Qodo GitLab account. You may need to contact your IT team to provision the user account.2
Click Next.
2
Add Qodo to GitLab
Using the email you just created, add Qodo as a user in your GitLab workspace.Back in the wizard, select the Confirm GitLab Qodo account creation checkbox, then click Next.
- Click Download Qodo logo for avatar and save it for use in sub-step 3.
1
Invite the Qodo user
In your GitLab group, go to Manage → Members and click Invite members. In the dialog, enter the Qodo email address, set the role to 
Maintainer, and click Invite.2
Create the Qodo GitLab account
The invited user receives an email from GitLab. Accept the invitation and complete the account setup.
The GitLab first name must be set as
Qodo.3
Add the public avatar
In the Qodo account’s GitLab profile settings, go to Edit Profile and upload the Qodo logo as the public avatar.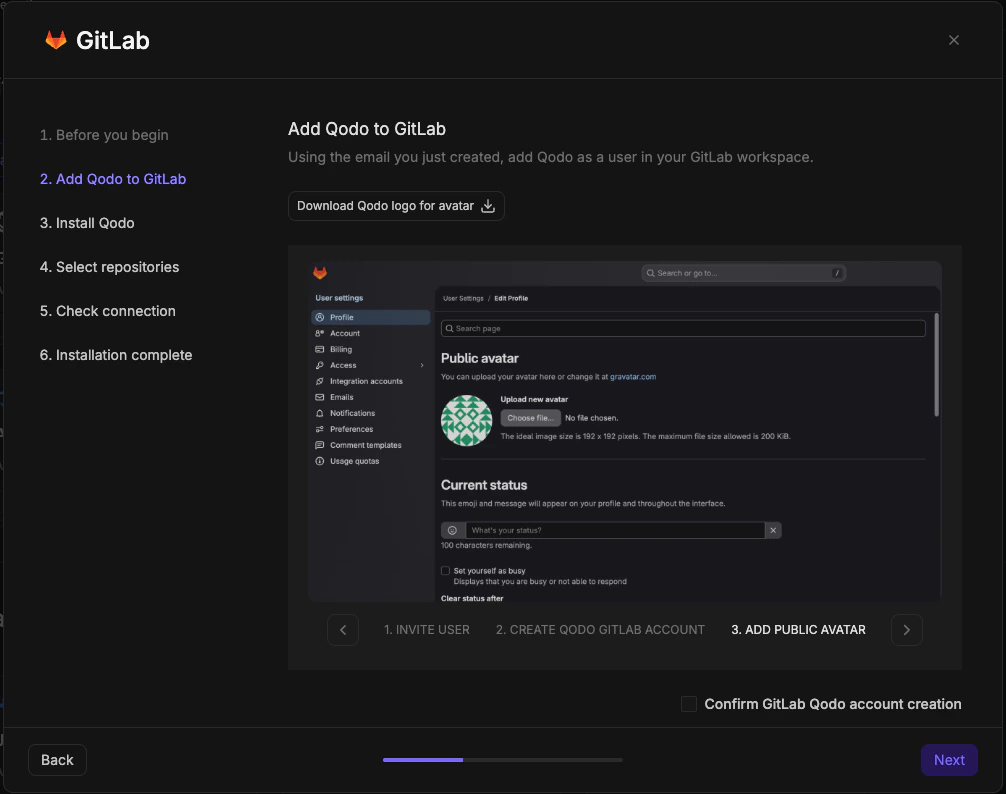
3
Install Qodo
1
Enter your GitLab Organization URL (for example, 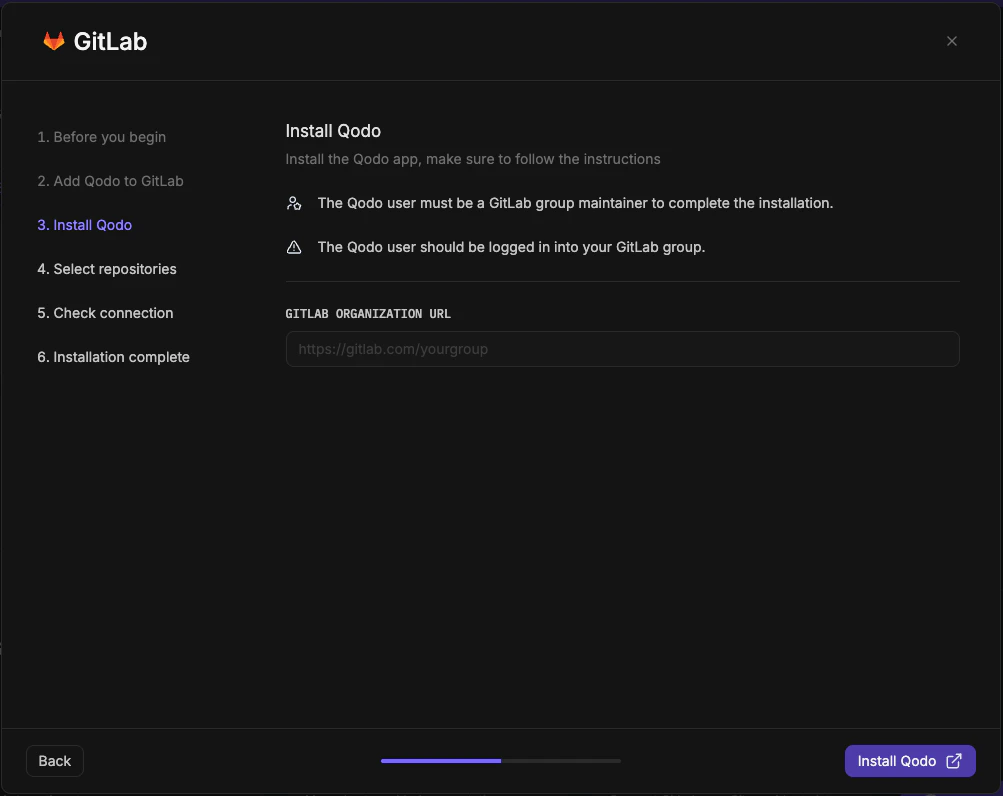
https://gitlab.com/yourgroup) and click Install Qodo. You are redirected to GitLab to authorize access.2
Review the requested permissions and click Authorize Qodo-code-review. You are redirected back to the wizard automatically.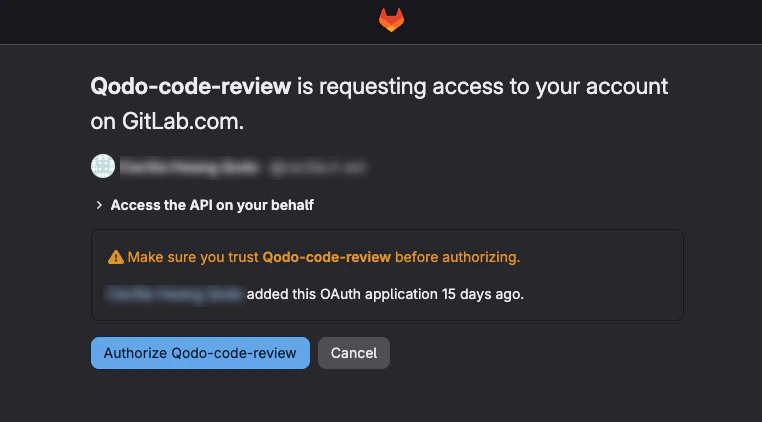
4
Select repositories
1
Select the repositories where you want to enable Qodo. Use the search bar to find specific repositories, or browse the group tree.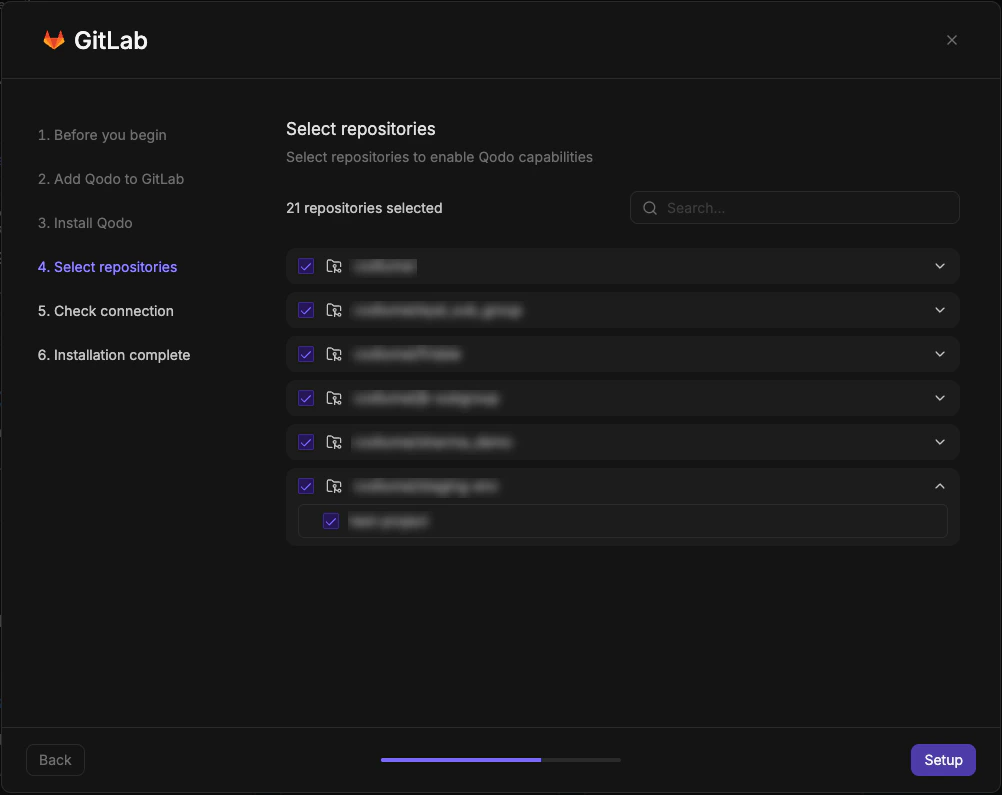
2
Click Setup to continue.
5
Check connection

- Click Next to proceed.
6
Installation complete

- Click Done.
Verify the installation
1
Open a new merge request in one of the connected repositories and confirm Qodo is triggered automatically.
2
Add a comment using one of the supported commands:
/agentic_describe/agentic_review
Next steps
- Repositories page: Enable or disable Qodo on individual repositories within your current scope.
- Using Qodo in PRs: Get the most out of Qodo.
- Migration guide: Migrate an existing Qodo installation.