

- This wizard can be used for Qodo multi-tenant and single-tenant, on both GitLab Cloud and GitLab Server.
- Not sure which deployment model you need? See Install Qodo in your Git provider for a full comparison, or check your deployment type.
Prerequisites
Before you begin, ensure you have:- Access to your Qodo portal.
- GitLab group Owner access (GitLab Cloud) or instance Admin access (GitLab Server), to sign in and generate the personal access token during setup.
Access the GitLab integration
1
Log in to your Qodo portal.
2
Start the wizard in one of the following ways:
1
From the Integrations page
Navigate to Integrations, then:
- GitLab Cloud: select the SaaS tab and click Add installation on the GitLab card.
- GitLab Server: select the Self-Hosted tab and click Add installation on the GitLab card.
2
From the homepage
On the homepage, in the top right-hand side, click the + button next to Git providers. On the selection page, choose GitLab.
Install Qodo on GitLab
1
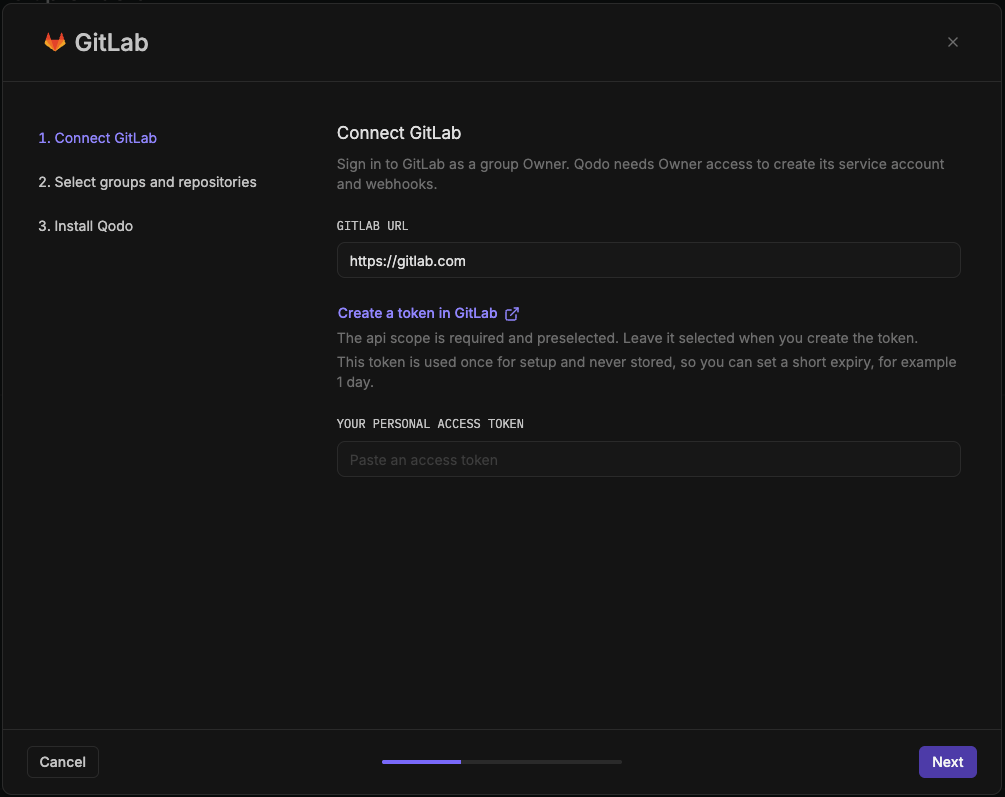
Connect GitLab
1
Enter your GitLab URL:
- On GitLab Cloud, this defaults to
https://gitlab.com. Sign in as a group Owner. - On GitLab Server, enter your instance URL (for example,
https://gitlab.example.com). Sign in as an instance Admin.
2
Click Create a token in GitLab to open your GitLab instance’s access token settings directly.
- On GitLab Cloud, this is the only link shown.
- On GitLab Server, once you enter a non-
gitlab.comURL, a second link also appears: Create a token in GitLab 16.6 or earlier. Use it only if your instance is on GitLab 16.6 or earlier; otherwise, use Create a token in GitLab.
api scope is required and preselected. Leave it selected when you create the token.This token is used once, to create a dedicated GitLab service account for Qodo, and is never stored, allowing a short expiry, e.g., 1 day. On GitLab Server, this is why the setup token requires instance Admin access: to create that account. The account itself holds Developer-level permissions only, and using a single service account simplifies access and resource management on your GitLab instance. The admin token can be revoked immediately after installation completes.
3
Paste the personal access token and click Next.
2
Select groups and repositories
1
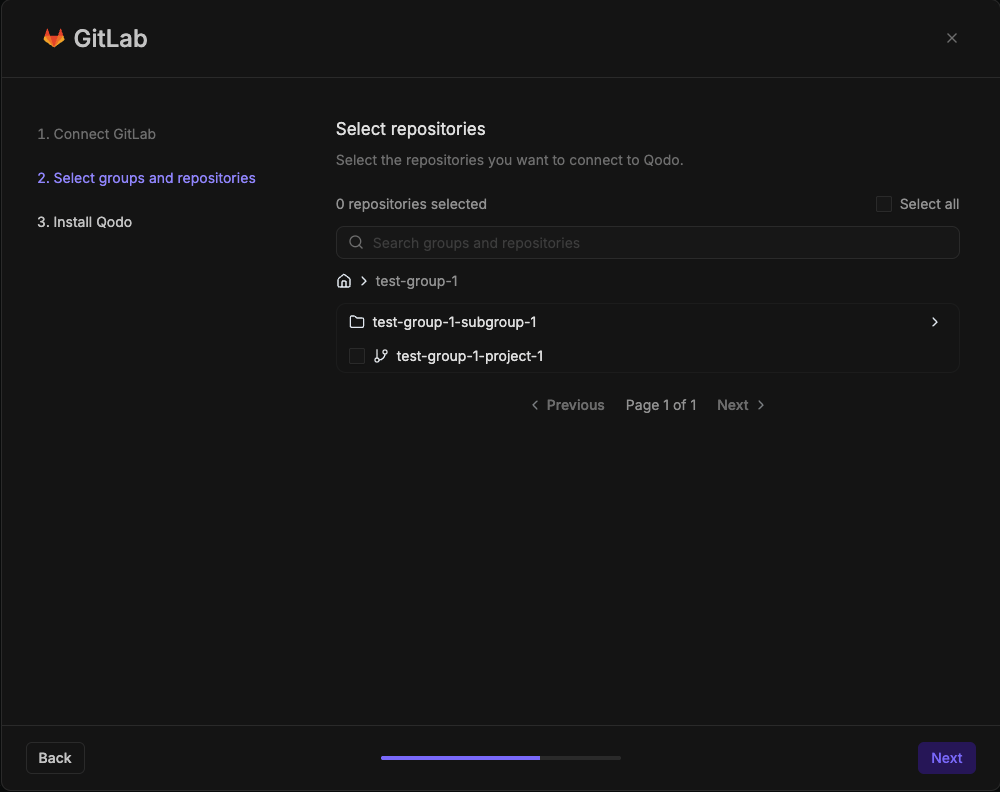
Find and select what to connect:
- Use the search bar to find a specific group or repository, or browse the list of top-level groups you have access to.
- Select a group to connect every repository within it, or drill into a group to select individual repositories.
- Select Select all to connect everything you have access to in one step.
This step appears as “Select repositories” on GitLab Community Edition and GitLab free-tier instances, which don’t support group hooks, or as “Select groups and repositories” on GitLab tiers that do. When group hooks are available, selecting a group creates a group hook; otherwise, selecting a repository creates a repository hook.
2
Click Next.
3
Install Qodo
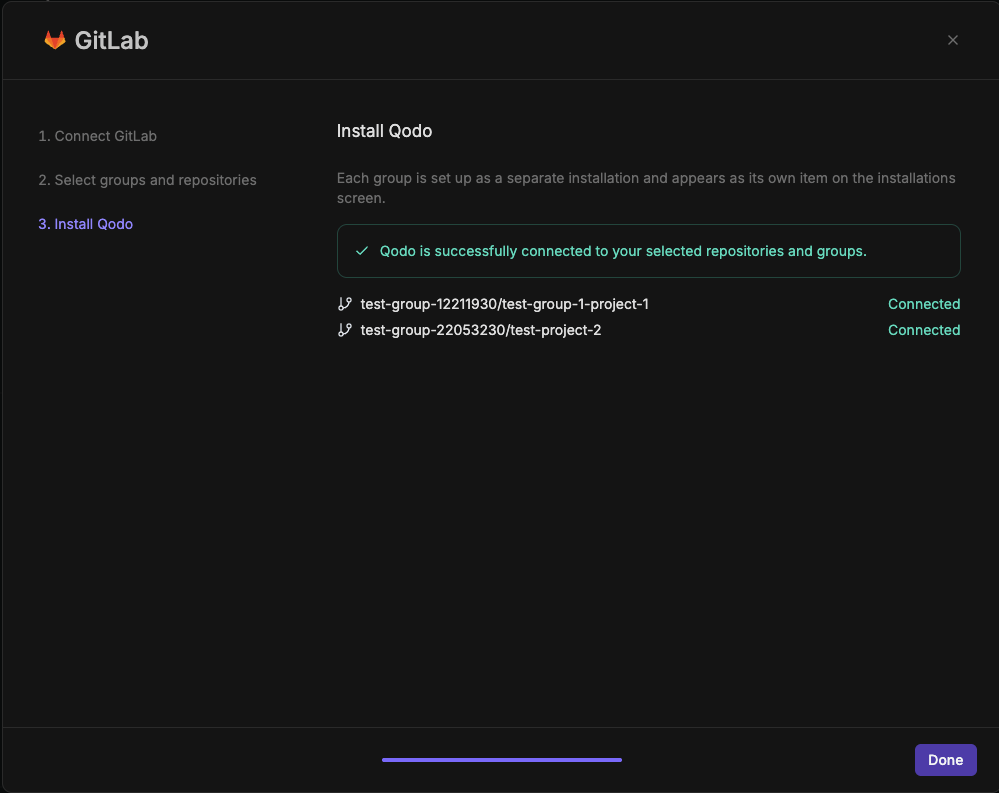
- Each one shows its status: Already connected from a previous installation, or Connected if newly connected.
- On GitLab Cloud, installing across multiple top-level groups sets up each group as a separate installation, appearing as its own item on the Installations tab.
- Click Done.
Verify the installation
1
Open a new merge request in one of the connected repositories and confirm Qodo is triggered automatically.
2
Add a comment using one of the supported commands:
/agentic_describe/agentic_review
Next steps
- Repositories page: Manage which repositories Qodo is active on, or remove an installation.
- Trigger a code review: Run a review automatically or on demand.
- Migration guide: Migrate an existing Qodo installation.