> ## Documentation Index
> Fetch the complete documentation index at: https://docs.qodo.ai/llms.txt
> Use this file to discover all available pages before exploring further.
# Install Qodo single-tenant on GitHub
> Quickly install and configure the GitHub integration using the built-in installation wizard.
Qodo can be integrated with all versions of GitHub Cloud. GitHub Enterprise Server, and GitHub Enterprise Cloud.
This guide walks you through installing and configuring Qodo single-tenant for GitHub. You can start with a single repository and later expand the integration to additional repositories or entire organizations as needed.
Assuming your Qodo environment is already set up, configuration typically takes about 5 minutes.
Once installed, Qodo automatically processes pull requests and delivers actionable insights, such as code reviews, directly within your PRs, bringing automated pull request intelligence into your GitHub workflow.
### Prerequisites
Before you begin, ensure you have:
* Access to your Qodo single-tenant portal
* Sufficient permissions to create GitHub applications
### Installation
#### Step 1: Access the GitHub integration
Log in to your [Qodo portal.](https://app.qodo.ai/signin)
From the left-hand navigation menu, select **Integrations**.
Locate the **GitHub** integration card.
Click **Add installation** to launch the automatic setup wizard.
The wizard will guide you through the required configuration steps.
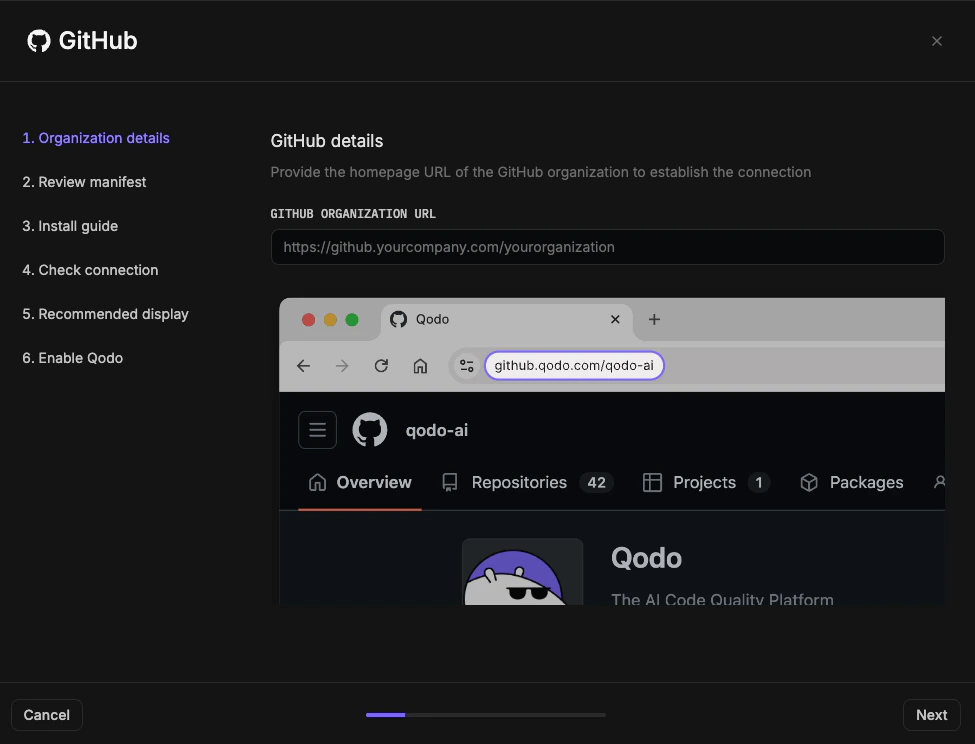
#### Step 2: Organization details
Enter the homepage URL of the GitHub organization or GitHub Enterprise instance you want to connect.
Click **Next**.
 #### Step 3: Install the GitHub App
The wizard will now guide you through creating and installing the Qodo GitHub App.
Review the **Manifest**, which defines the configurations and permissions Qodo requires.
Review the **Installation guide**. It consists of steps you will configure in GitHub, including naming your app and selecting which repositories Qodo can access.
If you have questions about permissions or need adjustments, contact your **Qodo Account Manager** before proceeding.
Click **Install GitHub App**.
You will now be redirected to GitHub.
#### In GitHub
Enter a name for the GitHub App (for example, your organization name + Qodo).
Click **Create GitHub App for Codium-AI**.
Select the GitHub user account to authorize the app.
* If the displayed account is correct, click **Continue**.
* Otherwise, sign in with a different account.
Select which repositories Qodo can access:
* All repositories (recommended)
* Selected repositories only
Repository-level review settings can later be managed from the Qodo portal.
#### Step 3: Install the GitHub App
The wizard will now guide you through creating and installing the Qodo GitHub App.
Review the **Manifest**, which defines the configurations and permissions Qodo requires.
Review the **Installation guide**. It consists of steps you will configure in GitHub, including naming your app and selecting which repositories Qodo can access.
If you have questions about permissions or need adjustments, contact your **Qodo Account Manager** before proceeding.
Click **Install GitHub App**.
You will now be redirected to GitHub.
#### In GitHub
Enter a name for the GitHub App (for example, your organization name + Qodo).
Click **Create GitHub App for Codium-AI**.
Select the GitHub user account to authorize the app.
* If the displayed account is correct, click **Continue**.
* Otherwise, sign in with a different account.
Select which repositories Qodo can access:
* All repositories (recommended)
* Selected repositories only
Repository-level review settings can later be managed from the Qodo portal.
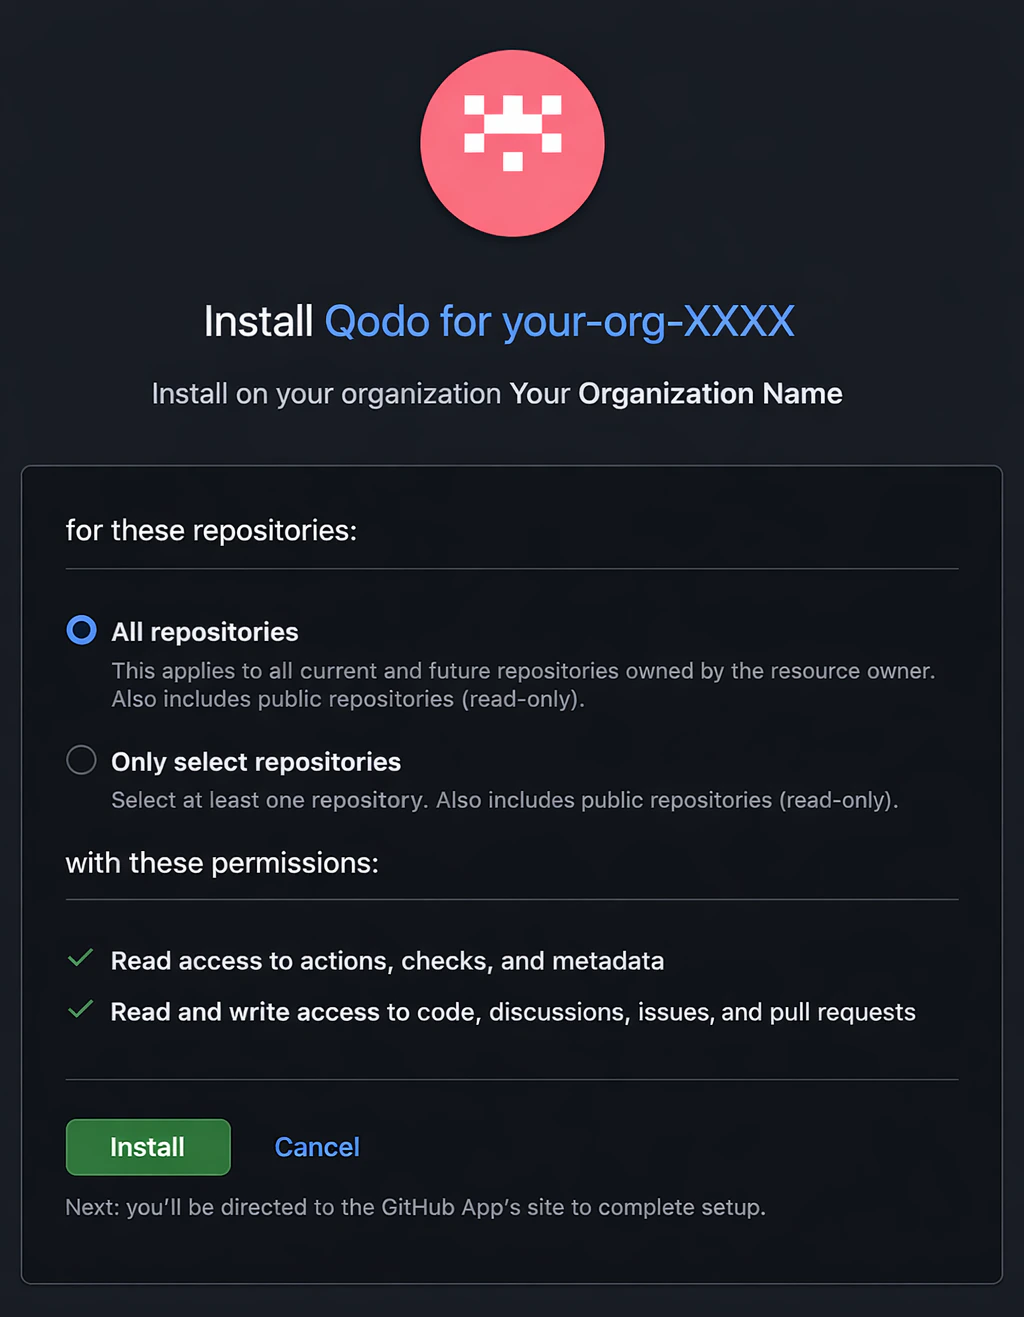 Click **Install**. After installation, you will be redirected back to the Qodo Portal.
* **Successful:** You’ll see a *“GitHub installation successful”* message.
* **Not successful:** You’ll see a *“Something went wrong”* message. Click **Test Connection** to retry. If it fails again, contact your **Qodo Account Manager**.
Click **Next**.
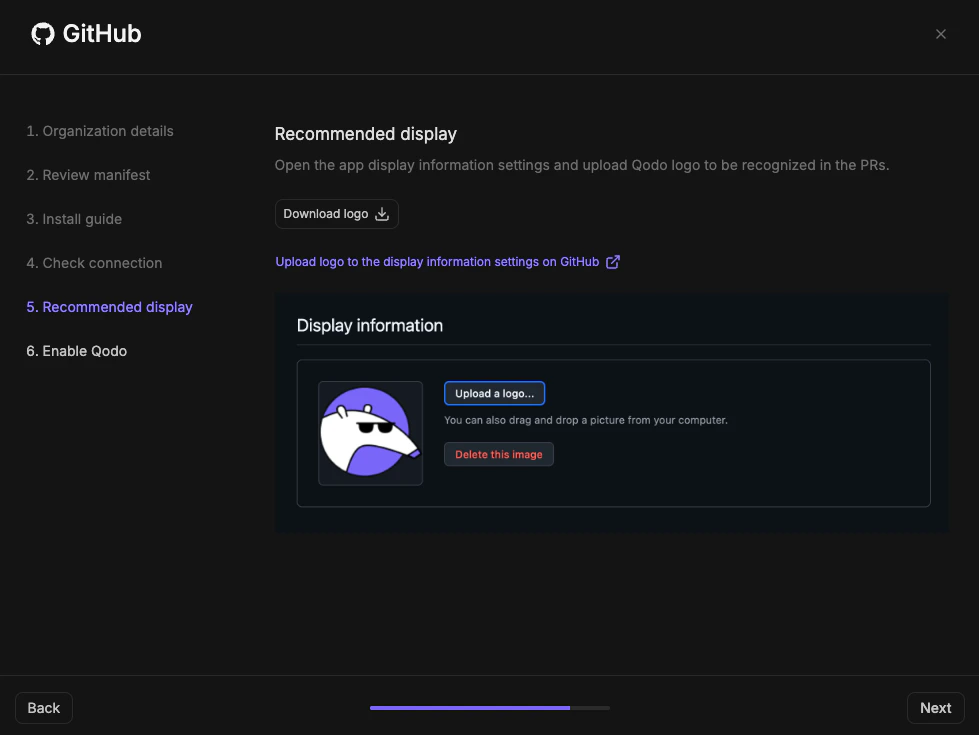
#### Step 5: Configure Qodo logo in PRs
To ensure Qodo appears consistently and is easy to recognize in pull requests:
Click **Download logo** to download the official Qodo logo.
Click the provided link to open the GitHub App settings page.
In the GitHub settings, upload the Qodo logo as the app logo and **Save.** You are redirected back to the Qodo portal wizard.
Click **Next**.
Click **Install**. After installation, you will be redirected back to the Qodo Portal.
* **Successful:** You’ll see a *“GitHub installation successful”* message.
* **Not successful:** You’ll see a *“Something went wrong”* message. Click **Test Connection** to retry. If it fails again, contact your **Qodo Account Manager**.
Click **Next**.
#### Step 5: Configure Qodo logo in PRs
To ensure Qodo appears consistently and is easy to recognize in pull requests:
Click **Download logo** to download the official Qodo logo.
Click the provided link to open the GitHub App settings page.
In the GitHub settings, upload the Qodo logo as the app logo and **Save.** You are redirected back to the Qodo portal wizard.
Click **Next**.
 #### Step 6: Enable Qodo review capabilities
Review capabilities enabled.
Click **Finish Installation**.
#### Step 6: Enable Qodo review capabilities
Review capabilities enabled.
Click **Finish Installation**.
 You will be redirected back to the **Integrations** page, where the GitHub card will show the number of connected organizations.
 ### Verify the installation
Open a new pull request in the configured repositories and confirm that Qodo is triggered automatically.
Add a comment to the pull request using one of the supported commands to verify two-way communication:
* `/agentic_describe`
* `/describe_review`
### Verify the installation
Open a new pull request in the configured repositories and confirm that Qodo is triggered automatically.
Add a comment to the pull request using one of the supported commands to verify two-way communication:
* `/agentic_describe`
* `/describe_review`