> ## Documentation Index
> Fetch the complete documentation index at: https://docs.qodo.ai/llms.txt
> Use this file to discover all available pages before exploring further.

# Set up Qodo with the onboarding wizard

> Connect your Git provider, apply a Review preset, and set up the Agentic Toolbox with the Qodo onboarding wizard. Available for multi-tenant, single-tenant, and on-premises deployments.

The onboarding wizard guides you through the essential setup for getting code reviews from Qodo, from connecting your code to choosing how Qodo reviews it and bringing Qodo into your developers' coding tools. Each step shapes how Qodo reviews your team's pull requests. Once the wizard is complete, Qodo reviews every new pull request automatically. You can change any of your choices later.

<Note>
  Only organization admins see the onboarding wizard. It opens automatically the first time an admin signs in to the Qodo portal. If you aren't an admin, see [Quickstart: From sign-up to your first code review](/get-started) for the steps that apply to every user.
</Note>

## The onboarding journey

<div style={{ display: "grid", gridTemplateColumns: "repeat(3, 1fr)", gap: "1.5rem", marginTop: "1rem" }}>
  <div>
    <div style={{ display: "flex", alignItems: "center", gap: "8px", marginBottom: "10px" }}>
      <span style={{ display: "flex", alignItems: "center", justifyContent: "center", width: "22px", height: "22px", borderRadius: "50%", backgroundColor: "#7968FA", color: "#fff", fontSize: "0.75rem", fontWeight: 700, flexShrink: 0 }}>1</span>
      <span style={{ margin: 0, fontSize: "0.8rem", fontWeight: 600, textTransform: "uppercase", letterSpacing: "0.05em", color: "#666" }}>Connect Git</span>
    </div>

    <p style={{ margin: 0 }}>Connect Qodo to the Git provider that hosts your code. <a href="#step-1-connect-git">Connect Git →</a></p>
  </div>

  <div>
    <div style={{ display: "flex", alignItems: "center", gap: "8px", marginBottom: "10px" }}>
      <span style={{ display: "flex", alignItems: "center", justifyContent: "center", width: "22px", height: "22px", borderRadius: "50%", backgroundColor: "#7968FA", color: "#fff", fontSize: "0.75rem", fontWeight: 700, flexShrink: 0 }}>2</span>
      <span style={{ margin: 0, fontSize: "0.8rem", fontWeight: 600, textTransform: "uppercase", letterSpacing: "0.05em", color: "#666" }}>Configure reviews</span>
    </div>

    <p style={{ margin: 0 }}>Answer questions about your team and apply the Review preset Qodo builds from your answers. <a href="#step-2-configure-reviews">Configure reviews →</a></p>
  </div>

  <div>
    <div style={{ display: "flex", alignItems: "center", gap: "8px", marginBottom: "10px" }}>
      <span style={{ display: "flex", alignItems: "center", justifyContent: "center", width: "22px", height: "22px", borderRadius: "50%", backgroundColor: "#7968FA", color: "#fff", fontSize: "0.75rem", fontWeight: 700, flexShrink: 0 }}>3</span>
      <span style={{ margin: 0, fontSize: "0.8rem", fontWeight: 600, textTransform: "uppercase", letterSpacing: "0.05em", color: "#666" }}>Get Agentic Toolbox</span>
    </div>

    <p style={{ margin: 0 }}>Share the Agentic Toolbox with your team and install it on your machine. <a href="#step-3-get-agentic-toolbox">Get Agentic Toolbox →</a></p>
  </div>
</div>

## Before you begin

Make sure you have:

* **Admin access to your Git provider**: The required permissions differ by Git provider. See [Install Qodo in your Git provider](/install-qodo/install) to find your provider's installation guide.
* **Node.js 20 or later**: Required only if you install the Agentic Toolbox on your machine during setup. See [Install Qodo Agentic Toolbox with the CLI](/agentic-toolbox/cli#prerequisites).

## Step 1: Connect Git
<Steps>
  <Step>
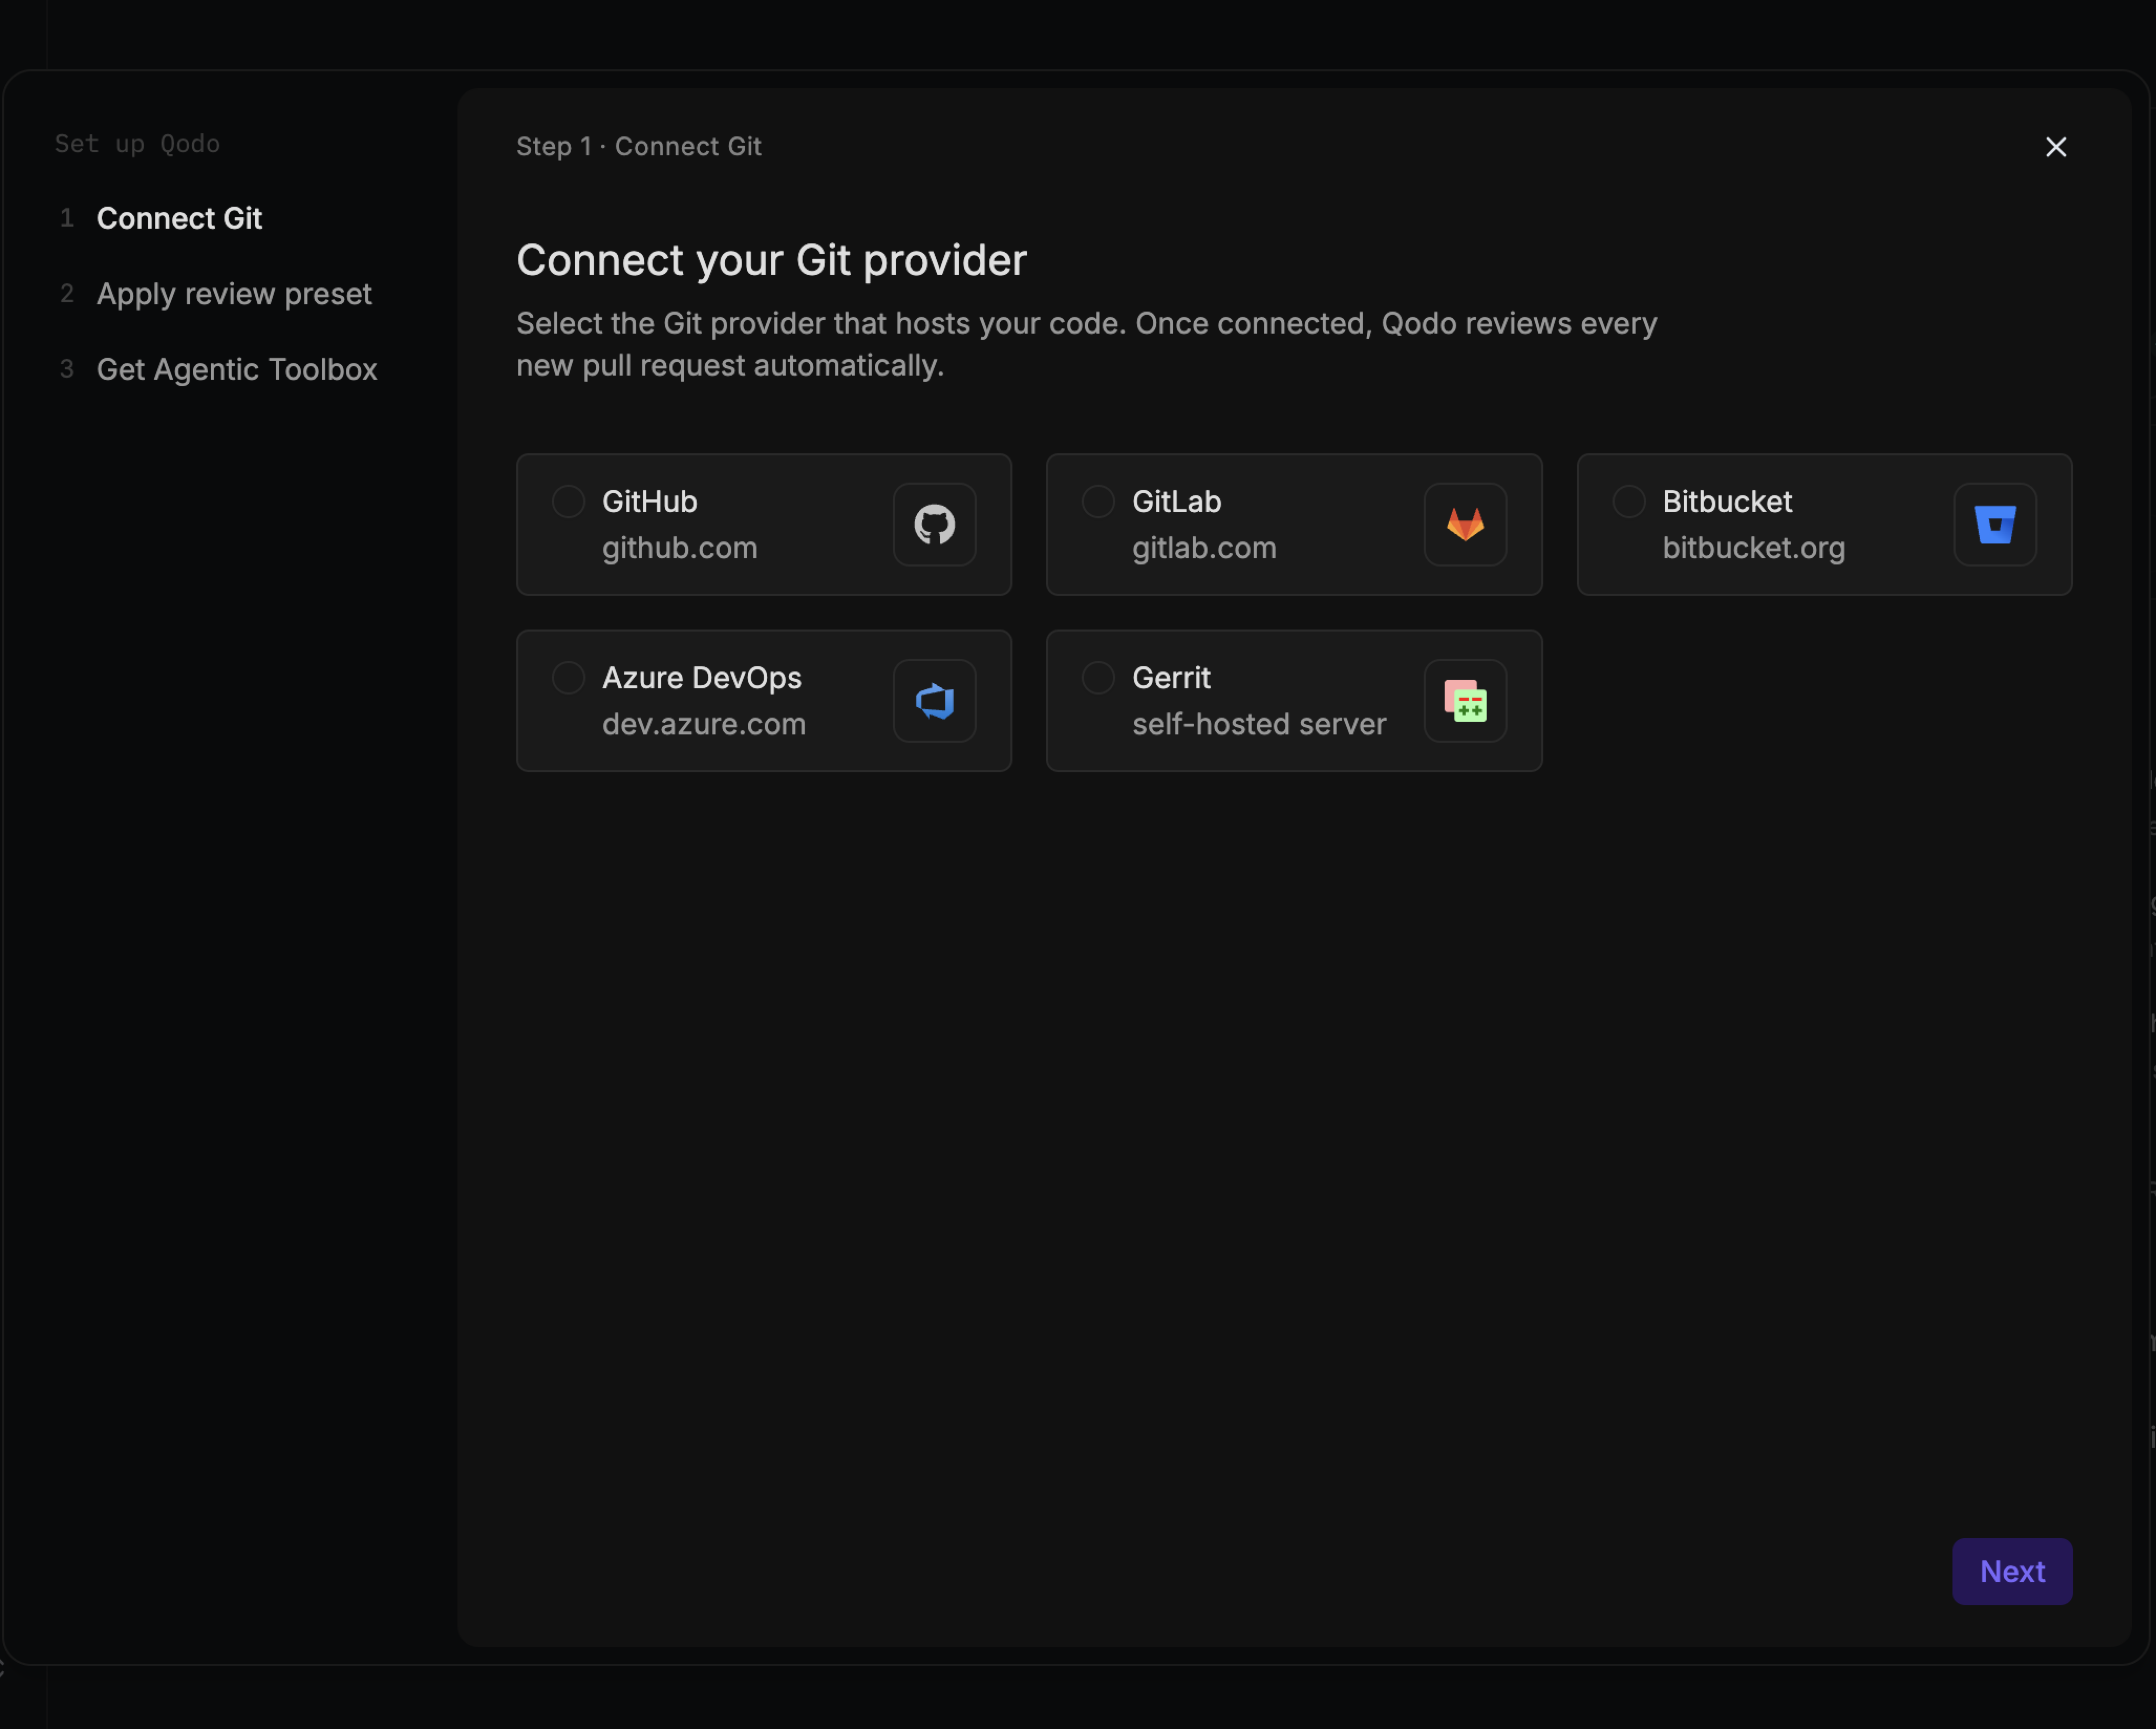
    Select the Git provider that hosts your code, then click **Next**. If your Git provider is self-hosted, select the self-hosted option that appears after you select the provider.

    <div style={{ marginBottom: "-1rem" }}>
      <img src="https://mintcdn.com/qodo/FIl5leP5_SGjP02f/images/onboarding-wizard/onboarding-wizard-connect-your-git-provider.png?fit=max&auto=format&n=FIl5leP5_SGjP02f&q=85&s=33ffec37e8dcbbed98e092bbc4b98620" alt="Onboarding wizard first screen showing the left panel and the Git provider selection" width="4110" height="3296" data-path="images/onboarding-wizard/onboarding-wizard-connect-your-git-provider.png" />
    </div>
  </Step>

  <Step>
    Complete the installation wizard for your Git provider. See [Install Qodo in your Git provider](/install-qodo/install).
  </Step>

  <Step>
    On the **Verify connection** step, Qodo checks the connection to your Git provider. The step shows the connection as loading while Qodo checks it, then as connected or failed. Once connected, it shows how many repositories are connected.
  </Step>

  <Step>
    Click **Next** to continue with the wizard.

    Qodo starts building context for your code reviews, and the following processes run automatically in the background:

    * [Repository sync](/governance/repositories/installations#view-repository-sync-status-from-anywhere-in-the-portal): Syncs each connected repository with Qodo.
    * [Pull request indexing](/governance/repositories/manage-repositories#check-repository-pr-history-indexing-status): Indexes each repository's pull request history.
    * [Cross-repo discovery](/governance/repositories/relationships#view-cross-repo-discovery-status-from-anywhere-in-the-portal): Finds relationships between your repositories.

    Track their progress from **Background activity** in the top-right corner of the portal.

    <Tip>
      It's recommended to import your team's existing rules and skills, which lets Qodo enforce your coding standards in its reviews. See [Importing rules and skills](/governance/rule-enforcement/building-review-standards#importing-rules-and-skills).
    </Tip>
  </Step>
</Steps>

## Step 2: Configure reviews

Qodo builds a Review preset from your answers to a few questions about your team. A Review preset is a set of configuration settings tuned to what your team needs most from code review.

<Steps>
  <Step>
    Answer the questions about your team's priorities and how your team works. Select as many answers as apply, then click **Next**.
  </Step>

  <Step>
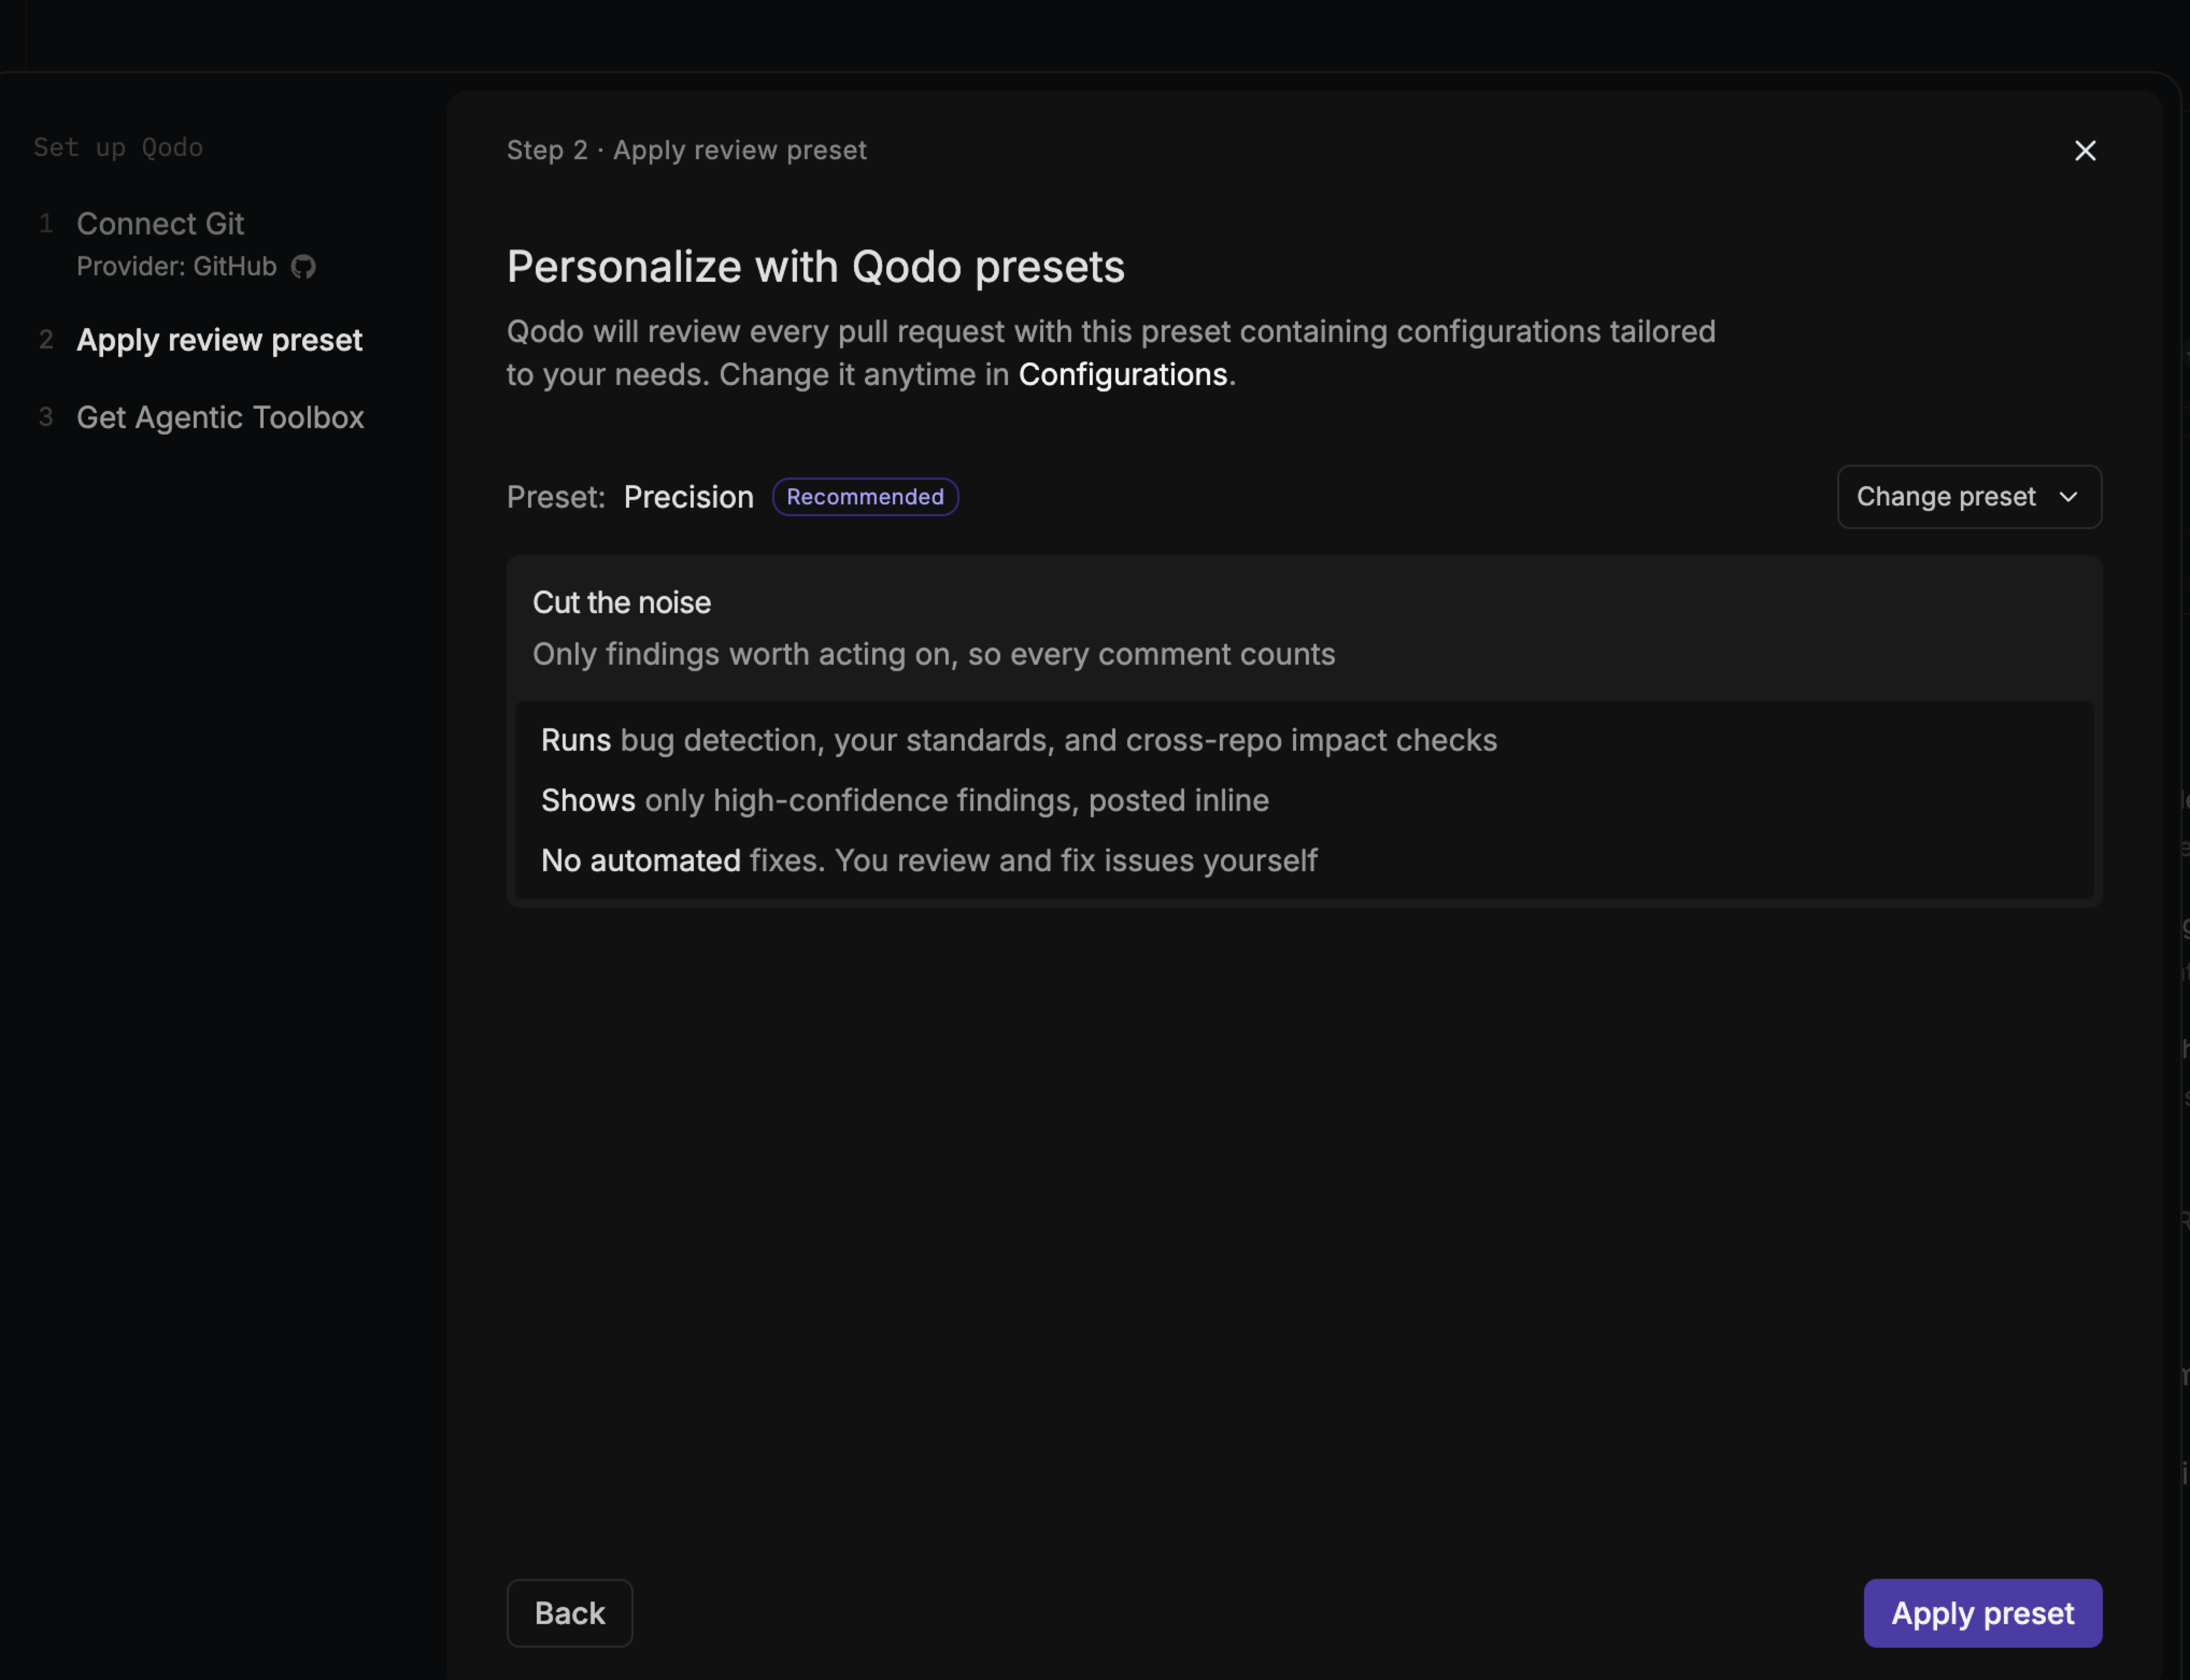
    Qodo shows the suggested preset, including what it runs, how it shows findings in pull requests, and what it automates. To use a different preset, select it from the dropdown.

    <div style={{ marginBottom: "-1rem" }}>
      <img src="https://mintcdn.com/qodo/FIl5leP5_SGjP02f/images/onboarding-wizard/onboarding-wizard-apply-preset.png?fit=max&auto=format&n=FIl5leP5_SGjP02f&q=85&s=316e9772573b7856034b00d79e8c8001" alt="Onboarding wizard suggested preset screen showing the preset dropdown" width="4072" height="3124" data-path="images/onboarding-wizard/onboarding-wizard-apply-preset.png" />
    </div>
  </Step>

  <Step>
    Click **Apply preset**.
  </Step>
</Steps>

To continue without answering the questions, click **Skip**. You can choose a Review preset or change individual settings later in **Configurations**. See [Configure code review with Qodo presets](/configuration/review-presets).

## Step 3: Get Agentic Toolbox

The [Agentic Toolbox](/agentic-toolbox/agentic-toolbox-overview) brings Qodo's code understanding, standards, and review capabilities into your coding agent.

<Steps>
  <Step>
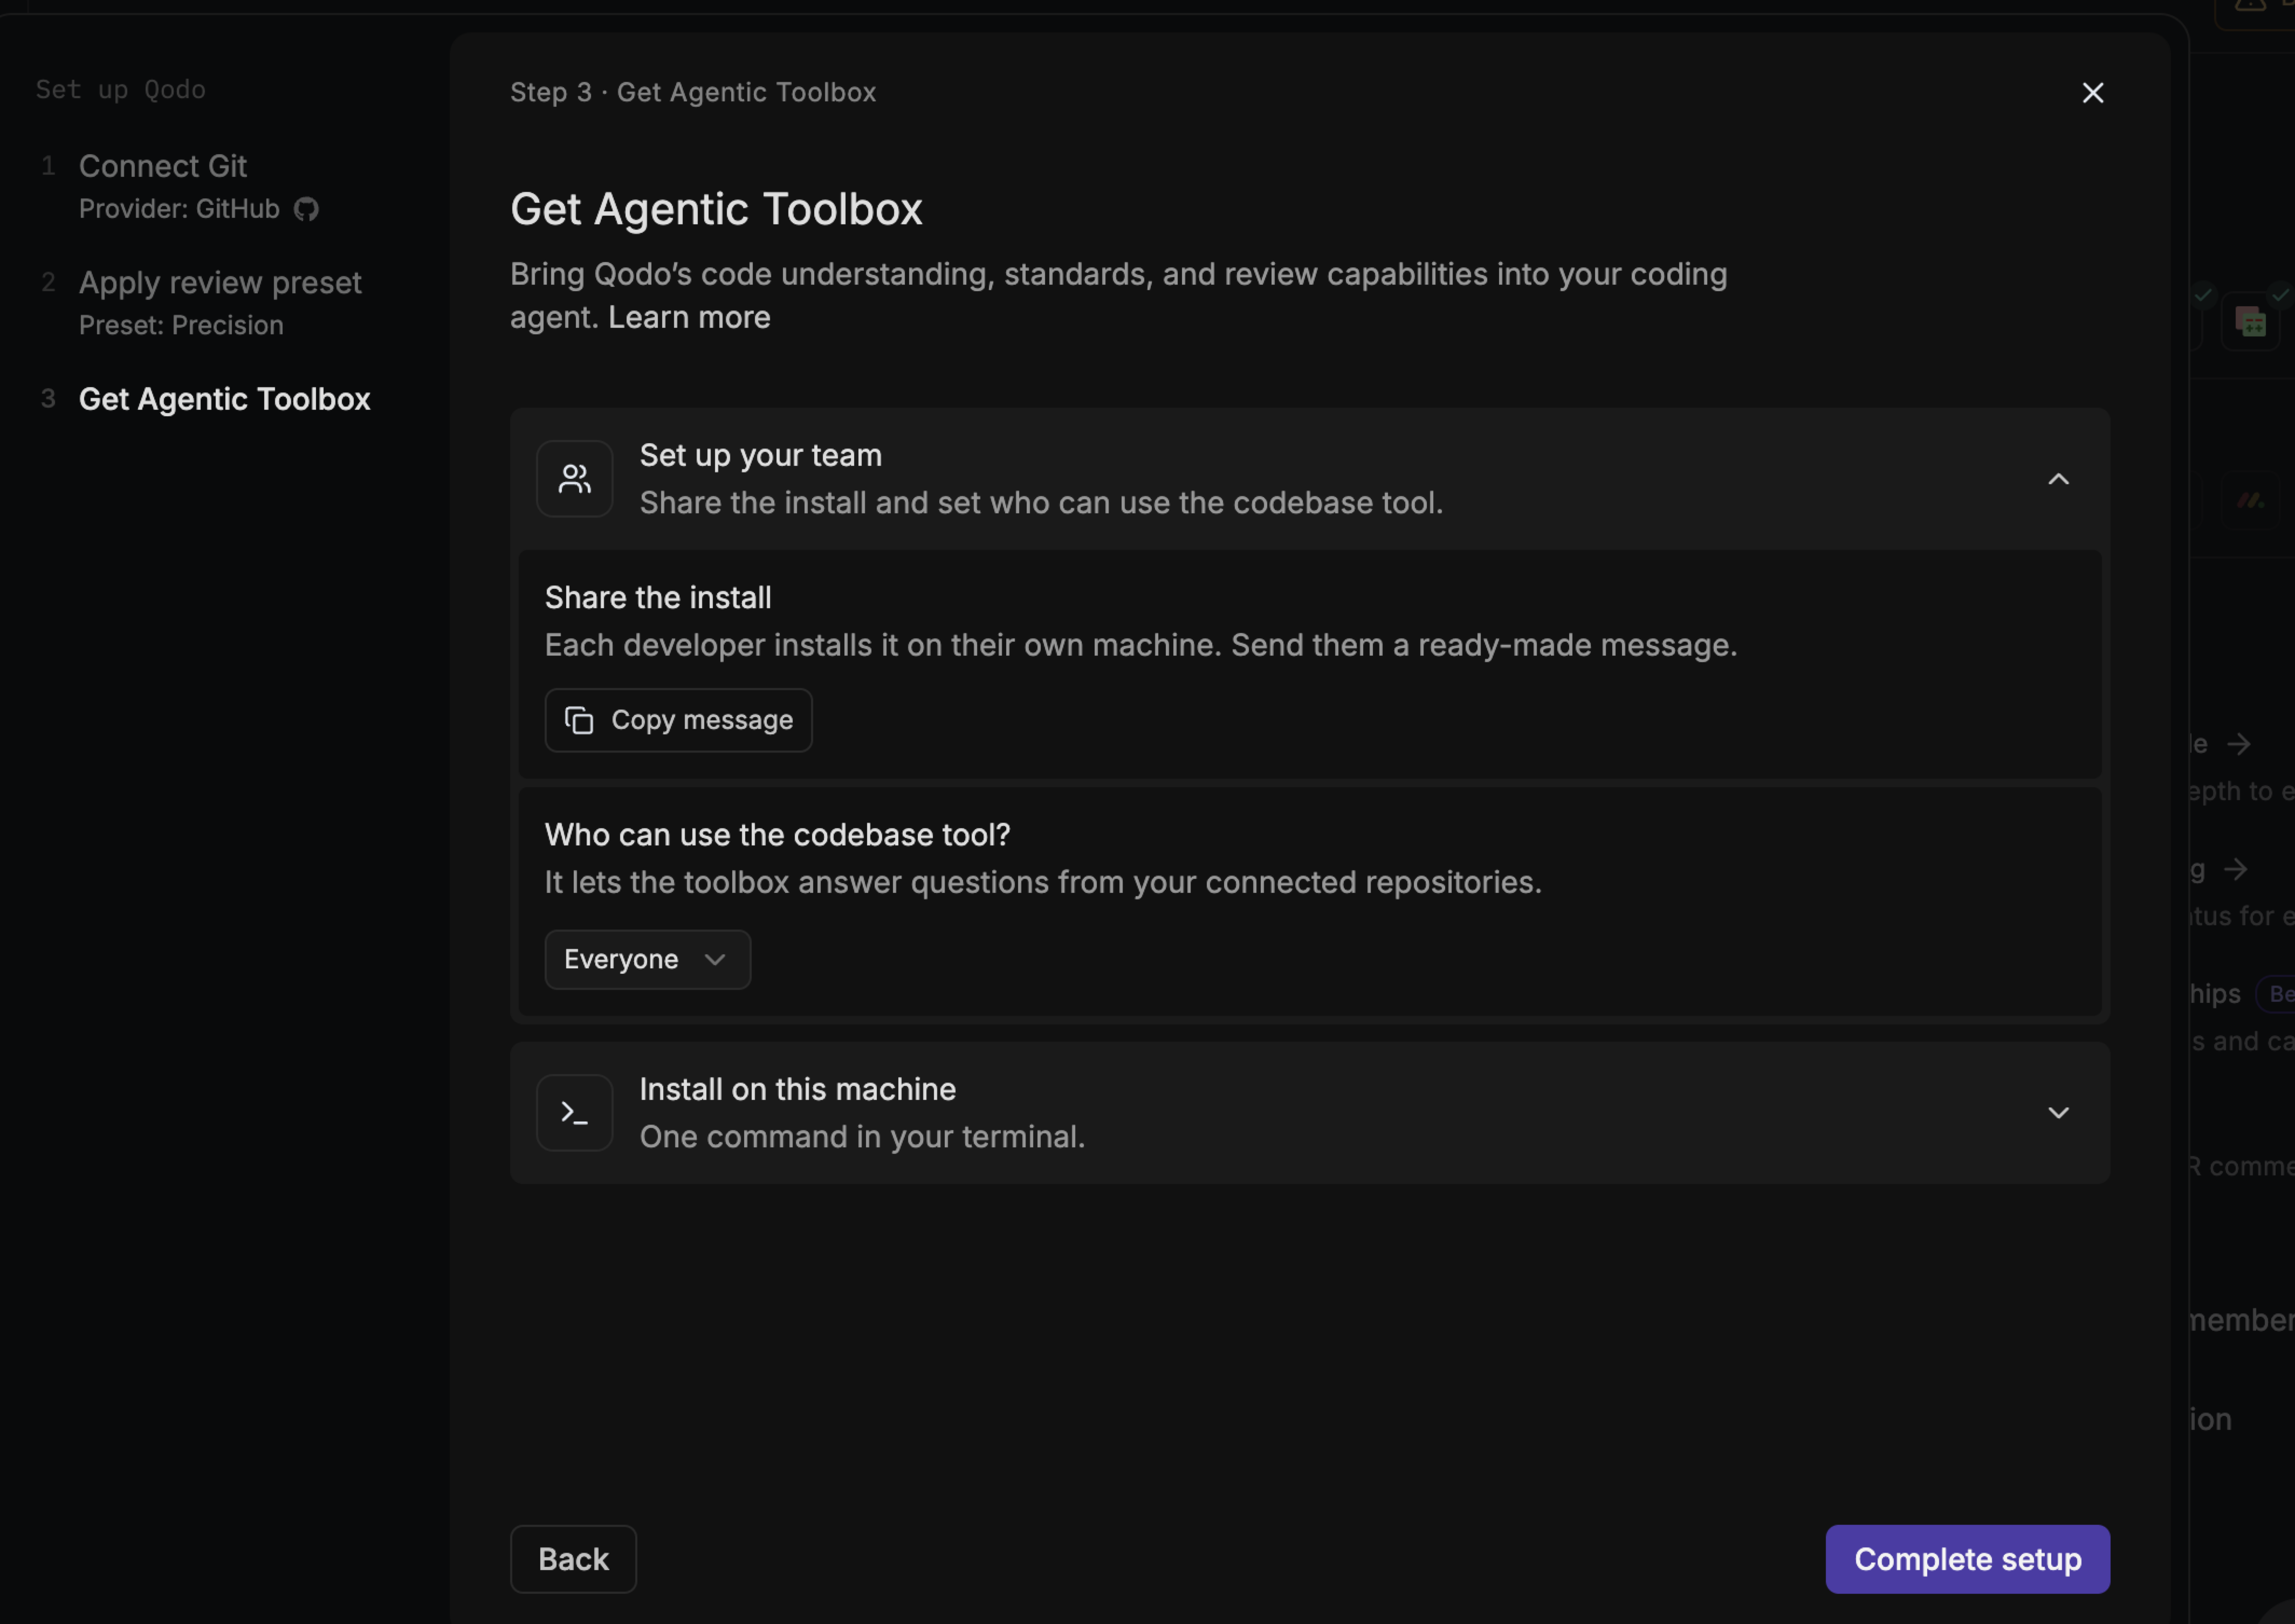
    In **Set up your team**, under **Share the install**, click **Copy message** to copy install instructions to send to your team. Each developer installs the Agentic Toolbox on their own machine.

    <div style={{ marginBottom: "-1rem" }}>
      <img src="https://mintcdn.com/qodo/FIl5leP5_SGjP02f/images/onboarding-wizard/onnboard-wizard-agentic-toolbox.png?fit=max&auto=format&n=FIl5leP5_SGjP02f&q=85&s=6b8193da92e26cfabc9eed18a4354bc3" alt="Onboarding wizard Get Agentic Toolbox step with both sections expanded" width="4256" height="3012" data-path="images/onboarding-wizard/onnboard-wizard-agentic-toolbox.png" />
    </div>
  </Step>

  <Step>
    Under **Who can use the codebase tool?**, select who in your organization has access. The codebase tool lets the Agentic Toolbox answer questions from your connected repositories. You can change this later. See [Manage access to the Agentic Toolbox](/agentic-toolbox/manage-access-in-qodo-portal).
  </Step>

  <Step>
    To install the Agentic Toolbox on your own machine, expand **Install on this machine**, then copy and run the command for your operating system, **macOS / Linux** or **Windows (PowerShell)**. To connect an MCP client instead, expand the MCP client option below the command. See [Install Qodo Agentic Toolbox with the CLI](/agentic-toolbox/cli) and [Connect Qodo Agentic Toolbox with MCP](/agentic-toolbox/mcp).
  </Step>

  <Step>
    Click **Complete setup**.
  </Step>
</Steps>

## Complete setup

The final screen confirms that Qodo now reviews every new pull request in your organization. Click **Go to Home**.

## Leave and complete setup later

You can close the wizard at any step. Steps you've already completed stay saved, and background processes keep running. If you close the wizard before your Git provider connection completes, you start Connect Git from the beginning when you resume.

<Steps>
  <Step>
    Click **X** in the top-right corner of the wizard.
  </Step>

  <Step>
    In the **Leave setup?** dialog, click **Leave**. To return to the wizard instead, click **Continue setup**.
  </Step>
</Steps>

To resume, click **Complete setup** at the bottom of the left sidebar. It shows how many steps you've completed.

## Next steps

* [Set up your Qodo organization as an admin](/set-up-your-qodo-organization): Link your Git account, connect task management, and invite your team.
* [Qodo portal quick tour](/qodo-portal-quick-tour): Find your way around the Qodo portal.
* [Trigger a code review](/code-review/use-qodo-in-prs): Run a review automatically or on demand.