> ## Documentation Index
> Fetch the complete documentation index at: https://docs.qodo.ai/llms.txt
> Use this file to discover all available pages before exploring further.
# Install Qodo on GitHub (on-premises)
> Install and configure the GitHub integration for Qodo on-premises deployments.
This guide helps you install and configure Qodo on-premises with GitHub. You can install it for a single repository or expand it across multiple organizations as needed.
Assuming your Qodo environment is already set up, configuring GitHub typically takes about 20 minutes. This includes creating a GitHub App, configuring webhooks, setting permissions, and installing the app.
Once complete, Qodo processes pull requests and delivers actionable output such as code reviews and insights, directly in your PRs.
## Prerequisites
Before you begin, ensure you have:
* **A Qodo on-premises deployment.** You will receive your Qodo on-premises URL from your Qodo Account Manager. It typically looks like: `qodo-merge.yourcompanyname.qodo.ai`
* **System administrator access to your GitHub organization.**
## Installation
### Step 1: Navigate to the GitHub Apps section
Log in to GitHub using an administrative account.
Click your profile picture → **Your organizations**.
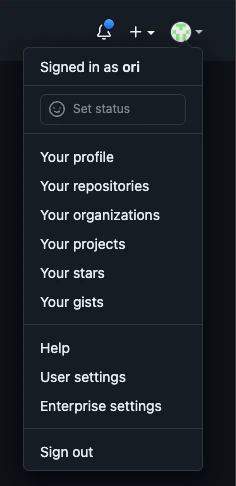 Select your organization.
 Click **Settings**.
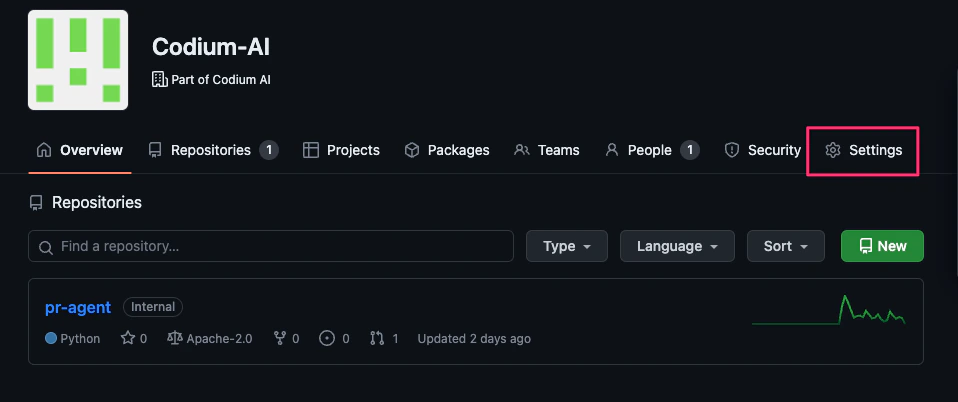 Go to **Developer settings → GitHub Apps**.
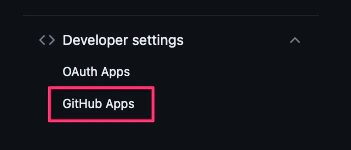 Click **New GitHub App**.
### Step 2: Create the GitHub App
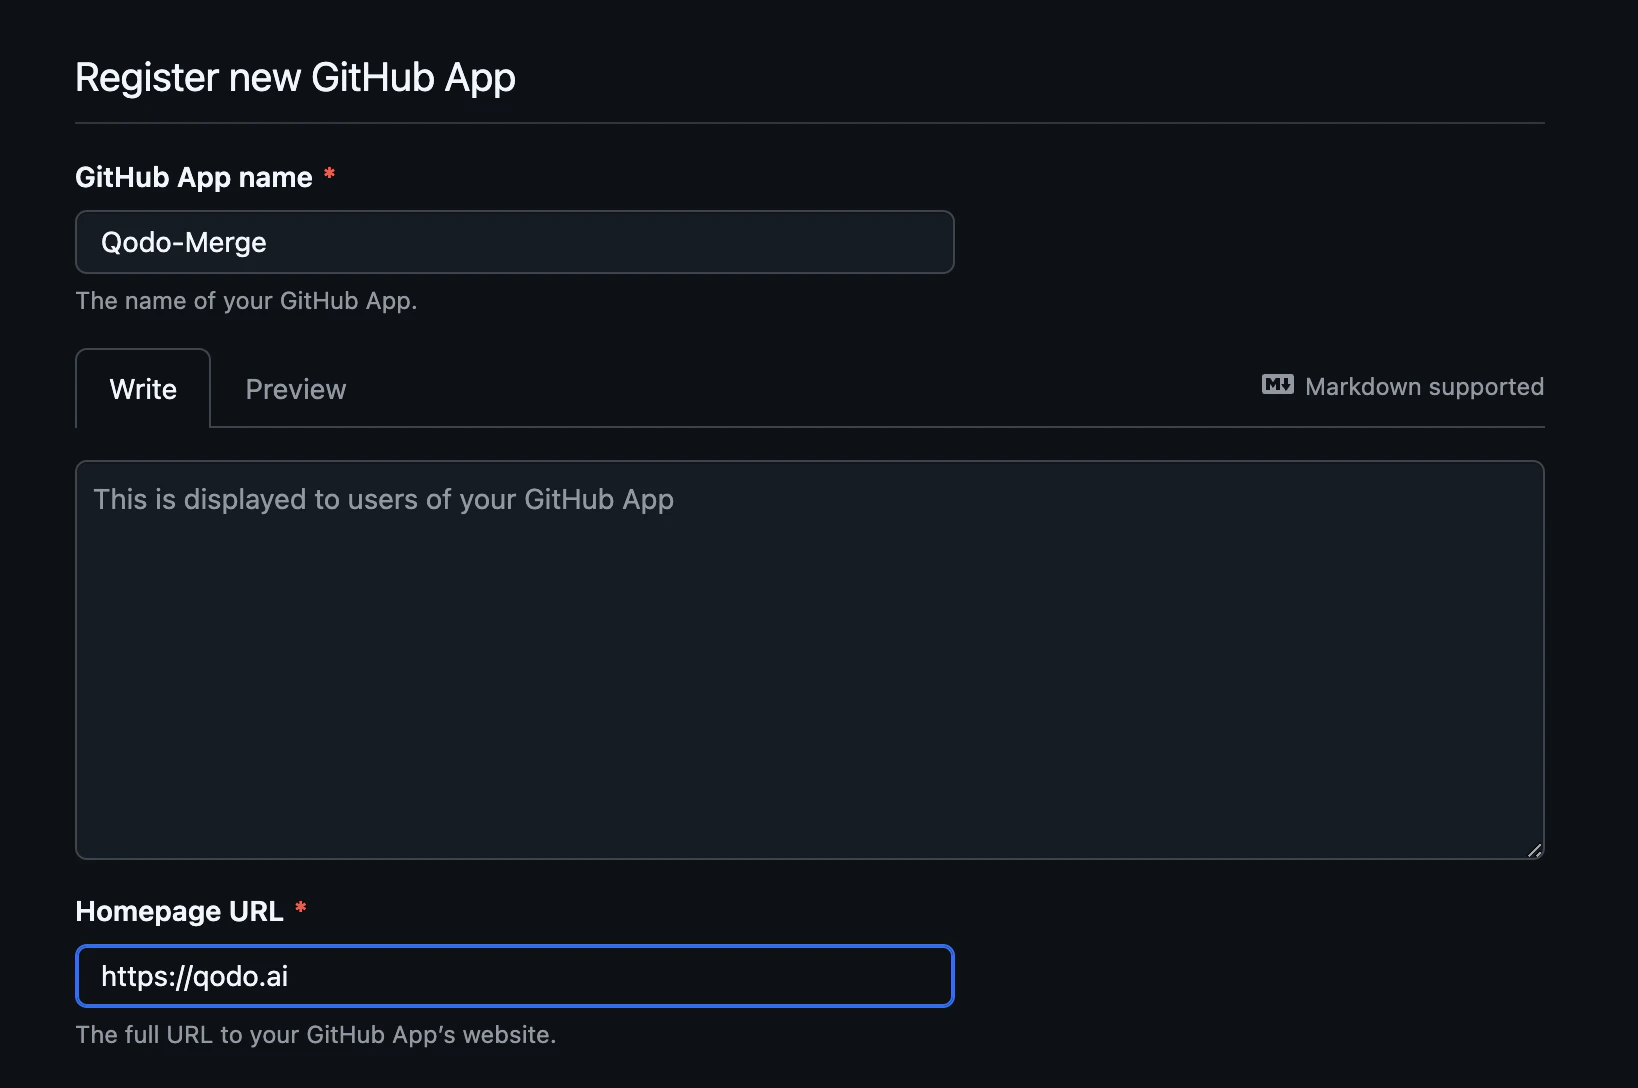
Register a new GitHub App with the following settings:
* **App name:** Qodo
* **Homepage URL:** `https://qodo.ai`
Click **New GitHub App**.
### Step 2: Create the GitHub App
Register a new GitHub App with the following settings:
* **App name:** Qodo
* **Homepage URL:** `https://qodo.ai`
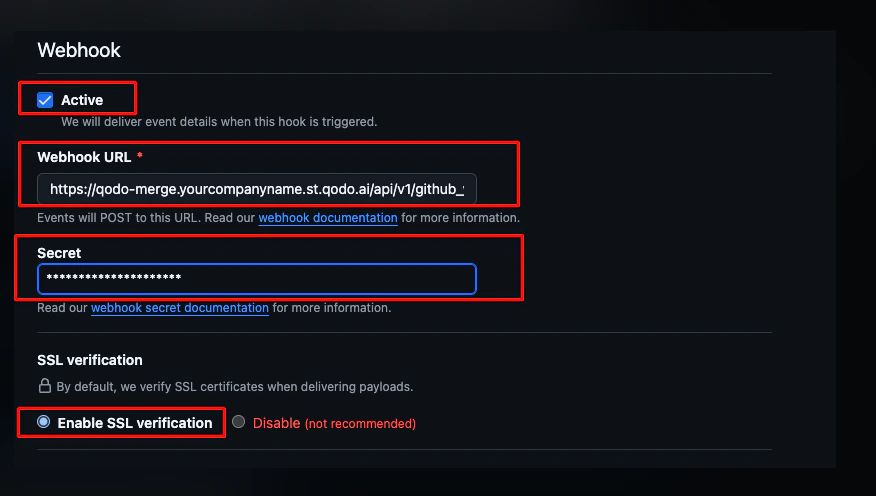
 Configure the webhook:
* Check the **Active** checkbox.
* **Webhook URL:** `https://qodo-merge.[yourcompanyname].qodo.ai/api/v1/github_webhooks`
* **Secret:** generate a strong random secret and save it. You will need it to configure the Qodo service.
* Select **Enable SSL verification**.
Configure the webhook:
* Check the **Active** checkbox.
* **Webhook URL:** `https://qodo-merge.[yourcompanyname].qodo.ai/api/v1/github_webhooks`
* **Secret:** generate a strong random secret and save it. You will need it to configure the Qodo service.
* Select **Enable SSL verification**.
 Set the following repository permissions:
| Permission | Access |
| ------------- | -------------- |
| Actions | Read-only |
| Checks | Read-only |
| Contents | Read and write |
| Discussions | Read and write |
| Issues | Read and write |
| Pull requests | Read and write |
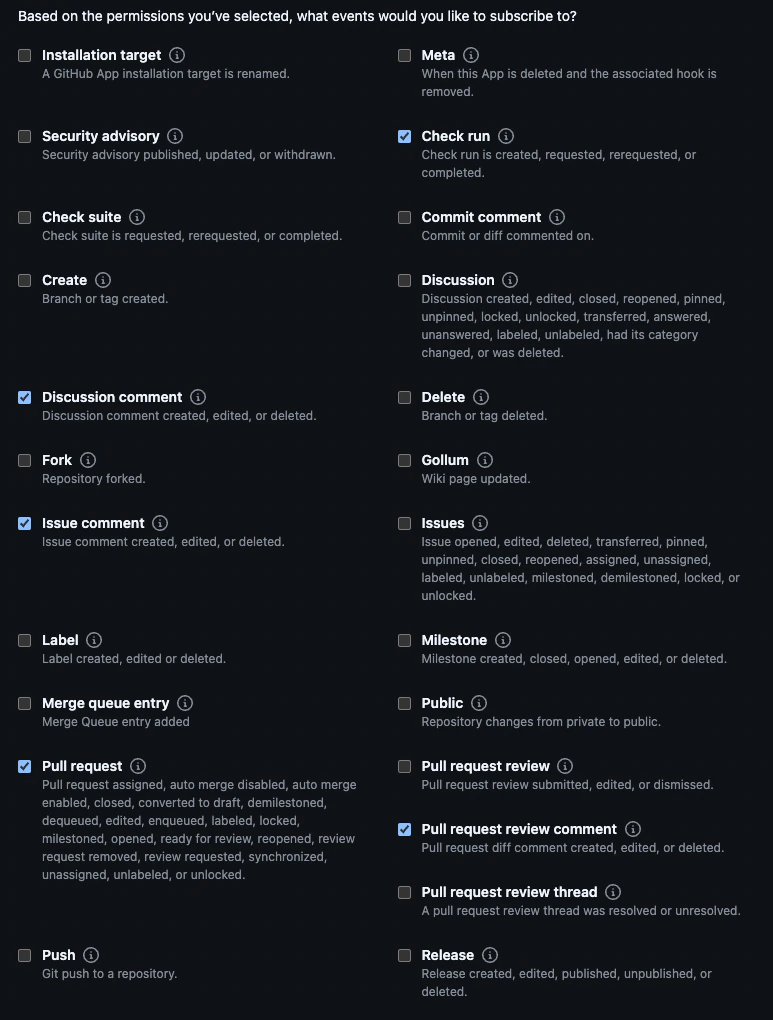
Subscribe to the following events:
Set the following repository permissions:
| Permission | Access |
| ------------- | -------------- |
| Actions | Read-only |
| Checks | Read-only |
| Contents | Read and write |
| Discussions | Read and write |
| Issues | Read and write |
| Pull requests | Read and write |
Subscribe to the following events:
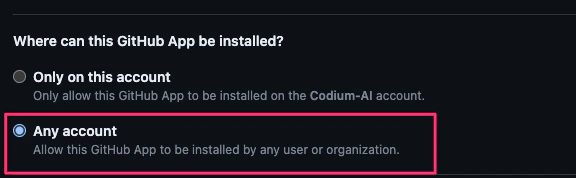
 Under **Where can this GitHub App be installed?**, choose **Any account**. This avoids creating a separate application per organization.
 Click **Create GitHub App**.
 ### Step 3: Post-creation actions
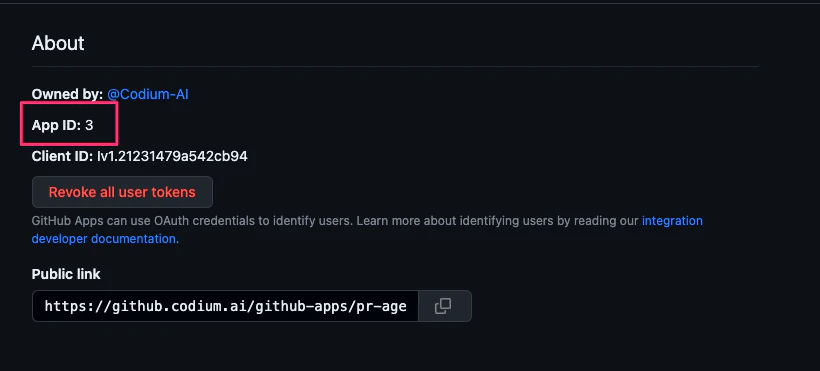
Note the **App ID**. You will need it for Qodo configuration.
### Step 3: Post-creation actions
Note the **App ID**. You will need it for Qodo configuration.
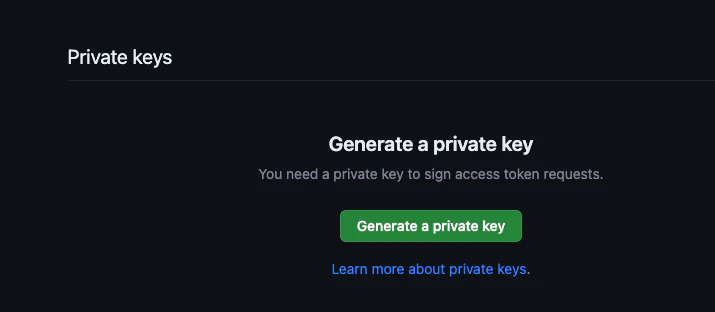
 Generate a **private key**. You will need it for Qodo configuration.
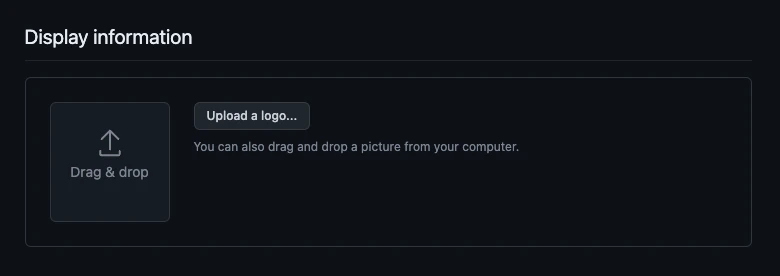
 Upload the Qodo logo to use on GitHub posts.
 ### Step 4: Install the app
Go to **Your Organization → Settings → Developer Settings → GitHub Apps**.
### Step 4: Install the app
Go to **Your Organization → Settings → Developer Settings → GitHub Apps**.
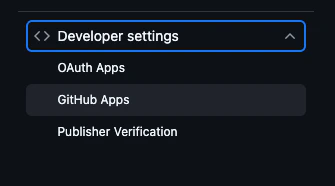 Click the Qodo app name.
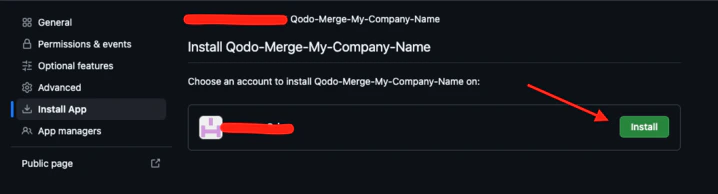
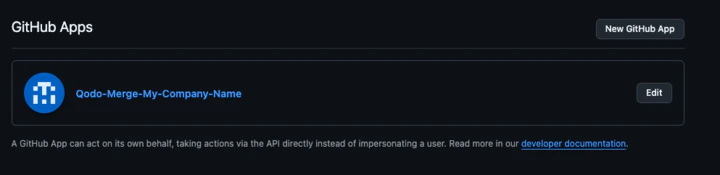 Click **Install** on each relevant organization.
 ### Step 5: Configure repository access
Go to **Settings → Developer Settings → GitHub Apps** in your organization.
Click **Configure** on the Qodo app.
### Step 5: Configure repository access
Go to **Settings → Developer Settings → GitHub Apps** in your organization.
Click **Configure** on the Qodo app.
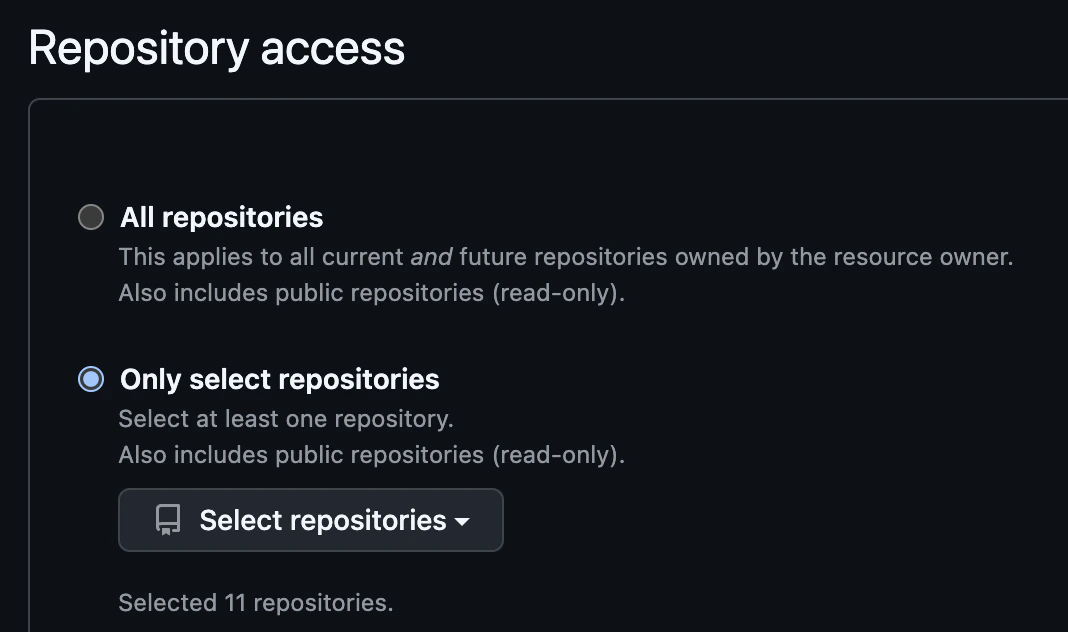
 Under **Repository Access**, choose **Only select repositories** and select the repositories to include.
 ### Step 6: Configure your Qodo instance
Add the following details to your Qodo on-premises configuration:
```
# GitHub App ID
app_id =
# Shared secret for webhook verification
webhook_secret = "your-webhook-secret-here"
# Private key (.pem file)
# Organization name(s) where the app is installed
```
The organization name is available in your organization's settings in GitHub. You can provide multiple organizations if the app is installed in more than one.
For production environments, follow your organization's secret management procedures to securely store these credentials.
## Verify the installation
Open a new pull request in one of the configured repositories and confirm that Qodo is triggered automatically.
Add a comment using one of the supported commands:
* `/agentic_describe`
* `/agentic_review`
Qodo should respond with a review or PR summary directly on the pull request.
## Troubleshooting
If Qodo is not responding:
* Verify that the pull request is in a repository selected in the app settings.
* Contact your Qodo Account Manager for assistance.
## Next steps
[Using Qodo in PRs](/code-review/get-started/use-qodo-in-prs): Get the most out of Qodo.
### Step 6: Configure your Qodo instance
Add the following details to your Qodo on-premises configuration:
```
# GitHub App ID
app_id =
# Shared secret for webhook verification
webhook_secret = "your-webhook-secret-here"
# Private key (.pem file)
# Organization name(s) where the app is installed
```
The organization name is available in your organization's settings in GitHub. You can provide multiple organizations if the app is installed in more than one.
For production environments, follow your organization's secret management procedures to securely store these credentials.
## Verify the installation
Open a new pull request in one of the configured repositories and confirm that Qodo is triggered automatically.
Add a comment using one of the supported commands:
* `/agentic_describe`
* `/agentic_review`
Qodo should respond with a review or PR summary directly on the pull request.
## Troubleshooting
If Qodo is not responding:
* Verify that the pull request is in a repository selected in the app settings.
* Contact your Qodo Account Manager for assistance.
## Next steps
[Using Qodo in PRs](/code-review/get-started/use-qodo-in-prs): Get the most out of Qodo.