> ## Documentation Index
> Fetch the complete documentation index at: https://docs.qodo.ai/llms.txt
> Use this file to discover all available pages before exploring further.
# Install Qodo on Bitbucket Data Center
> Install guide for Qodo automated code review on Bitbucket Data Center, using the guided installation wizard.
This wizard can be used for Qodo multi-tenant, single-tenant, and on-premises deployments.
Qodo works directly with Bitbucket Data Center, using a dedicated Bitbucket account to post code review comments on pull requests. Depending on your setup, Qodo either creates this account for you using administrator credentials, or your administrator creates it and shares the credentials with Qodo. It relies on webhooks to deliver automated insights.
You can configure Qodo for selected projects or across your entire Bitbucket Data Center server. Configuration typically takes around 5 minutes.
Once installed, Qodo automatically processes pull requests and delivers actionable insights, such as code reviews, descriptions, and improvement suggestions, directly within your Bitbucket workflow.
## Prerequisites
Before you begin, ensure you have:
* Access to your Qodo portal.
* A Qodo environment configured for Bitbucket Data Center.
* Bitbucket System Administrator access, or access to an administrator who can create a dedicated Qodo account and webhooks for you.
## Access the Bitbucket Data Center integration
Log in to your Qodo portal.
Start the installation wizard in one of the following ways:
* **From the onboarding wizard**: If you're an organization admin signing in for the first time, the onboarding wizard opens automatically. In the Connect Git step, select **Bitbucket**. See [Set up Qodo with the onboarding wizard](/onboarding-wizard).
* **From the homepage**: On the homepage, in the top right-hand side, click the **+** button next to Git providers. On the selection page, choose **Bitbucket**.
For Bitbucket Data Center, select the self-hosted option that appears after you select **Bitbucket**.
## Install Qodo on Bitbucket Data Center
Choose how the Qodo account is created. The rest of the wizard follows from this choice.
Qodo creates and configures the account for you.
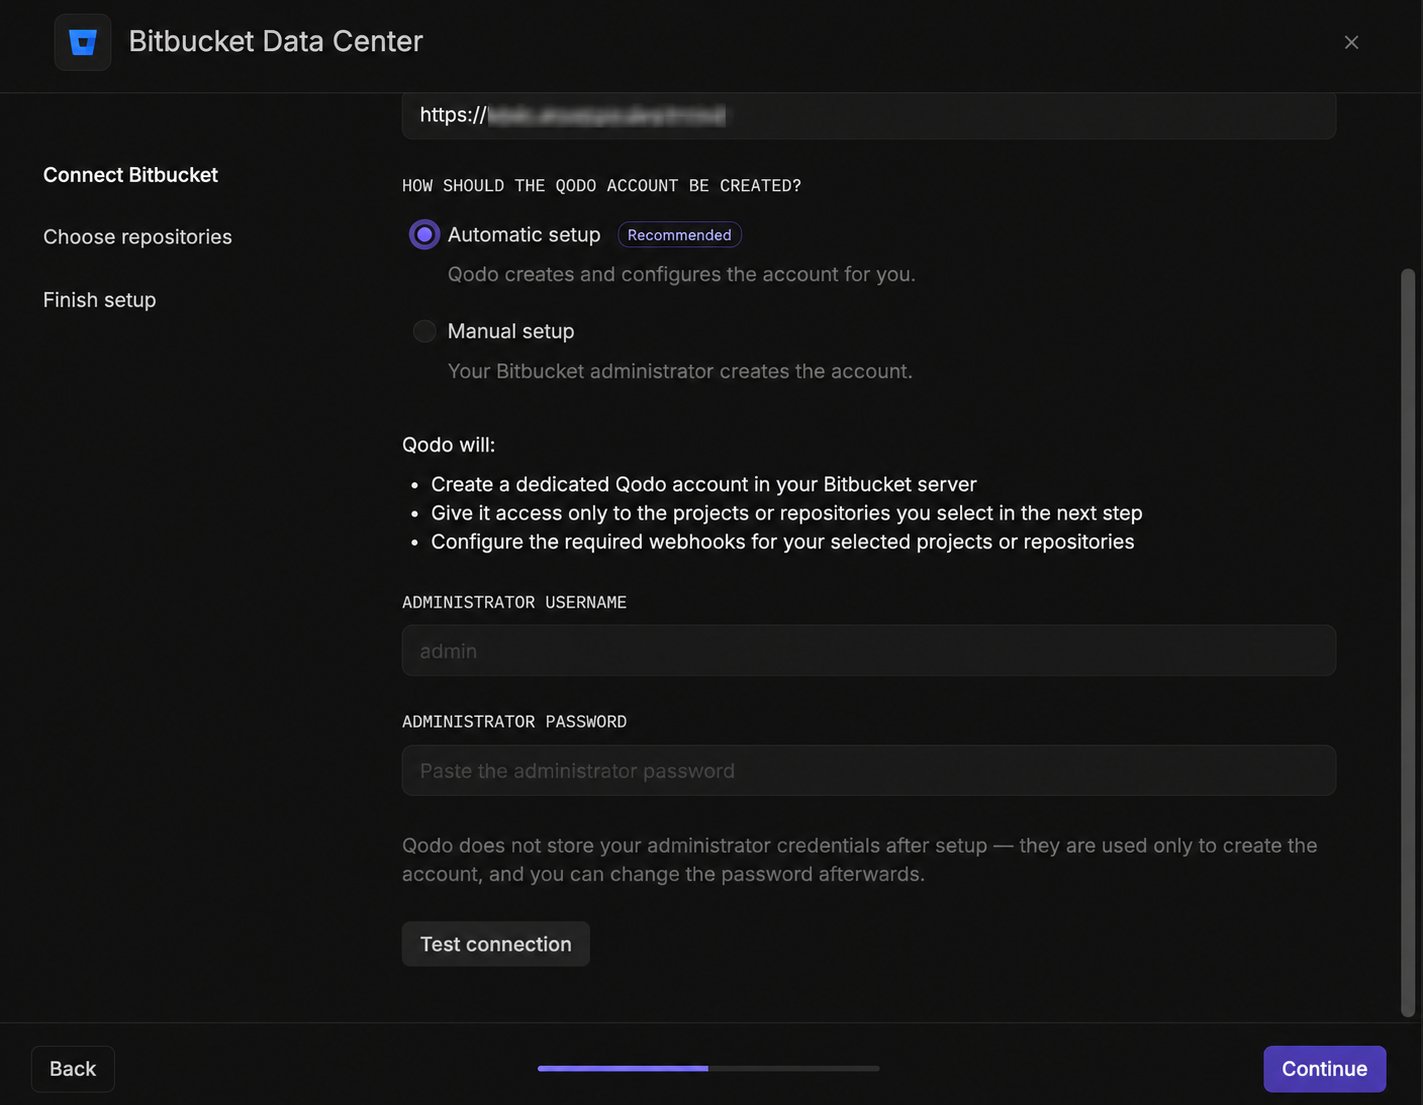 Enter your **server URL**, for example `https://bitbucket.example.com`.
Enter your **administrator username** and **administrator password**. Qodo uses them once to:
* Create a dedicated Qodo account in your Bitbucket server.
* Give it access only to the projects or repositories you select in the next step.
* Configure the required webhooks for your selected projects or repositories.
Optionally, click **Test connection** to verify the server and sign-in before continuing.
Qodo doesn't store your administrator credentials after setup. They're used only to create the account and configure webhooks, and you can change the password afterward.
Click **Continue**.
Enter your **server URL**, for example `https://bitbucket.example.com`.
Enter your **administrator username** and **administrator password**. Qodo uses them once to:
* Create a dedicated Qodo account in your Bitbucket server.
* Give it access only to the projects or repositories you select in the next step.
* Configure the required webhooks for your selected projects or repositories.
Optionally, click **Test connection** to verify the server and sign-in before continuing.
Qodo doesn't store your administrator credentials after setup. They're used only to create the account and configure webhooks, and you can change the password afterward.
Click **Continue**.
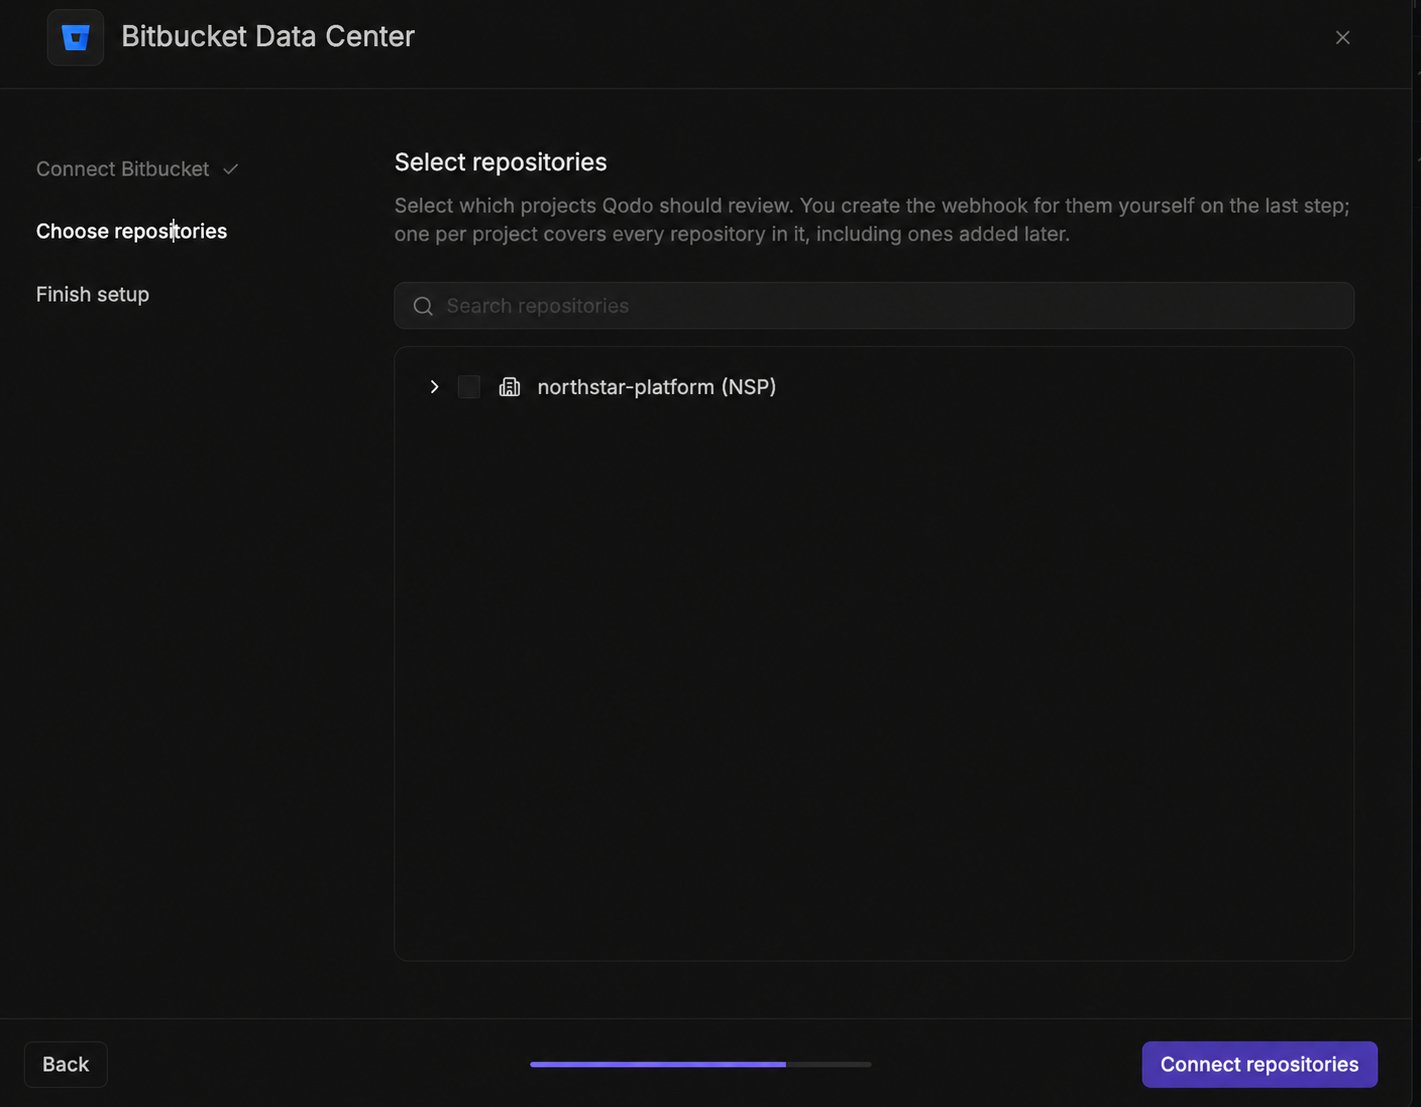 Select which projects or repositories Qodo should review.
* Use the search bar to find a specific project or repository, or browse the list of projects on your server.
* Selecting a project includes every repository in it, including ones added later.
* Selecting an individual repository includes only that repository.
Click **Connect repositories**.
Select which projects or repositories Qodo should review.
* Use the search bar to find a specific project or repository, or browse the list of projects on your server.
* Selecting a project includes every repository in it, including ones added later.
* Selecting an individual repository includes only that repository.
Click **Connect repositories**.
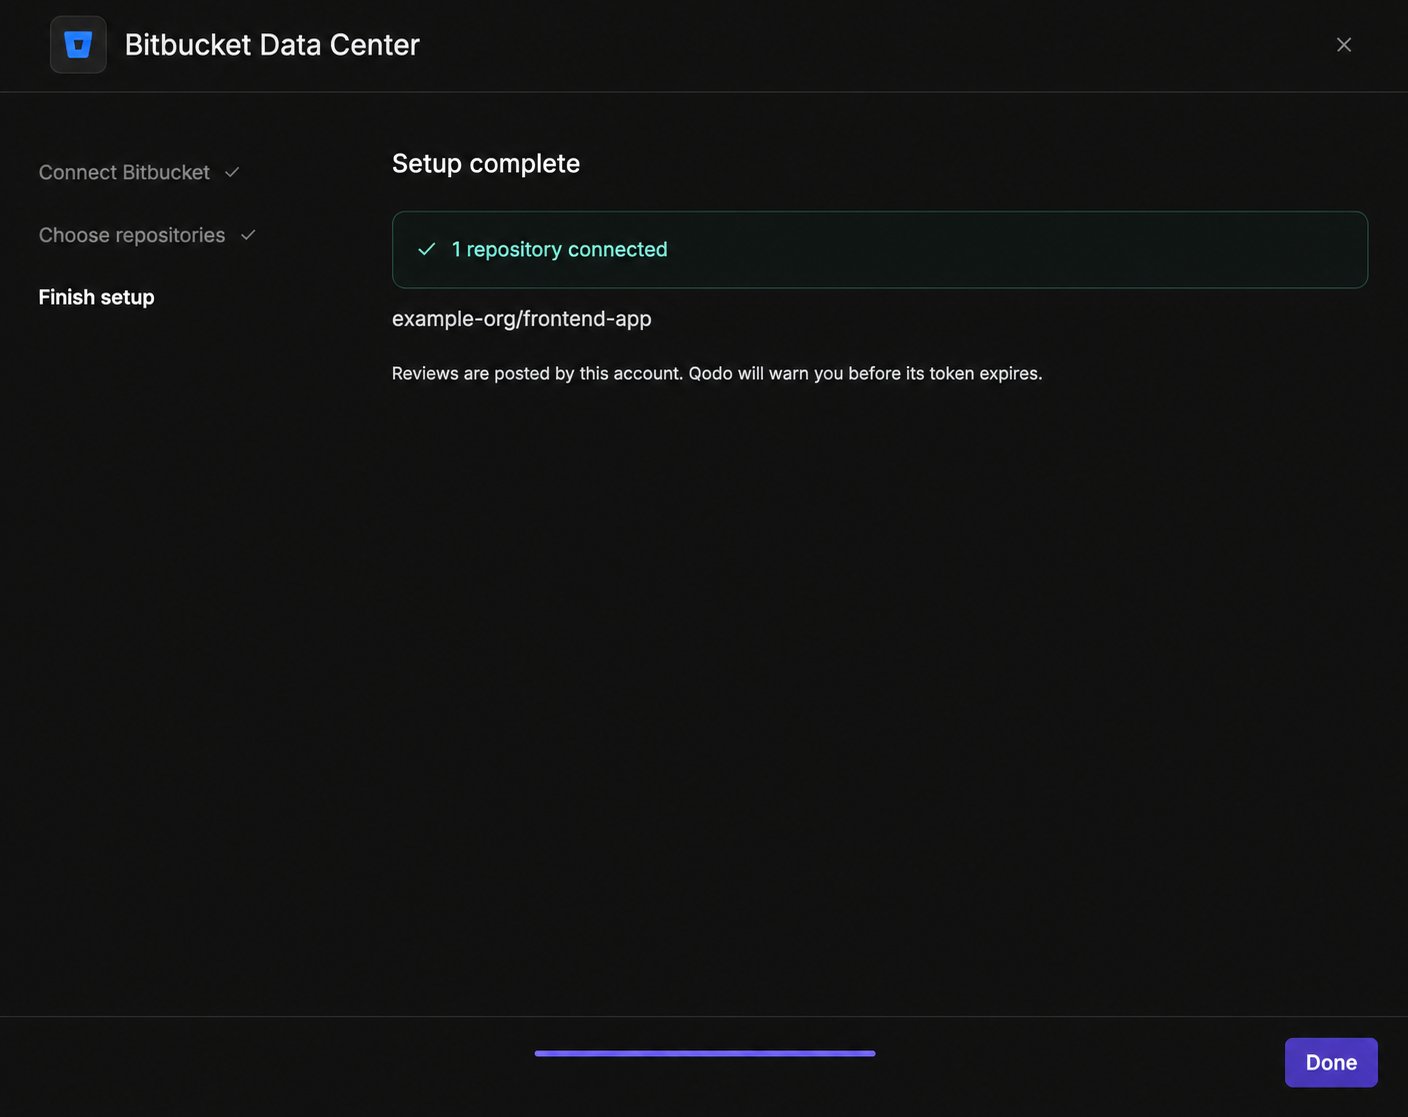 Qodo creates the `qodo-bot` account and registers the required webhooks in Bitbucket.
Once setup completes, Qodo confirms the number of repositories connected. Reviews are posted by the `qodo-bot` account. Qodo warns you before its token expires.
* Click **Done**.
Your Bitbucket administrator creates the account instead of sharing administrator credentials with Qodo.
Qodo creates the `qodo-bot` account and registers the required webhooks in Bitbucket.
Once setup completes, Qodo confirms the number of repositories connected. Reviews are posted by the `qodo-bot` account. Qodo warns you before its token expires.
* Click **Done**.
Your Bitbucket administrator creates the account instead of sharing administrator credentials with Qodo.
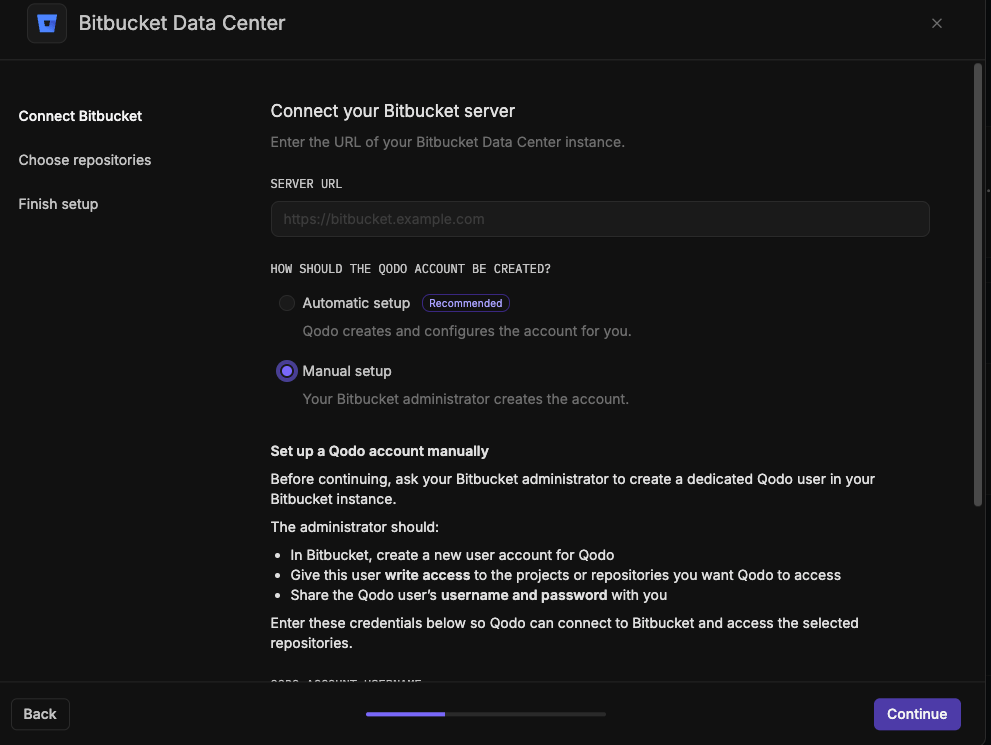 Enter your **server URL**, for example `https://bitbucket.example.com`.
Ask your administrator to:
* Create a new Bitbucket user account for Qodo. The username must contain `qodo` (for example, `qodo-bot`, `svc-qodo`, or `qodo_reviewer`). Qodo rejects a username without it.
* Give this user **write access** to the projects or repositories you want Qodo to access.
* Share the account's username and password with you.
Enter the account's **username** and **password**, then click **Test connection** to verify.
If the connection isn't verified, the cause is usually one of the following:
* **Wrong credentials**: Bitbucket rejects the sign-in. Double-check the username and password and try again.
* **Username doesn't contain `qodo`**: Qodo rejects the account. Use a username that contains `qodo` and try again.
Click **Continue**.
Select which projects or repositories Qodo should review. You create the webhook for them yourself on the next step.
* Use the search bar to find a specific project or repository, or browse the list of projects on your server.
* Selecting a project includes every repository in it, including ones added later.
* Selecting an individual repository includes only that repository.
Click **Connect repositories**.
Enter your **server URL**, for example `https://bitbucket.example.com`.
Ask your administrator to:
* Create a new Bitbucket user account for Qodo. The username must contain `qodo` (for example, `qodo-bot`, `svc-qodo`, or `qodo_reviewer`). Qodo rejects a username without it.
* Give this user **write access** to the projects or repositories you want Qodo to access.
* Share the account's username and password with you.
Enter the account's **username** and **password**, then click **Test connection** to verify.
If the connection isn't verified, the cause is usually one of the following:
* **Wrong credentials**: Bitbucket rejects the sign-in. Double-check the username and password and try again.
* **Username doesn't contain `qodo`**: Qodo rejects the account. Use a username that contains `qodo` and try again.
Click **Continue**.
Select which projects or repositories Qodo should review. You create the webhook for them yourself on the next step.
* Use the search bar to find a specific project or repository, or browse the list of projects on your server.
* Selecting a project includes every repository in it, including ones added later.
* Selecting an individual repository includes only that repository.
Click **Connect repositories**.
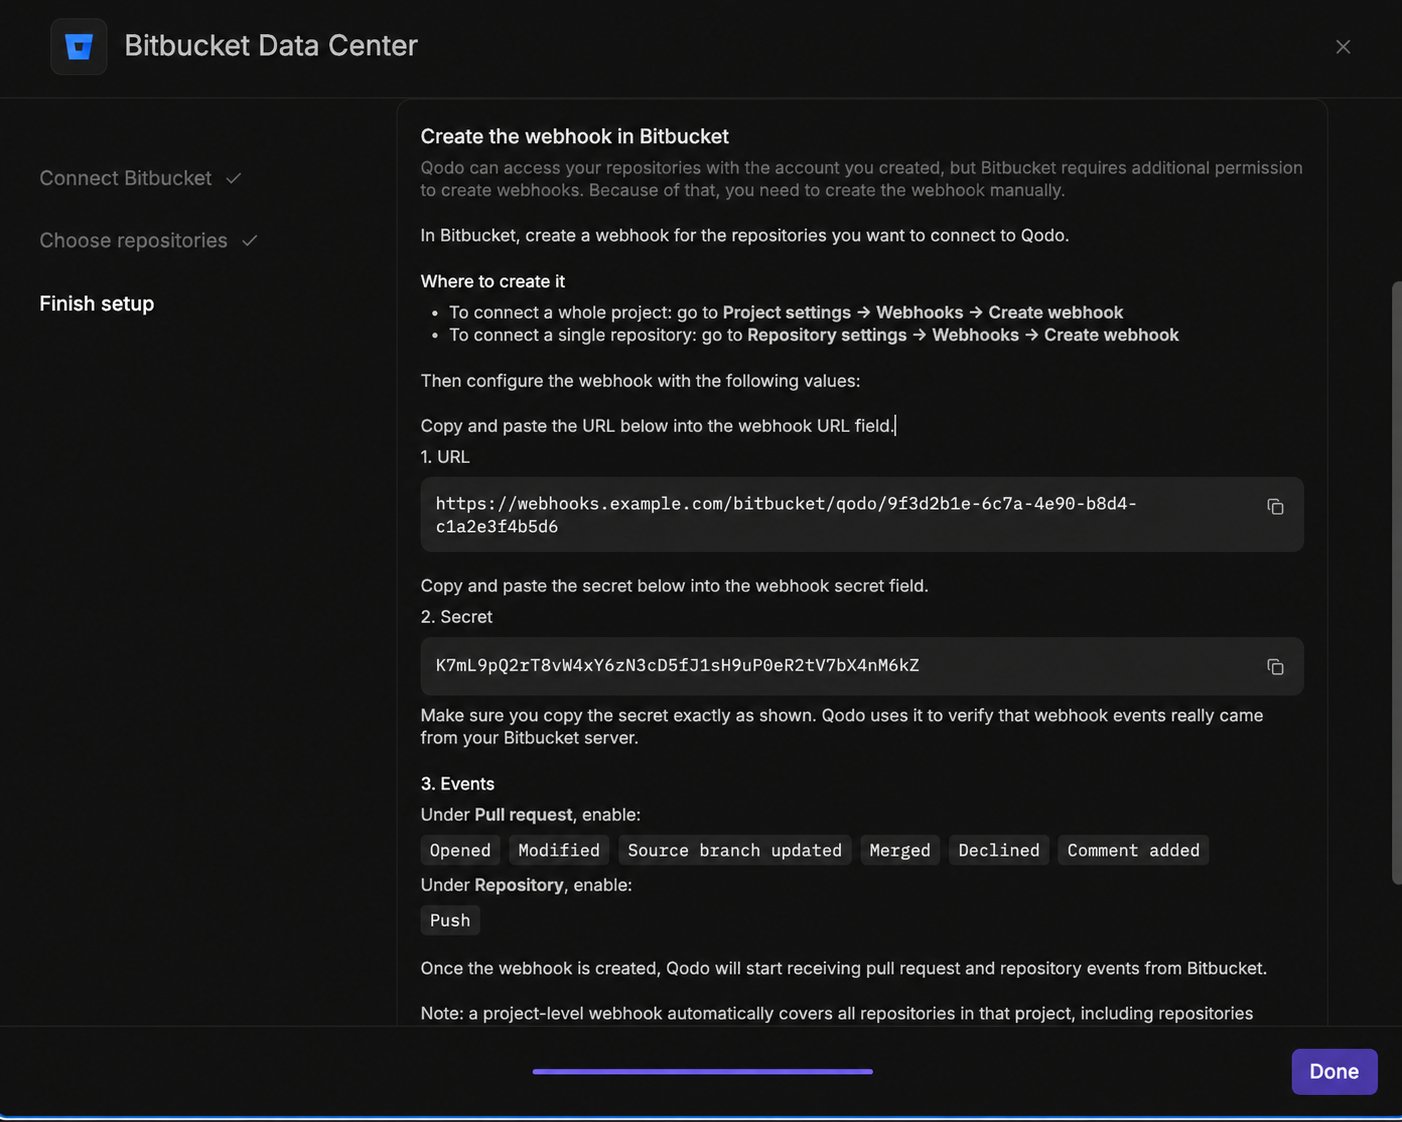 Bitbucket requires additional permission to create webhooks beyond what the connected account has. Create the webhook yourself in Bitbucket, using the values Qodo provides here.
* To connect a whole project: go to **Project settings** > **Webhooks** > **Create webhook**.
* To connect a single repository: go to **Repository settings** > **Webhooks** > **Create webhook**.
Configure the webhook with the following values:
* **URL**: Paste the URL Qodo displays into the webhook URL field.
* **Secret**: Paste the secret Qodo displays into the webhook secret field, copied exactly as shown. Qodo uses it to verify that webhook events came from your Bitbucket server.
* **Events**: Under **Pull request**, enable Opened, Modified, Source branch updated, Merged, Declined, and Comment added. Under **Repository**, enable Push.
Once the webhook is created, Qodo starts receiving pull request and repository events from Bitbucket.
A project-level webhook automatically covers all repositories in that project, including ones added later. Project-level webhooks require Bitbucket 8.8 or later. On older versions, create a webhook for each repository instead.
* Click **Done**.
Qodo uses the Bitbucket account you created to access repositories and post reviews. If you change that account's password in Bitbucket, reconnect this server in Qodo with the new password.
Qodo is now active on the repositories in the projects you selected. To add more projects, return to this wizard at any time and run a new installation with the updated scope. Projects that already have Qodo installed are not available for selection. To reduce scope, remove the installation and create a new one.
If you're connecting your Git provider as part of the onboarding wizard, the wizard continues to the next onboarding step once the connection completes. See [Set up Qodo with the onboarding wizard](/onboarding-wizard).
## What happens after you connect
Qodo starts building context for your code reviews, and the following processes run automatically in the background:
* [Repository sync](/governance/repositories/installations): Syncs each connected repository with Qodo.
* [Pull request indexing](/governance/repositories/manage-repositories#check-repository-pr-history-indexing-status): Indexes each repository's pull request history.
* [Cross-repo discovery](/governance/repositories/relationships): Finds relationships between your repositories.
Track their progress from **Background activity** in the top-right corner of the portal. If a process needs attention, see [Troubleshoot background processes](/governance/troubleshoot-background-processes).
It's recommended to import your team's existing rules and skills, which lets Qodo enforce your coding standards in its reviews. See [Importing rules and skills](/governance/rule-enforcement/building-review-standards#importing-rules-and-skills).
## Verify the installation
Open a new pull request in one of the connected repositories and confirm Qodo is triggered automatically.
Add a comment using one of the supported commands:
* `/agentic_describe`
* `/agentic_review`
Qodo should respond with a review or PR summary directly on the pull request.
## Next steps
* [Repositories page](/governance/repositories): Manage which repositories Qodo is active on, or remove an installation.
* [Trigger a code review](/code-review/use-qodo-in-prs): Run a review automatically or on demand.
This documentation is built and hosted on [Mintlify](https://mintlify.com), a developer documentation platform.
Bitbucket requires additional permission to create webhooks beyond what the connected account has. Create the webhook yourself in Bitbucket, using the values Qodo provides here.
* To connect a whole project: go to **Project settings** > **Webhooks** > **Create webhook**.
* To connect a single repository: go to **Repository settings** > **Webhooks** > **Create webhook**.
Configure the webhook with the following values:
* **URL**: Paste the URL Qodo displays into the webhook URL field.
* **Secret**: Paste the secret Qodo displays into the webhook secret field, copied exactly as shown. Qodo uses it to verify that webhook events came from your Bitbucket server.
* **Events**: Under **Pull request**, enable Opened, Modified, Source branch updated, Merged, Declined, and Comment added. Under **Repository**, enable Push.
Once the webhook is created, Qodo starts receiving pull request and repository events from Bitbucket.
A project-level webhook automatically covers all repositories in that project, including ones added later. Project-level webhooks require Bitbucket 8.8 or later. On older versions, create a webhook for each repository instead.
* Click **Done**.
Qodo uses the Bitbucket account you created to access repositories and post reviews. If you change that account's password in Bitbucket, reconnect this server in Qodo with the new password.
Qodo is now active on the repositories in the projects you selected. To add more projects, return to this wizard at any time and run a new installation with the updated scope. Projects that already have Qodo installed are not available for selection. To reduce scope, remove the installation and create a new one.
If you're connecting your Git provider as part of the onboarding wizard, the wizard continues to the next onboarding step once the connection completes. See [Set up Qodo with the onboarding wizard](/onboarding-wizard).
## What happens after you connect
Qodo starts building context for your code reviews, and the following processes run automatically in the background:
* [Repository sync](/governance/repositories/installations): Syncs each connected repository with Qodo.
* [Pull request indexing](/governance/repositories/manage-repositories#check-repository-pr-history-indexing-status): Indexes each repository's pull request history.
* [Cross-repo discovery](/governance/repositories/relationships): Finds relationships between your repositories.
Track their progress from **Background activity** in the top-right corner of the portal. If a process needs attention, see [Troubleshoot background processes](/governance/troubleshoot-background-processes).
It's recommended to import your team's existing rules and skills, which lets Qodo enforce your coding standards in its reviews. See [Importing rules and skills](/governance/rule-enforcement/building-review-standards#importing-rules-and-skills).
## Verify the installation
Open a new pull request in one of the connected repositories and confirm Qodo is triggered automatically.
Add a comment using one of the supported commands:
* `/agentic_describe`
* `/agentic_review`
Qodo should respond with a review or PR summary directly on the pull request.
## Next steps
* [Repositories page](/governance/repositories): Manage which repositories Qodo is active on, or remove an installation.
* [Trigger a code review](/code-review/use-qodo-in-prs): Run a review automatically or on demand.
This documentation is built and hosted on [Mintlify](https://mintlify.com), a developer documentation platform.